|
|
|||||||
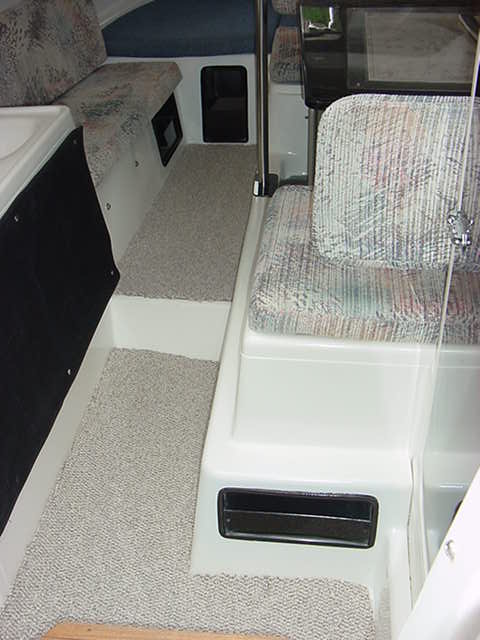
| Interior Carpet | |||||||
|
Download our Font |
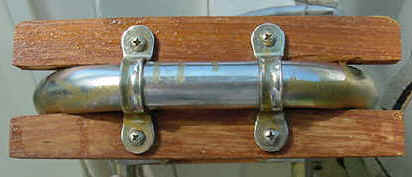
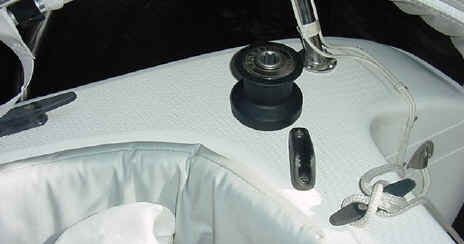
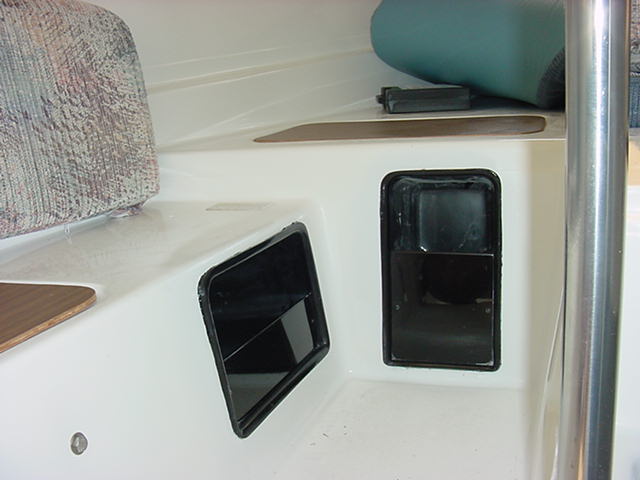
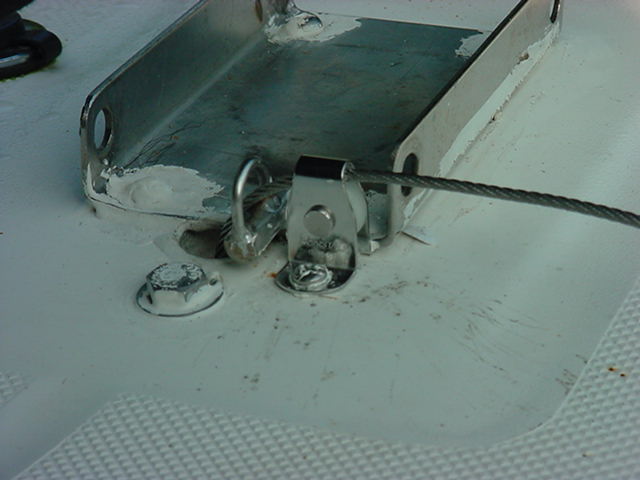
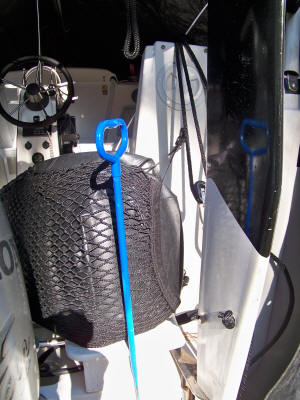
Line Pull Storage | ||||||
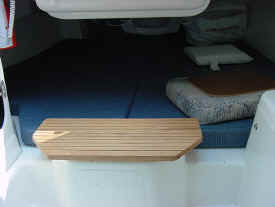
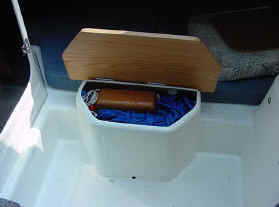
| Aft Berth Raised Storage | |||||||
| Galley Redesign | |||||||
|
|
|||||||
| Interior Carpet | |||||||
|
Download our Font |
Line Pull Storage | ||||||
| Aft Berth Raised Storage | |||||||
| Galley Redesign | |||||||
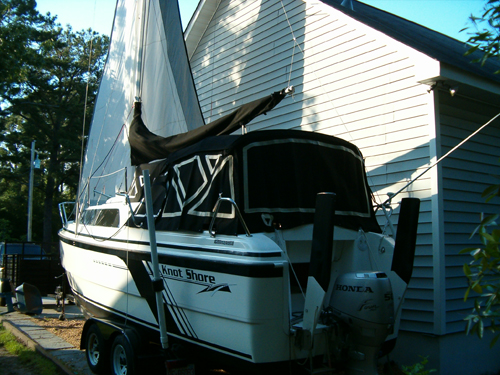
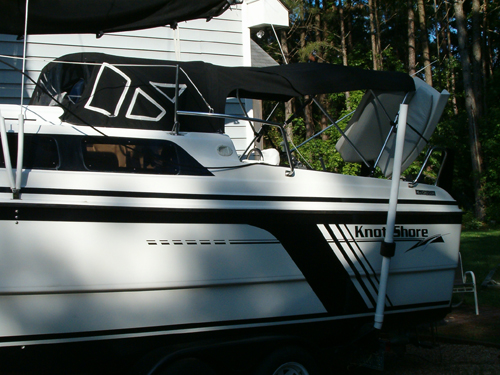
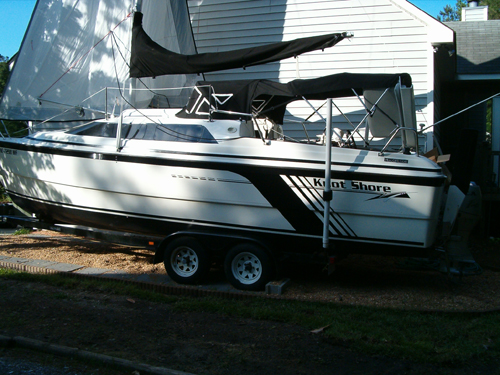
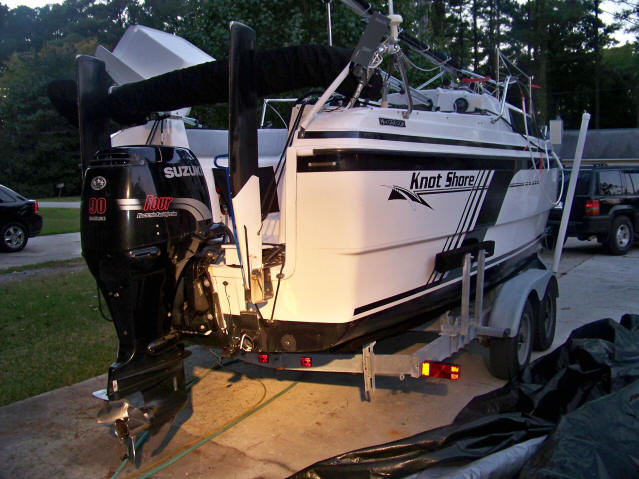
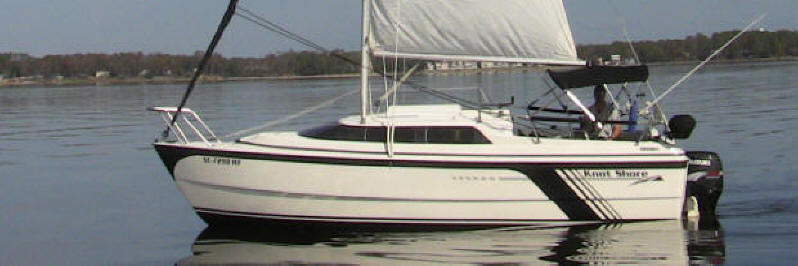
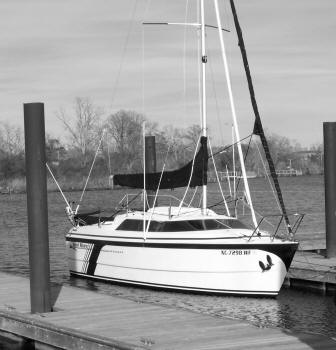
Hull
Decoration/Design
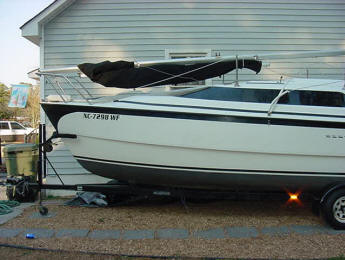
~ I finally bought my 26x.. after owning my Mac19
for about 8 years... thought I would give it a different look... ya know...
separate it from all those other Mac26x's roaming near NC beaches.. The
black stripes are vinyl from a sign shop, the swoosh is from a website that
makes pin striping.
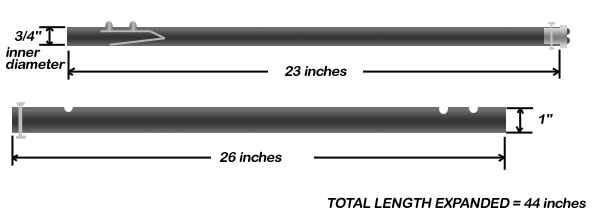
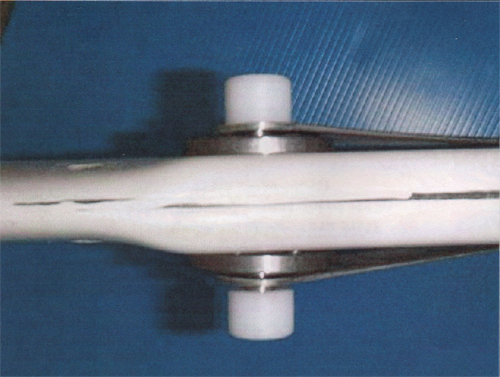
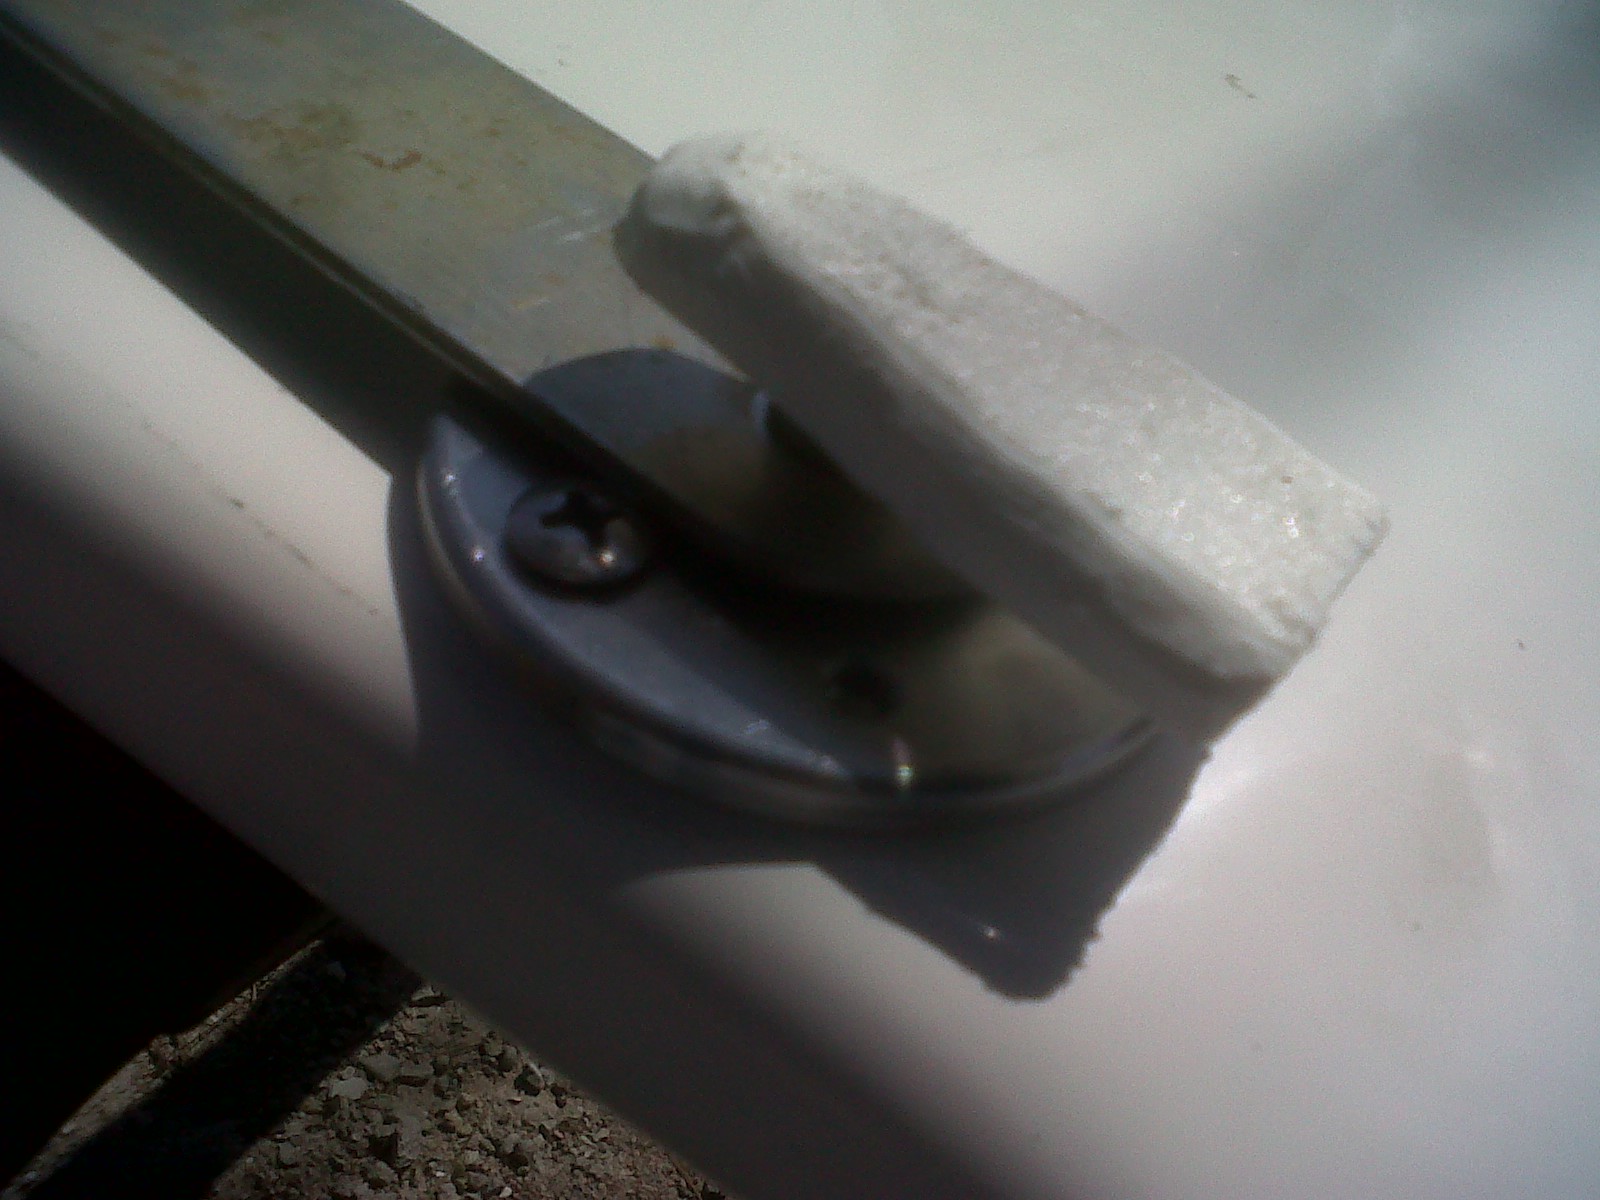
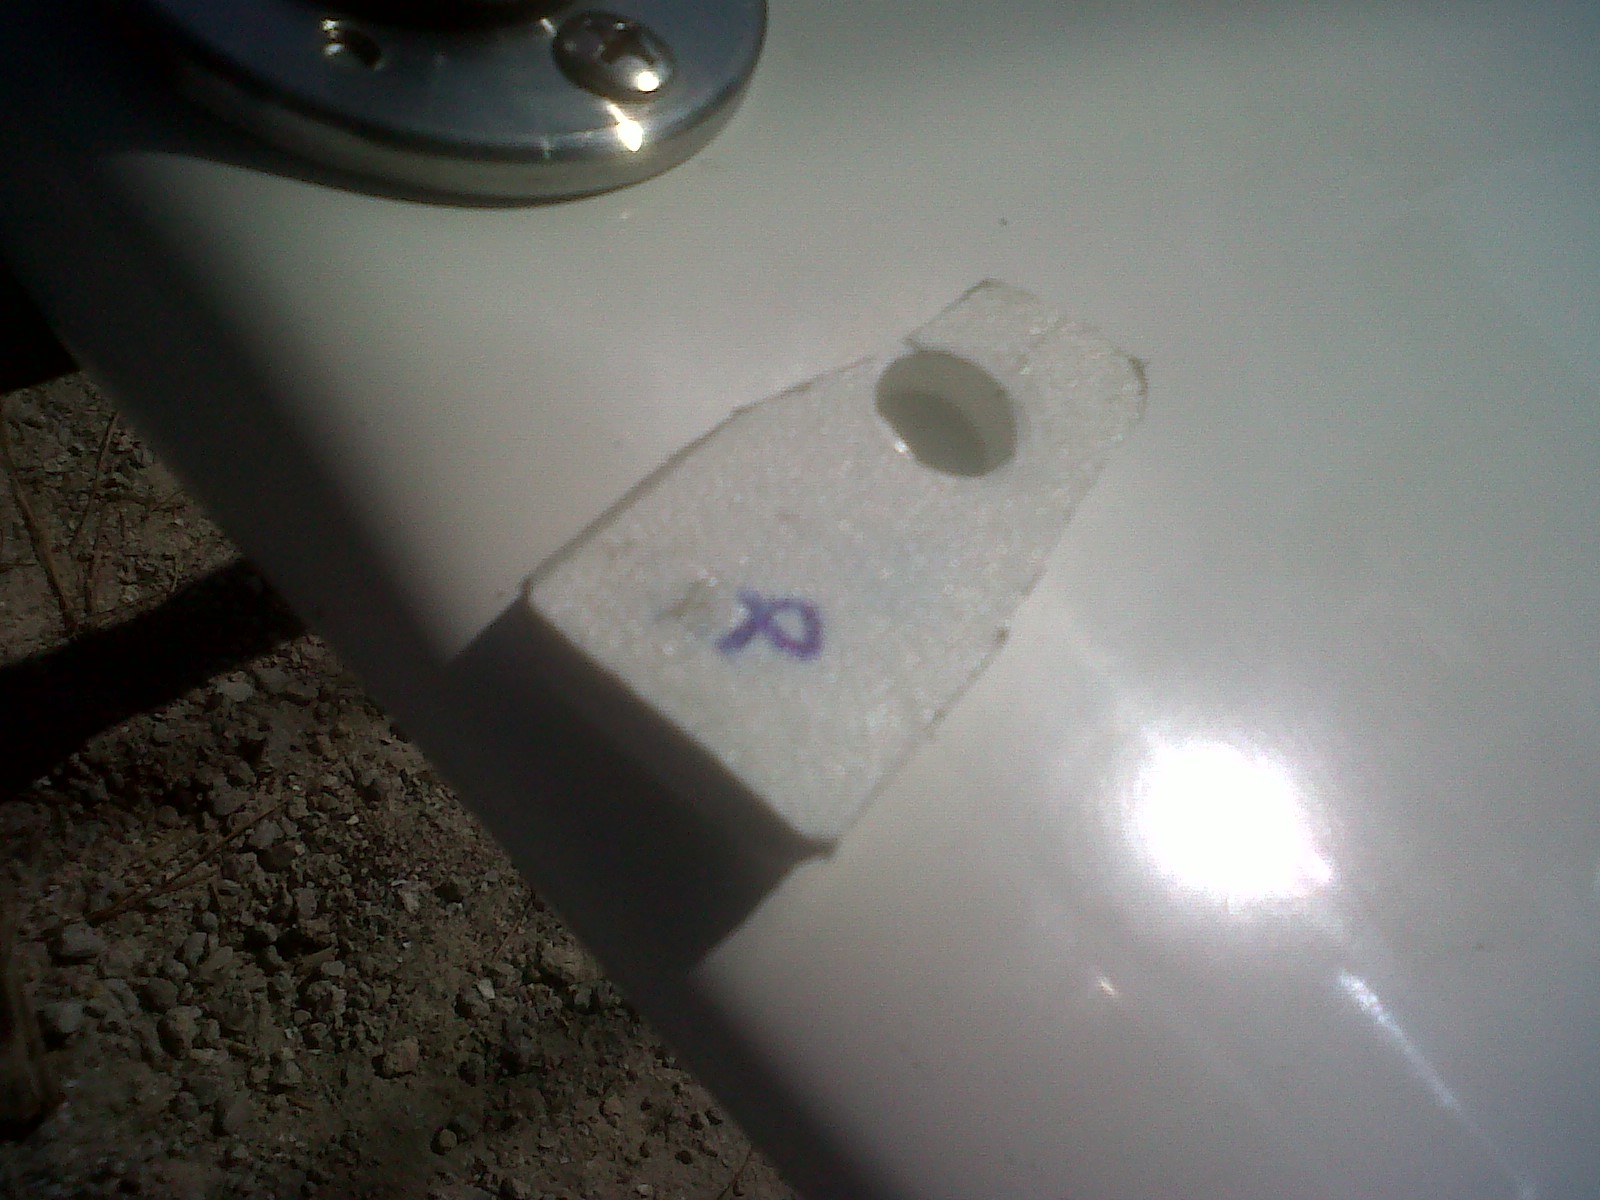
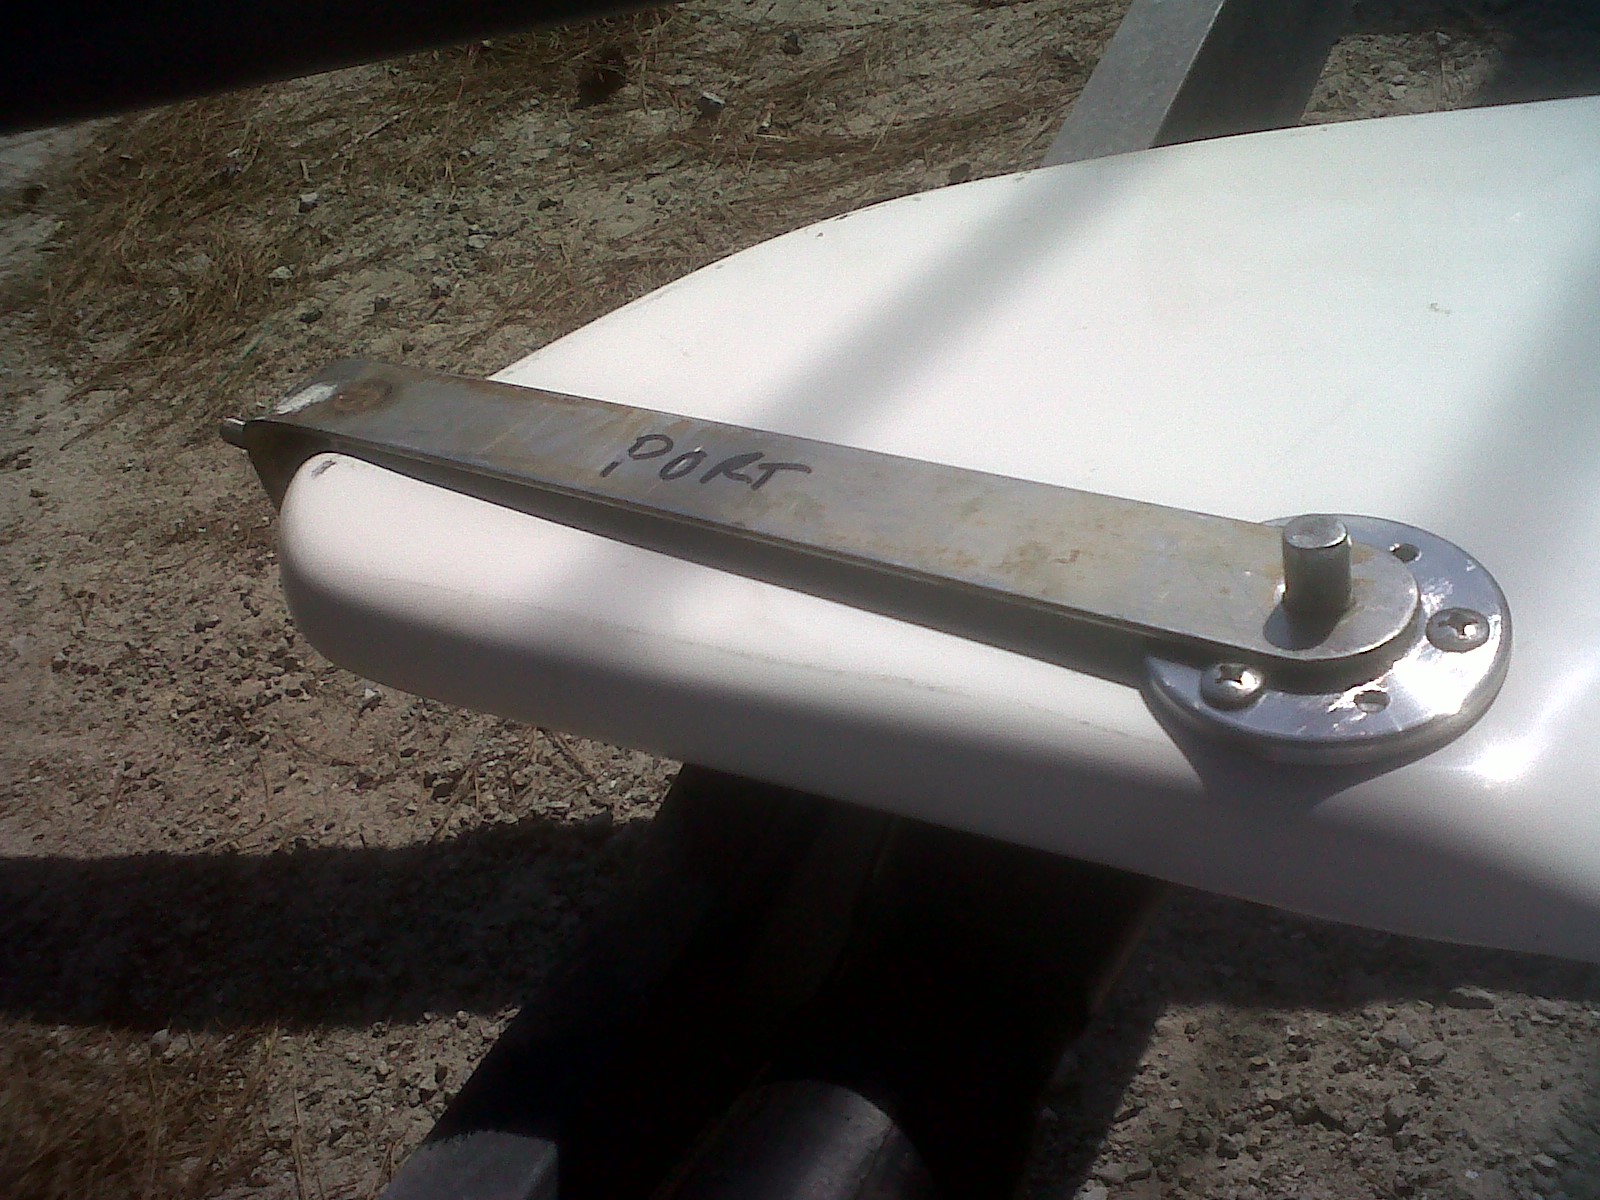
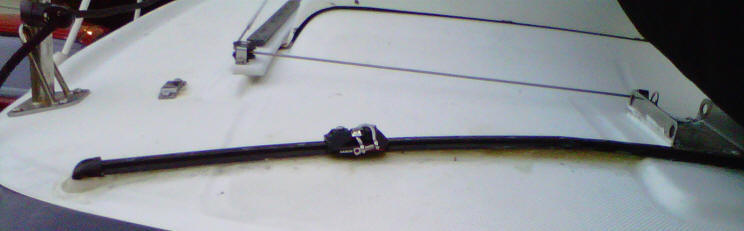
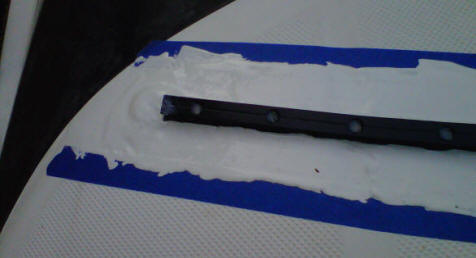
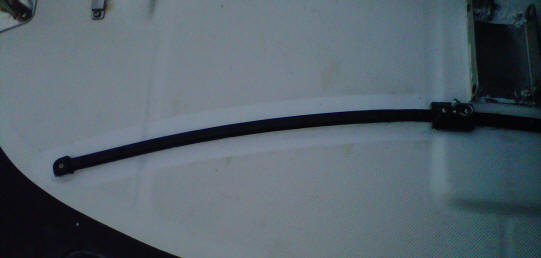
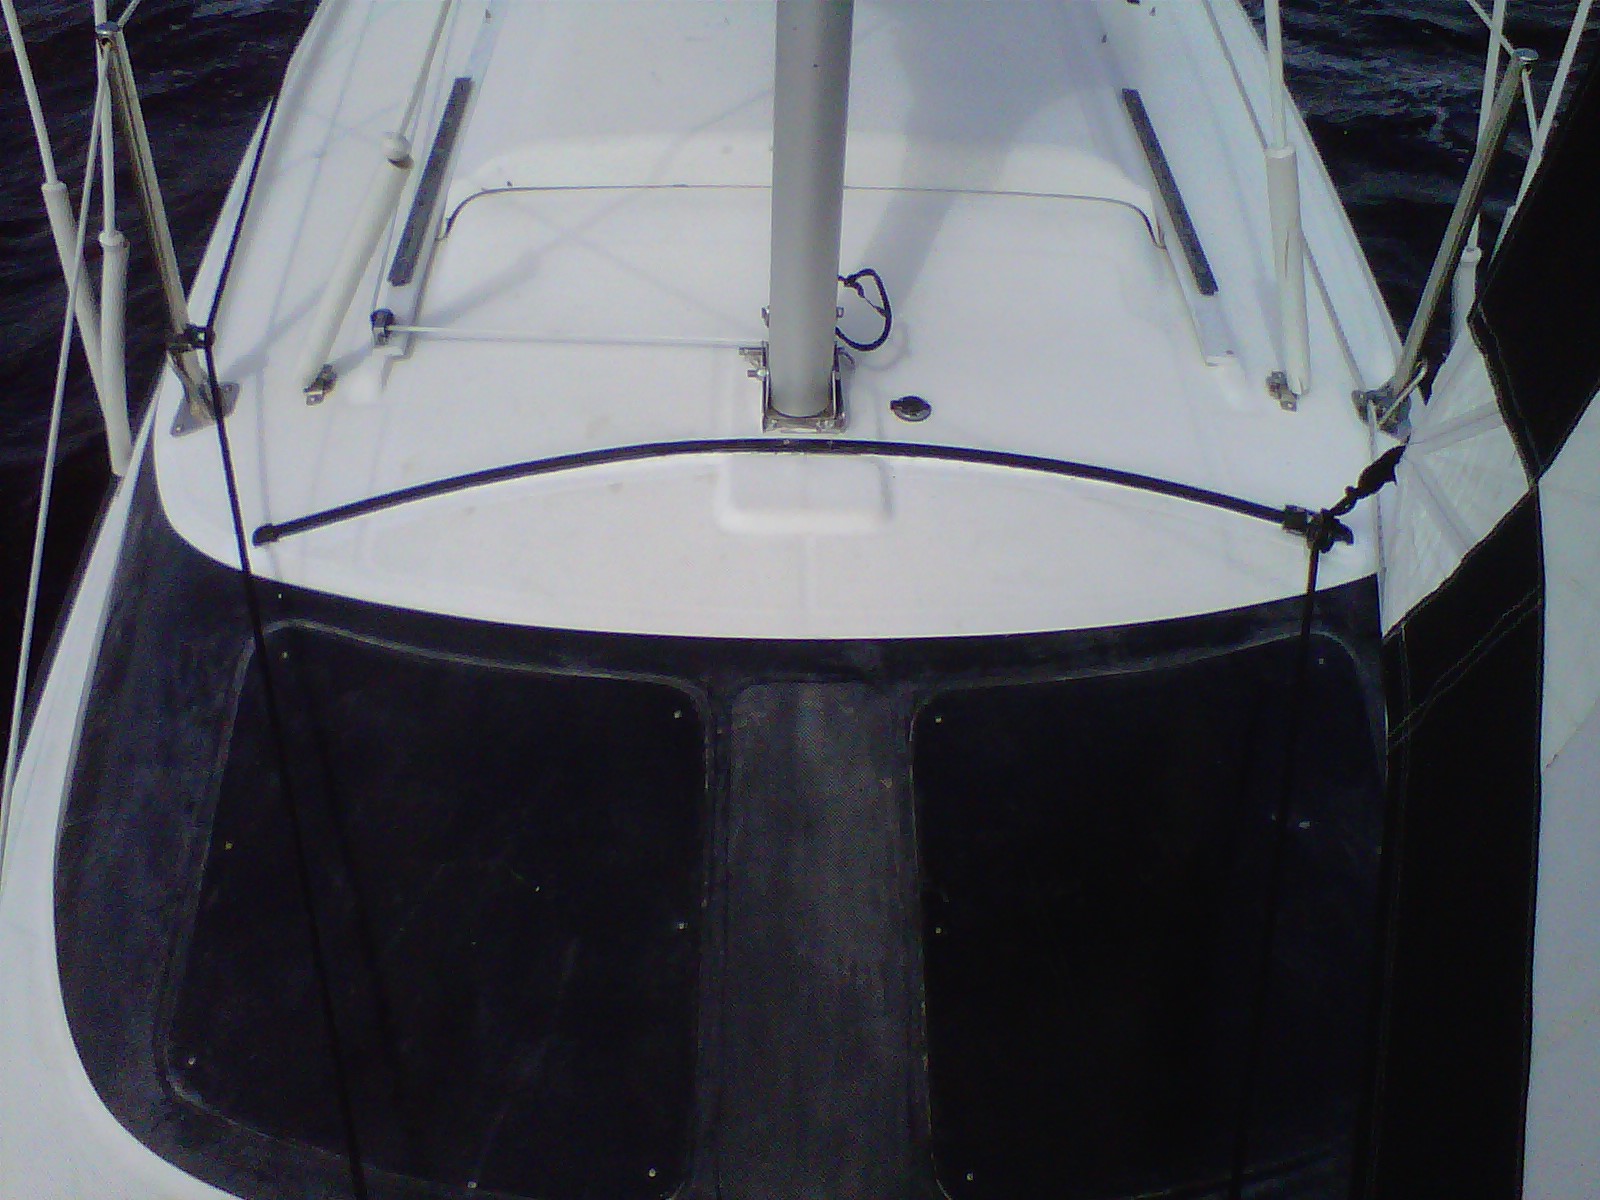
Collapsible Spreader
~ After going through several replacement
spreaders.... I came up with the idea of a collapsible spreader that would use
spring buttons on the poles like my grass trimmer does. I couldn't
remember where I had seen poles with the spring buttons... found some companies
that sell them by the thousands... then I thought where I have been hanging out
lately.. ah yes.. West Marine. This requires 2 poles... the pole is WM #
1954650 for the black ones, #143284 for the aluminum ones.
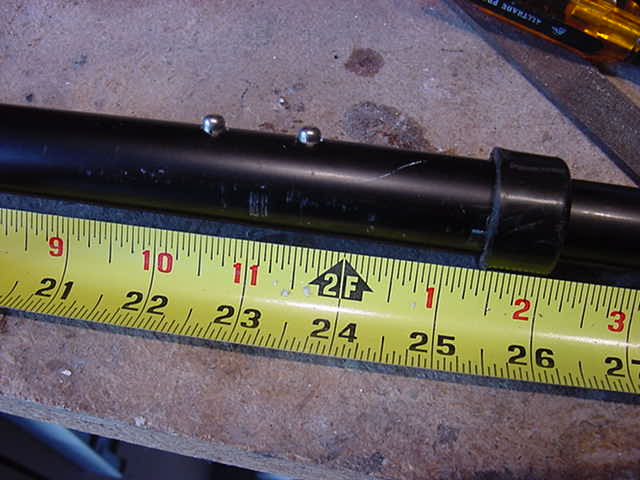
The elusive spring clip.. it just pulls out of the pole. I cut the one
inch pole to 26 inches and the 3/4 inch (inner diameter) pole to 23 inches.
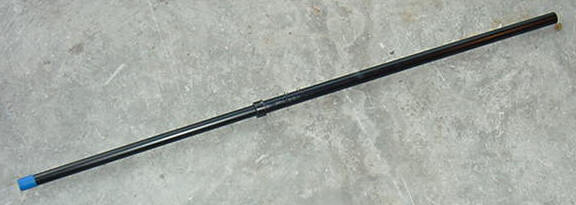
The almost finished pole at 44 inches when extended, 27 inches collapsed.
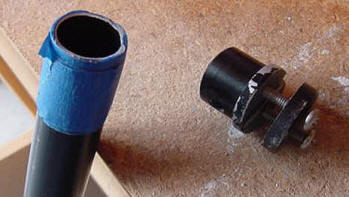

The original end cap vice for the wire (stay)... I had to get it turned by a
machine shop ($10) from 7/8 to 3/4.
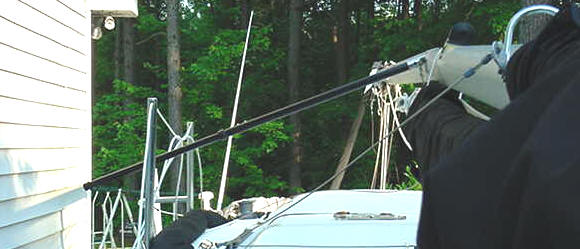
New Spreader installed and extended.

Spreader on Left is Extended... Spreader on Right is Collapsed.
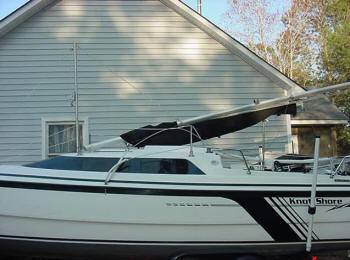
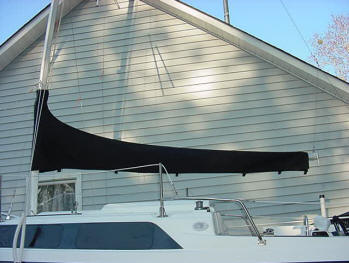
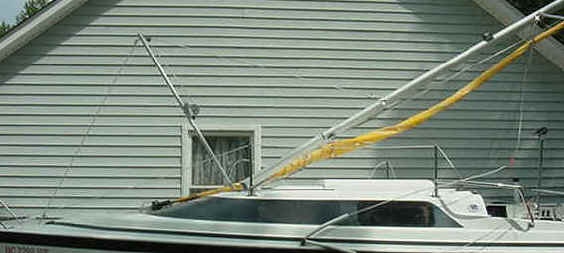
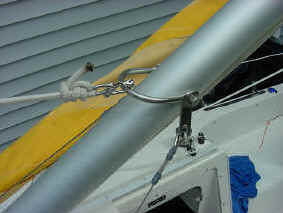
Boom Stays on Mast
Cover
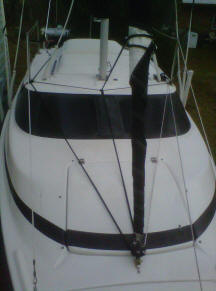
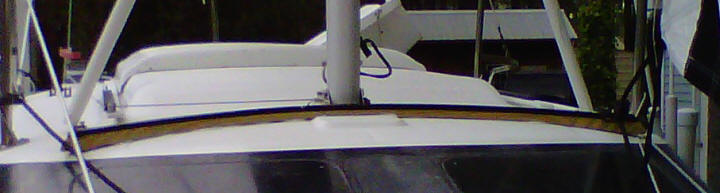
~
I usually raise and lower the mast with the boom attached. I had a
custom sail cover made from www.TrailerSailor.com that added zippers to the bottom to have a place to
stuff the boom vang and main sheet.
Stored for Trailering
Raising the Mast and Boom
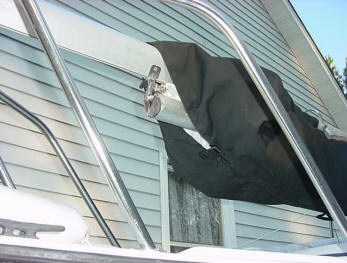
Where the boom is attached to the mast.
Main sheet and boom vang are inside the cover
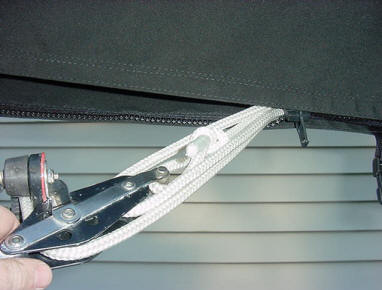
Zippers were added to store the boom vang and main sheet inside the cover.
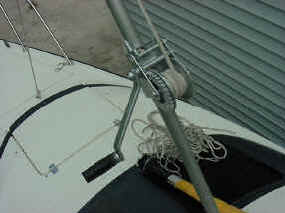
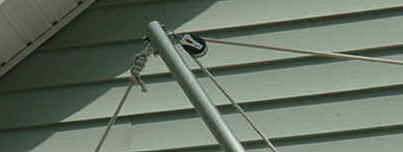
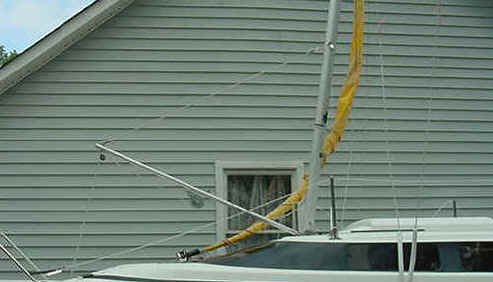
Roller Furling
Traveller
*** warning..
true sailors who 'tune' their rigs should not read this. ***
~ This is an attempt to make it easier to store the roller furler on the mast since the mast and furler are
about the same
length and I didn't want to build a platform on the front of the boat or keep
bending the
furler.
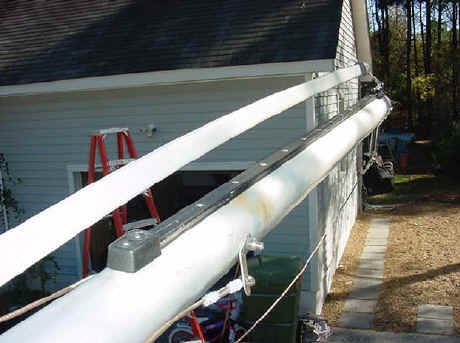
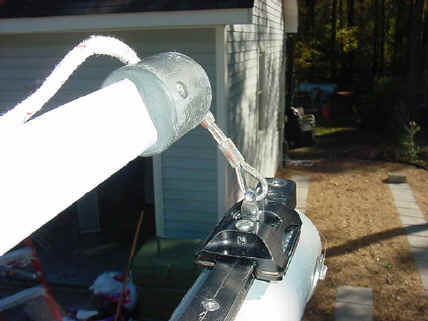
Basically I attached a Traveler system onto the top of the mast to
replace the bolt and flange that holds the top of the
jib/furler to the mast.
When I raise the mast the traveler rolls down to the heavy duty end stop....
then when I take
the mast down I just push the furler and it rolls to the top of
the mast. Then I just lash the furler to the mast since
they are about the
same length. I will be adding a safety wire to the furler top connection in case the
traveler breaks loose...
don't want the mast falling unexpectedly.
I used a small boat traveler (WM# 3732518), track (WM# 2640548),
end stops (WM# 359786).
The biggest pain was getting a ratchet with an 3
foot extension down the mast to get the nuts on
the bolts and tighten.. patience
is a necessary tool.
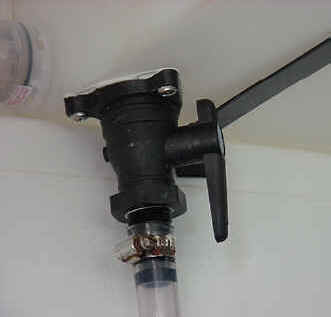
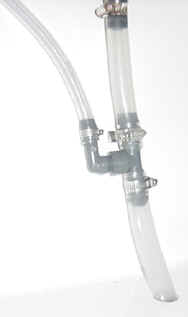
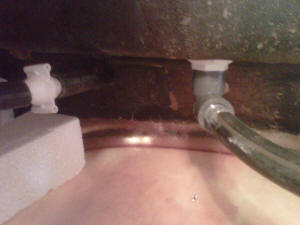
Trailerable Water Tank
~ This modification was inspired by my
wife who doesn't like treated or stale water... and me who
doesn't like to haul 5 gallon
jugs full of water onto the boat.
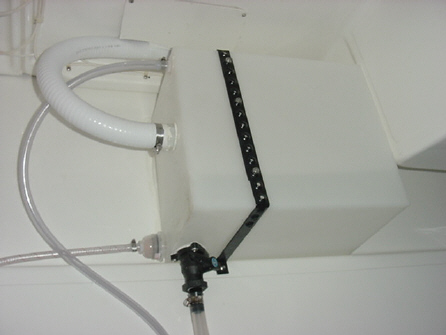
**** Added Note: The tank will not fill all the way where the factory hole
is... that darned gravity thing again.
**** Second Note: Thanks to some advice I added a vent tube to the top corner of
the tank which feeds
down to the drain tube... so now the tank fills up completely.
The 9 gallon tank is suspended on the Starboard side in the Aft sleeping berth
supported by a gas tank strap
and mostly Fiberglass roving everywhere the tank touches the hull liner. The white pipe leads from the water inlet
(which I installed behind
the Genoa track) , the clear striped pipe with the strainer leads to the pump that
leads to the
electric faucets. The clear pipe at the bottom has a valve to drain the
water to a thru-hull in back
of the boat. So basically I fill it for the
day we go out (sometimes adding some ice cubes), then drain the rest
at the end of the voyage.. always fresh
water.
^ FILL thru
hull
^ DRAIN to back thru-hull
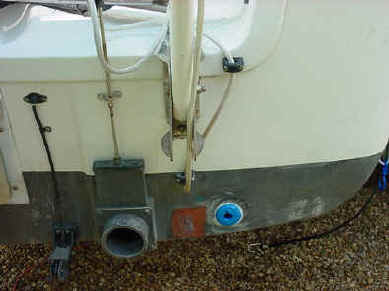
^ Added vent tube to drain
tube
^ Thru hull drain
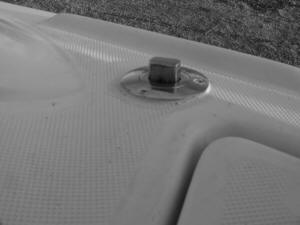
Watch were you drill or you'll drill into the ballast tank. Use the screws
from the high fairlead to find the
right position... don't use the lower
fairlead (like I did) or you'll be doing some fiberglass patching.
New Mast Raising
~ This modification was inspired by the
new MacGregor 26M's mast raising kit that looked easier.
Video of me setting up: http://www.youtube.com/watch?v=C5i0nLon1aA
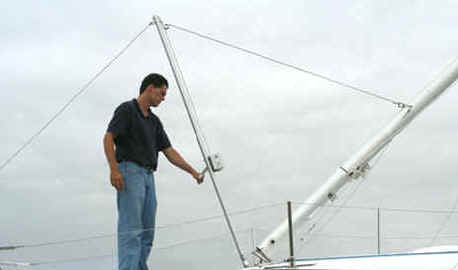
The 26M Mast Raising Kit
The Newly copied 26X Mast Raising Kit. The mast raising pole remains at
the same angle during the
whole raising process just like the 26M... see the
picture below for reversing the winch to act more like
the 26X mast raising pole
which moves with the mast.
Here is a picture of the boom bail and shackle connected to where the baby stays
attach.
A close up of the winch and the line used from the old 26X mast
raising kit (shortened significantly).
I added a new pulley to the raising pole... I could have just used the pulley on
the jib halyard since
I have a roller furling jib and don't need the pulley
anymore..
This is where I just turned the pole around so that the winch and pulley are now
on the opposite side,
the mast raising pole stays at the same angle to the mast
during the whole raising process.
The force needed seemed equal either
way. The raising pole can be attached to the mast if you want...
but the
genoa lines seems to get caught on the winch when sailing.
Overall the process seems easier, just three connections and
start cranking. I can also hold onto the furling
drum as the mast raises
keeping it from slamming into the deck or ground. Attaching of the furling
drum to
the front stay pin is easier than before with the old raising kit.
Getting the mast back into the crutch while
lowering the mast is pretty easy...
just push the raising pole in the direction you need and the mast moves
as well.
I also painted the winch with rustoleum to keep it from rusting.
Here are the parts and prices:
TRAILERWINCH (PERSONAL WATERCRAFT) West Marine
#305054 $34.99
(this one had the reversible locking
mechanism)
BoomBail West Marine
#129627 $29.49
(attach this to where the baby stays
attach to the mast)
2 Stainless Steel Bolts, nuts, washers
2 Snap Shackles West Marine
#121046 $19.99 each
1 pulley.. use the one from the jib halyard.
Cut the original line.
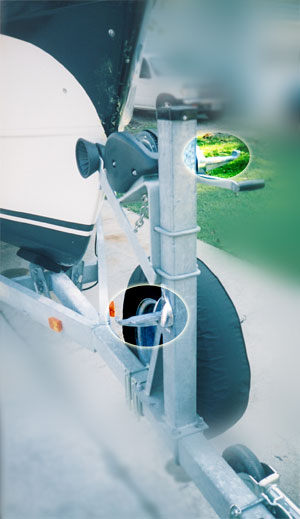
Trailer Wheels
~ Added
a second axle and wheels for safer trailering and weight management as shown at
www.macgregorsailors.com
modifications page.
**** Added Note: I added the second axle behind the existing axle, this
however added more weight
to the tongue (about 410lbs) and my hitch was rated at 350lbs.... so I had both axles moved
forward to help reduce tongue weight.
Also added pvc piping with a
roller in the middle to the existing metal support.
*** New Note: replaced trailer when axle snapped... see replacement trailer below ***
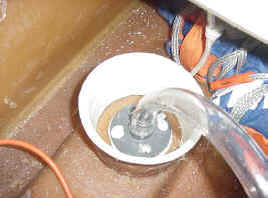
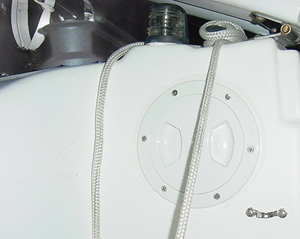
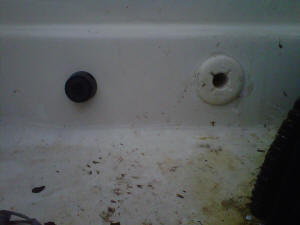
Auto Ballast Tank
~ Added air tube to ballast tank as shown
at www.macgregorsailors.com modifications
page.
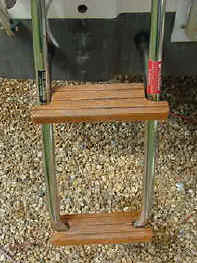
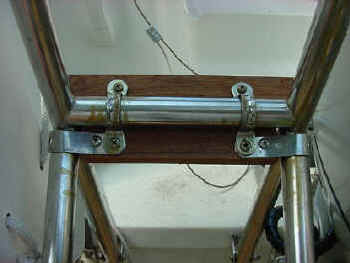
Swim ladder
~ Added wooden steps to the existing rail
ladder just as I had on the Mac19 I used to own.
I couldn't find the
pre-made ones anymore so I made them myself.
Update: I went to a welding shop and had them weld on some stainless
steel plates to support the wood.
Interior Step
~ Got rid of the unsteady step and made a
new larger step with hinges. Might add a one step ladder later.
Good
storage area for ropes... also makes it easier to run wires from one side of the
boat to the other.
Also shown at www.macgregorsailors.com
modifications page.
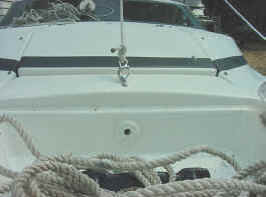
Ships
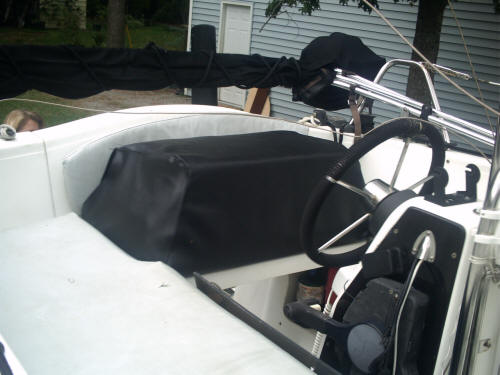
Wheel Cover
~ Ok, this was the most annoying time
consuming modification... but it looks good. I just wrapped line around the wheel.
Winches
in aft corners
~ Made this mod to enable single handling
of the boat. It is a 5 inch winch and a cleat. I had to cut holes in
the back and add access panels to bolt down the winches.
Ballast
Tank Handle Extension
~ This handle (which I took off a West
Marine bilge pump and tapped the end) makes this a little
easier to grab from the captain's seat.
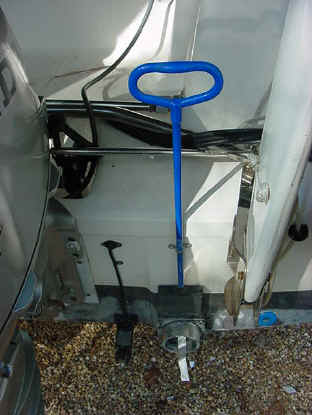
There is also a piece of silver ribbon
attached to the top of the
ballast fill hole that gets sucked in when filling then pops back out when the
tank is full.
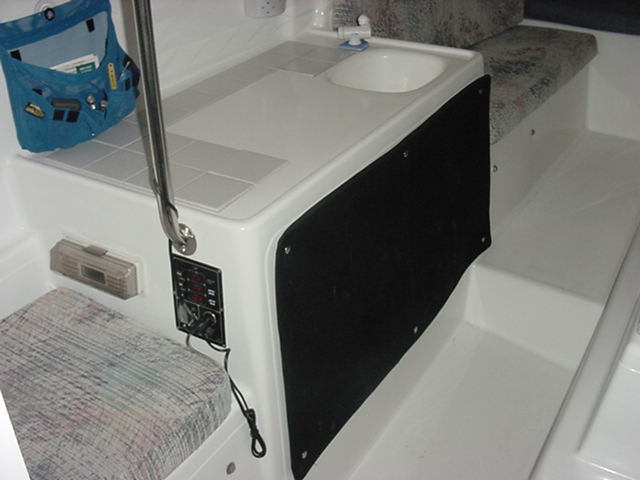
Electric
Faucets
~ Added electric faucets to galley and
head that goes with the water tank mod. The base
of the faucet is
a blue cutting board from wal-mart.

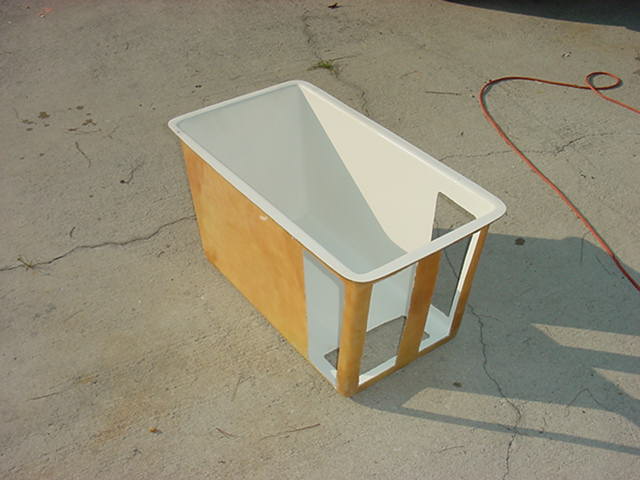
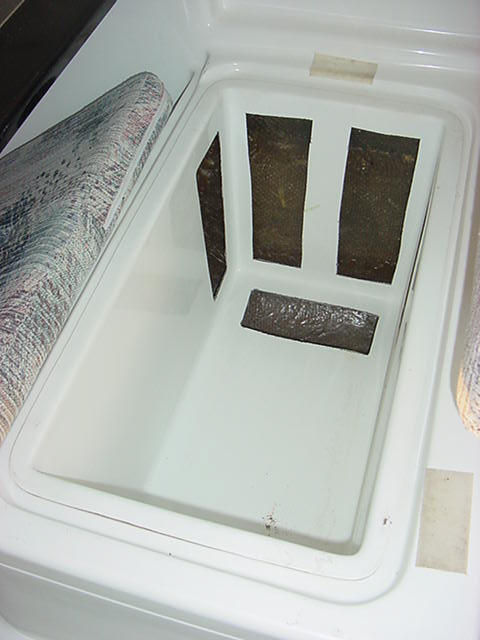
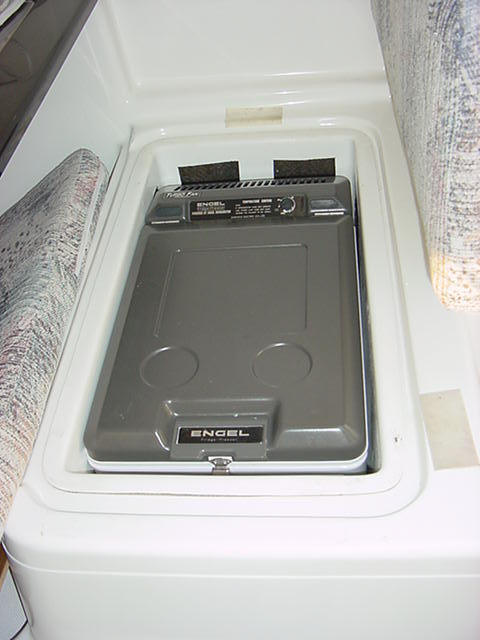
DC Refrigerator
~ Found out
about this Engle 35 refrigerator from
www.ahoycaptain.com...
works off of DC and AC... I cutout some of the cooler insert to allow it to
ventilate and added more fiberglass roving to help support the extra weight.
It automatically detects if AC current is on uses it instead of DC. This will
keep everything refrigerated.... and will make ice. Draws about .7 to 2.7
amps depending on where you set the knob.

Open Galley
~ Took the
suggestions from
www.macgregorsailors.com and removed the factory insert and put in
shelves. My wife loves the incredible amount of storage there is now.
I had a canvas shop make a double thick black cover with snaps at the same
location as the original screws.
Plexiglas Hatch Cover
~ After spending a rainy night on the boat with the
original hatch cover in place claustrophobia set in somewhat. Bought two
pieces of thick Plexiglas from Lowe's, added vents to the lower section and
tinted the inside of them.
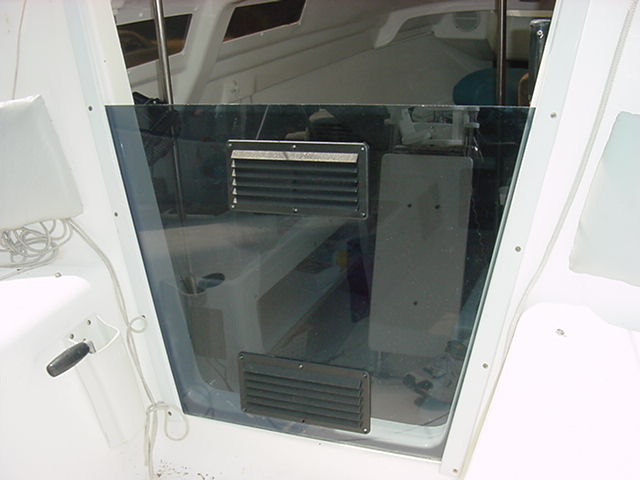
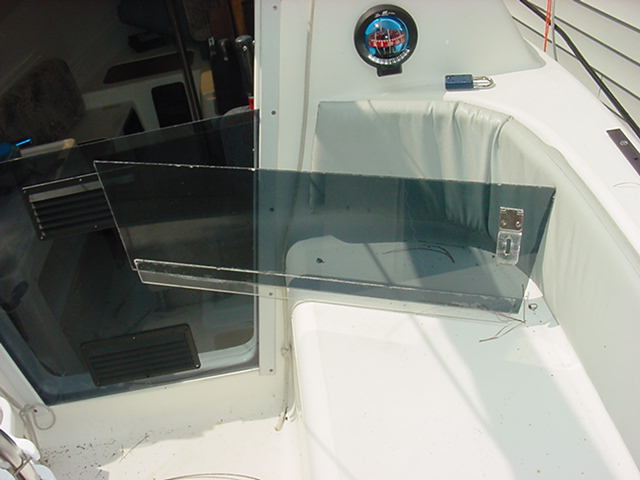
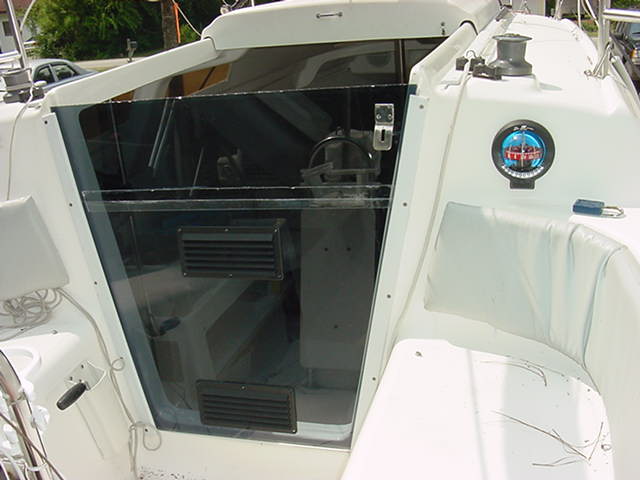
*** Note: I don't use this anymore since I got the A/C Mod below.
Galley Drawers Reused
~ After modifying the galley I had this big black
galley insert with drawers just sitting in my garage... so naturally I cut out
the drawers and added more storage to the inside.
Weighted Centerboard
~ I was
looking for more stability, better pointing and possibly less sudden heeling...
I added 138 LBS to the hollow centerboard. This is a major modification. I used
my experience of a weighted centerboard from my O'Day 19 to design the changes.
Step 1: find some lead... not an easy task. (update: buck shot online... a
little more pricy but easier to work with. Finally found a salvage yard that
had lead rings used in piping, bought 150lbs of it ($40). Got my turkey cooker
out, an old cast iron pot, a ventilation mask (lead is poisonous), a metal
ladle, and floor scale and started melting. 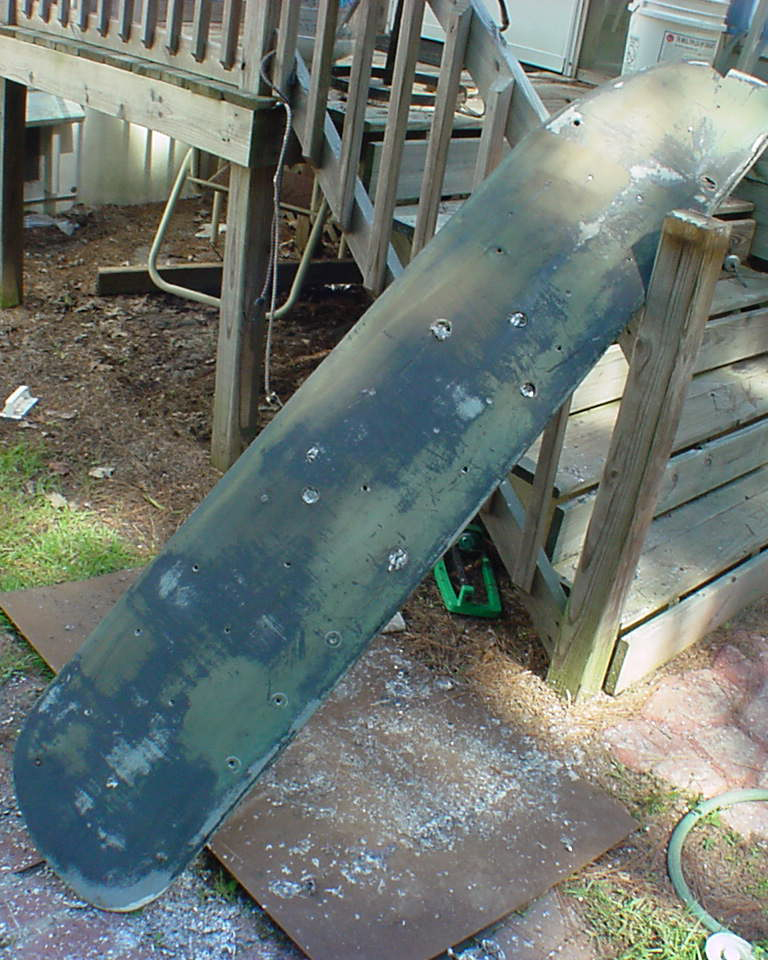 I
drilled several large holes (1 inch) to pour the lead in, and several smaller
holes to help with ventilation and cooling. The smaller holes also let me know
where the lead was going. I had the board leaning up against some stairs (about
35-45 degrees). I poured the lead in using the ladle (1/2 cup) and allowed it to
cool between each pour (kept the fiberglass from blistering).
I
drilled several large holes (1 inch) to pour the lead in, and several smaller
holes to help with ventilation and cooling. The smaller holes also let me know
where the lead was going. I had the board leaning up against some stairs (about
35-45 degrees). I poured the lead in using the ladle (1/2 cup) and allowed it to
cool between each pour (kept the fiberglass from blistering).
 The
centerboard weighed 29 LBS before, I kept weighing the board until it got to 138
LBS.
The
centerboard weighed 29 LBS before, I kept weighing the board until it got to 138
LBS.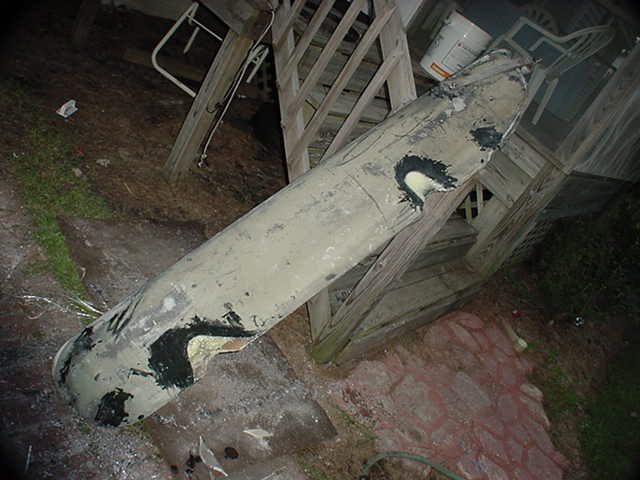
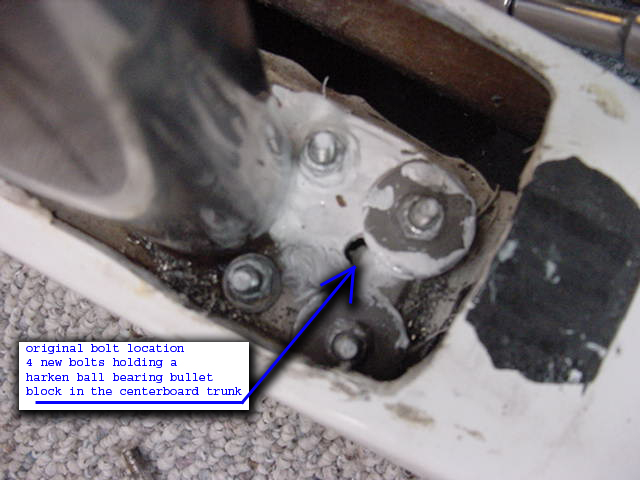
Step 2: Cut away sections for block clearance using a metal cutting jig saw.
 With
the new pull connection further back on the board I had to shave off (dark black
line above) so the bolt heads would not tear into the centerboard trunk. The
original factory connection had it the same way. Their bolt was only about 1/4
inch, I used about 1/2 inch bolts. I then filled the holes and reinforced the
pull area with fiberglass roving and filler. I then sanded and painted the
entire board.
With
the new pull connection further back on the board I had to shave off (dark black
line above) so the bolt heads would not tear into the centerboard trunk. The
original factory connection had it the same way. Their bolt was only about 1/4
inch, I used about 1/2 inch bolts. I then filled the holes and reinforced the
pull area with fiberglass roving and filler. I then sanded and painted the
entire board.
Step 3: While waiting for the board to dry I started working on the two harken
bullet blocks that get mounted in the centerboard trunk and reinforced the trunk
where the connection for the hanger is. I added more fiberglass, 2 sheets of mat
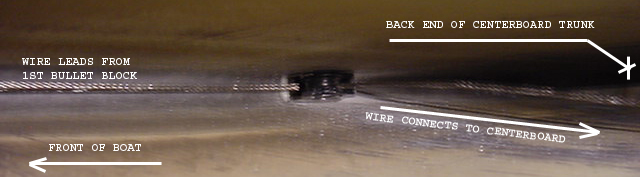
and 2 sheets of roving,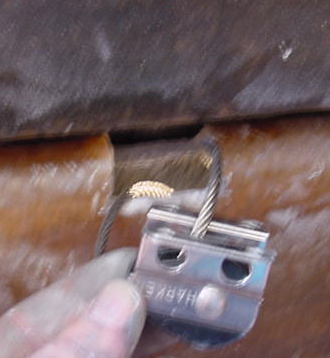 around the trunk where the bolt for the hanger attaches. The first block will go
right where the wire comes out of the tube from the deck. I had to remove one
bolt from inside the cabin that holds the plate that the tube is connected to...
the four bolts that will hold the block will also replace the one larger bolt.
With the help of my first mate I was able to hold the screw from the trunk as
she ratcheted the nuts down.
around the trunk where the bolt for the hanger attaches. The first block will go
right where the wire comes out of the tube from the deck. I had to remove one
bolt from inside the cabin that holds the plate that the tube is connected to...
the four bolts that will hold the block will also replace the one larger bolt.
With the help of my first mate I was able to hold the screw from the trunk as
she ratcheted the nuts down.
 I
then went to work on the second block... the trunk tapers in as it goes aft just
like the centerboard, so I measured the trunk at the top from inside the cabin
(took out the cooler insert temporarily) and jig sawed some of it away.
I
then went to work on the second block... the trunk tapers in as it goes aft just
like the centerboard, so I measured the trunk at the top from inside the cabin
(took out the cooler insert temporarily) and jig sawed some of it away.
Just enough to squeeze in the next bullet block and have the flanges supported
by the trunk cut aways. I then mixed up some fiberglass epoxy and added the
silica stuff to make it into a paste.
 I
put it in between the flange and the trunk and took a scrap square piece of
fiberglass (from some other mod where I cut some of the liner away... ) and put
that on top to seal up the hole. Then I added the rest of the paste on top of
that to really seal it up.
I
put it in between the flange and the trunk and took a scrap square piece of
fiberglass (from some other mod where I cut some of the liner away... ) and put
that on top to seal up the hole. Then I added the rest of the paste on top of
that to really seal it up.
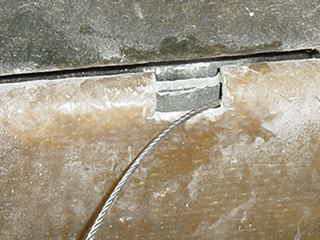
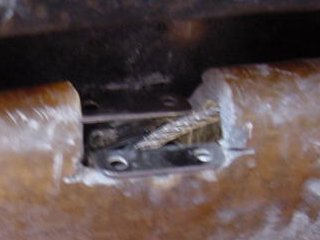
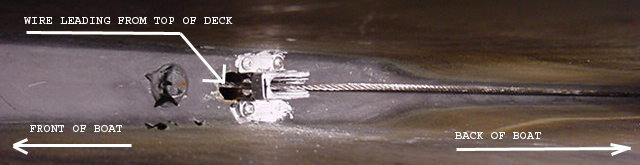
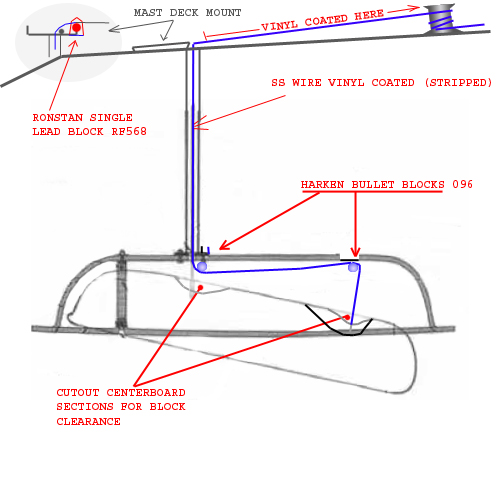
Step 4: Running the wire. I bought vinyl coated wire and stripped it after I got
it up on a lift and tested the movement, I removed it from where it entered the
hole on the top of the deck to all the way down to the connection on the
centerboard. I needed to keep the vinyl on the top deck so it would give the
winch something to hold on to.
I am using the winch (and winch
handle) that is used for the jib to lift the board.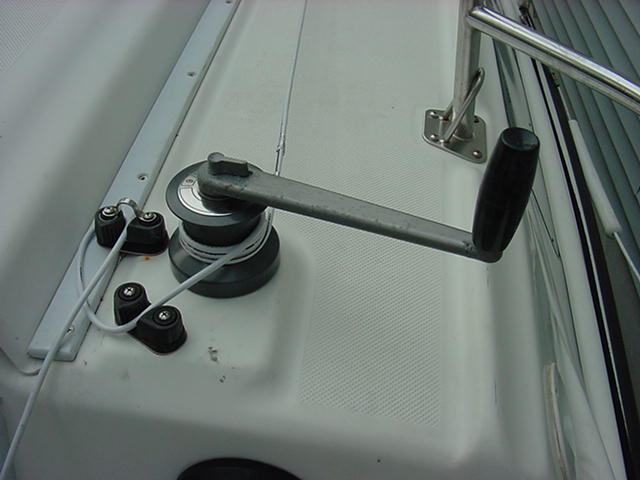
 I
added a Ronstan 19mm single lead black to ease the wire coming out of the tube
onto the deck. I will be replacing the turning block that brought the
centerboard line back to the cockpit as it is old and not very tough
I
added a Ronstan 19mm single lead black to ease the wire coming out of the tube
onto the deck. I will be replacing the turning block that brought the
centerboard line back to the cockpit as it is old and not very tough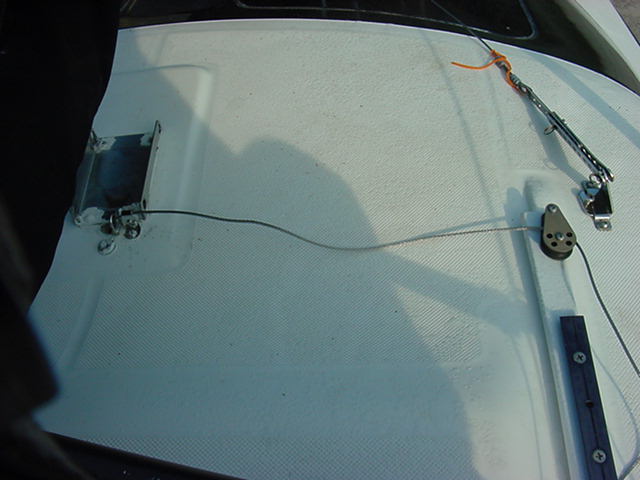
| Ok.. just go back from the sea... er...
river trials... Powering... seemed to do just fine... was doing 17.5 mph for about an hour... hit a few 1-2 ft waves no banging, seems just as before. Boat seemed to sit a little lower in the water.. as if wife was inside the cabin (175lbs) (she wasn't) or the ballast tank was full (it wasn't) Sailing... (no water ballast) nothing quantitative.. just a feeling... on a close reach with 10-15 mph winds, heeled slowly... not as quick or sudden as it used to.. felt more like a keel boat heeling... got a heel of up to 30 degrees doing 5.3 mph... didn't round up into the wind like it normally would do. Filled the ballast, less heeling... same "keel boat" feeling with it slowly heeling... not sudden heels. Hitting bottom: it works like a 'boat brake" I purposely went into shallow water while sailing... boat came to a slow stop... just cranked it up a little and it continued along. The new wire connecting to the board does sing a little while sailing... nothing annoying. Overall I'm pretty happy with the performance. |
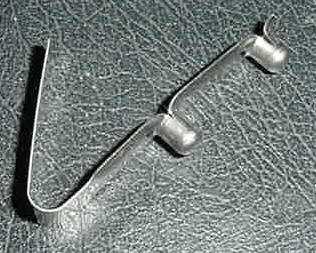
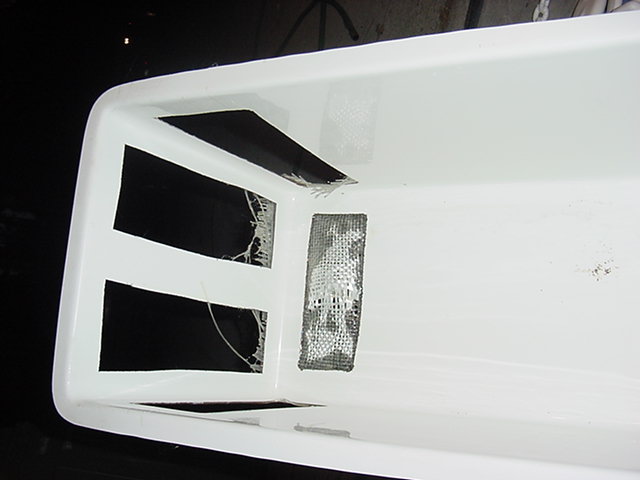
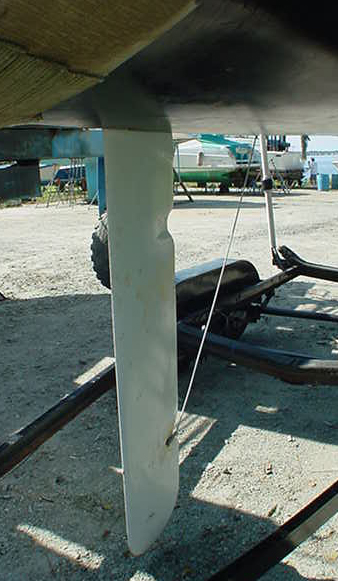
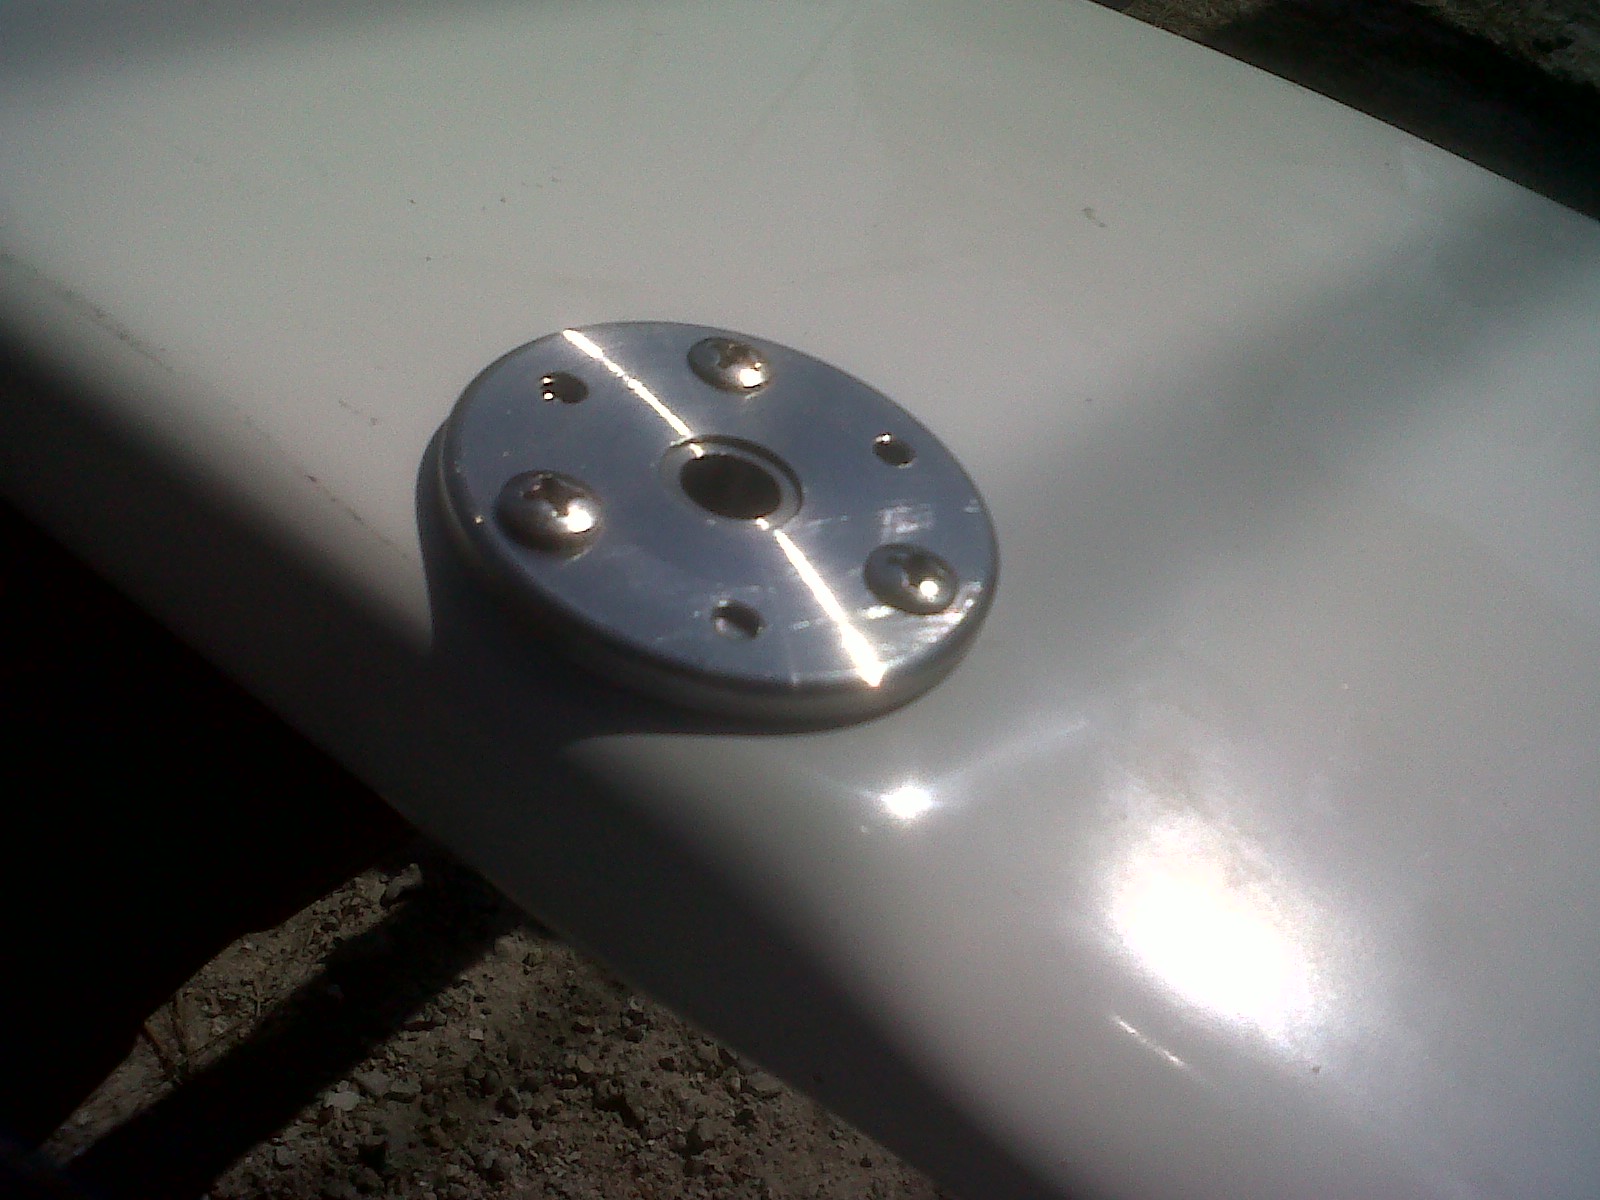
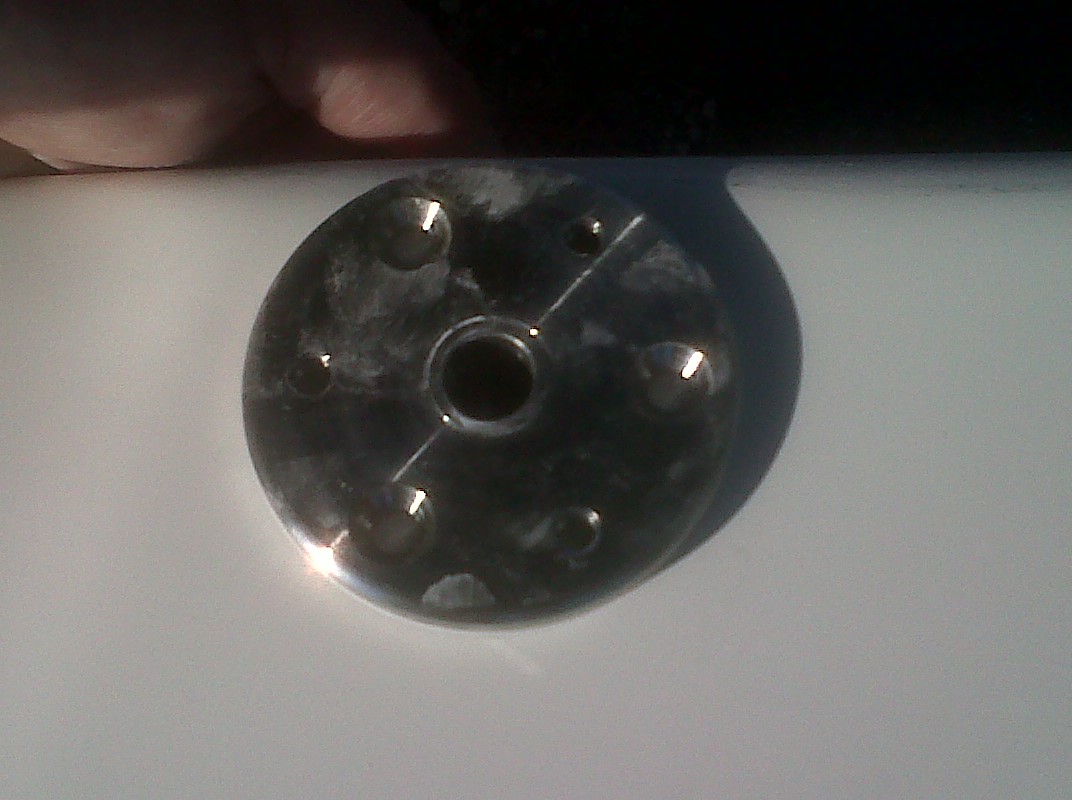
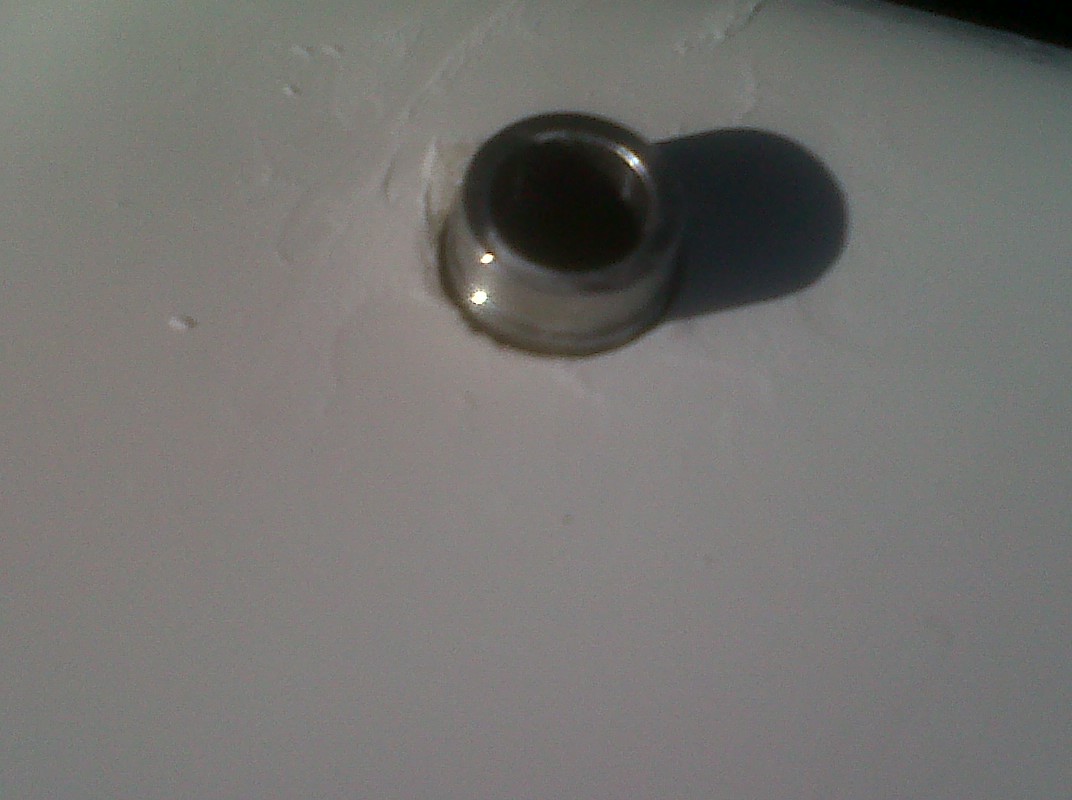
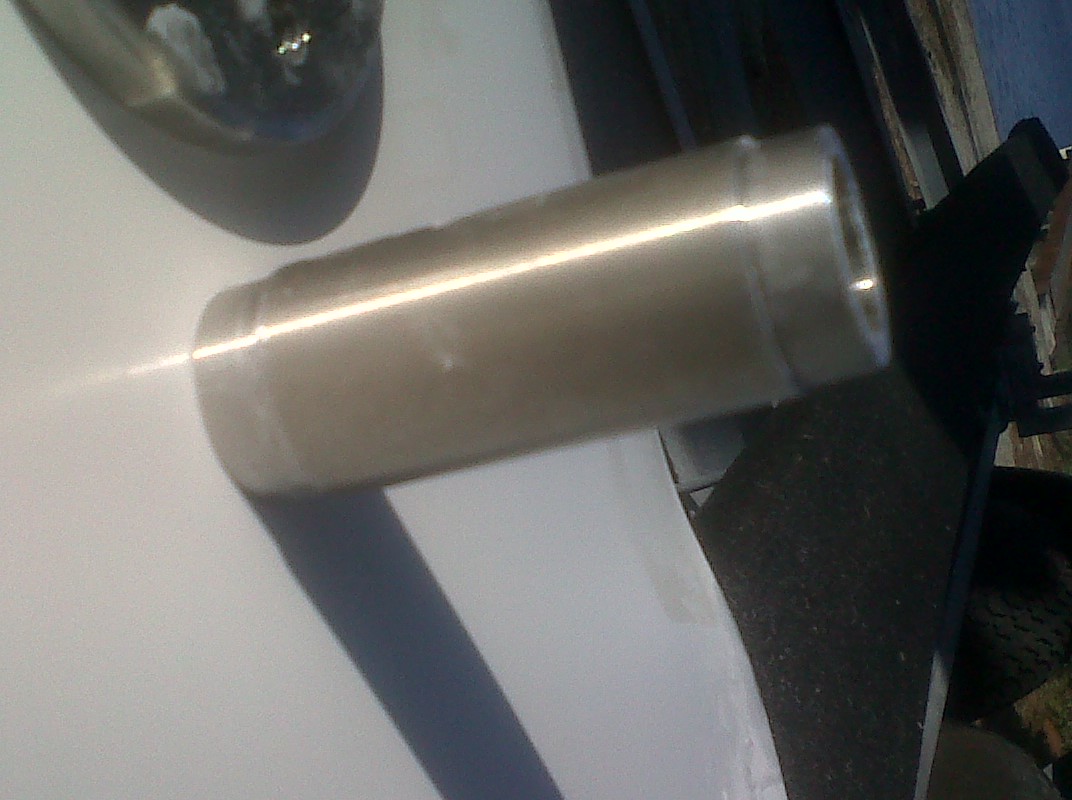
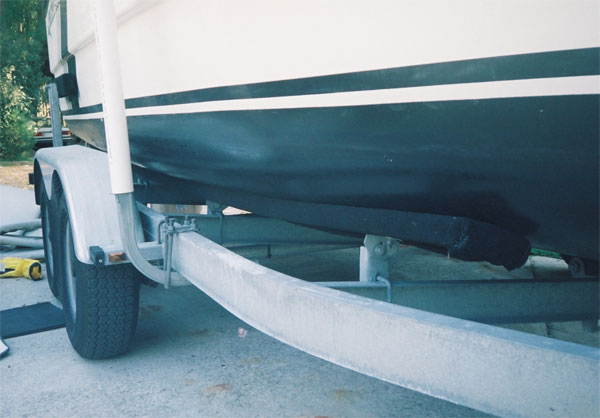
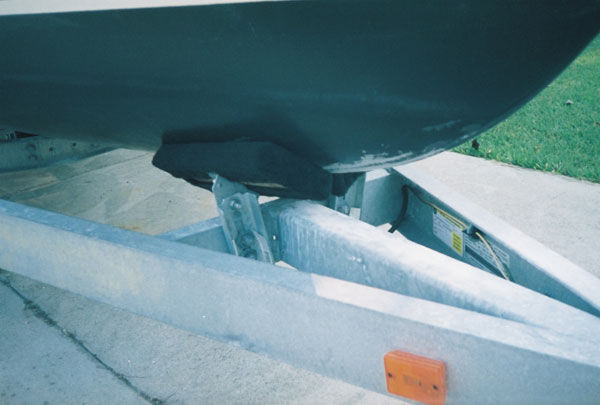
Pivot Point Repair
This was designed by Cliff Ainsworth and he
installed it on his. Haven't heard anything about performance.
Posted his mod here because his link is gone from the internet.

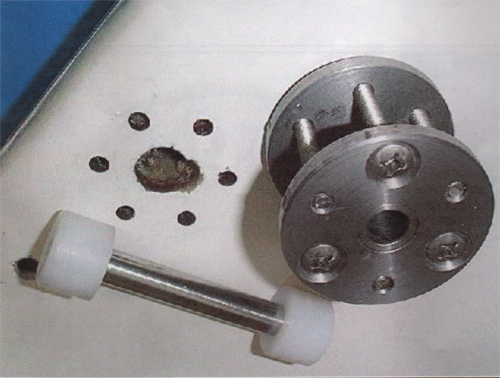
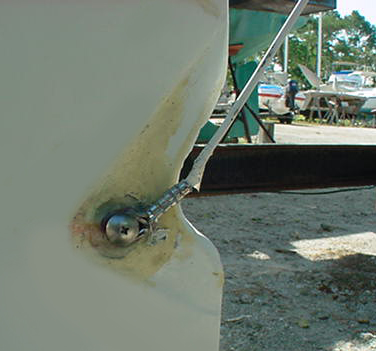
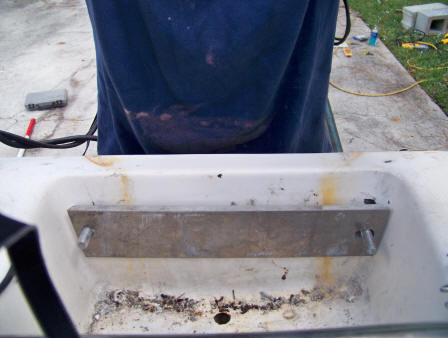
END PLATES - 2 1/2" Diameter by 1/4" thick stainless steel, center hole 11/16" diameter; six holes drilled/tapped/countersink for 1/4" x 2" stainless steel bolts, 3 from each side.
WEAR SLEEVE - 3/4" OD x 1/2" ID x 1 15/16 L The outer diameter is machined down to 11/16" for a length of 1/4" on each side to create a shoulder that fits into the END PLATE center hole.
CENTER PIN - stock item, the diameter was machined down just enough to slide easily in the wear sleeve; alternately, the ID of the sleeve could be just larger.
END CAPS - As shown will not fit into the trunk area, the need to machined as a smaller ID. I have found that 1/4" plastic tubing ends available from hardware stores are perfect for the job.
CENTERBOARD - drill and/or repair the pivot hole to accommodate the assembly; the plate may be used as a drill guide.
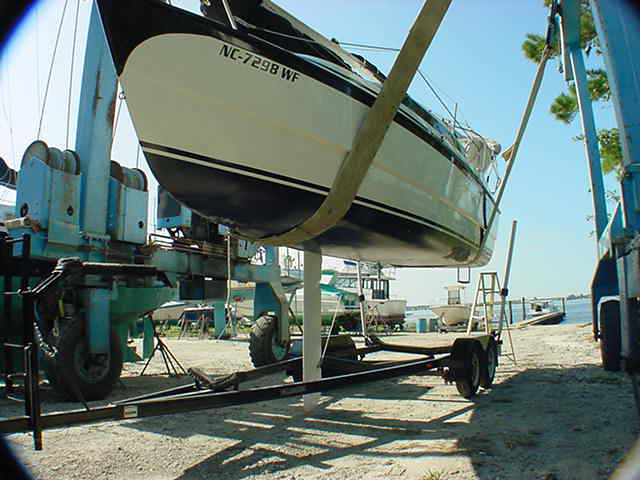
*** Update ***
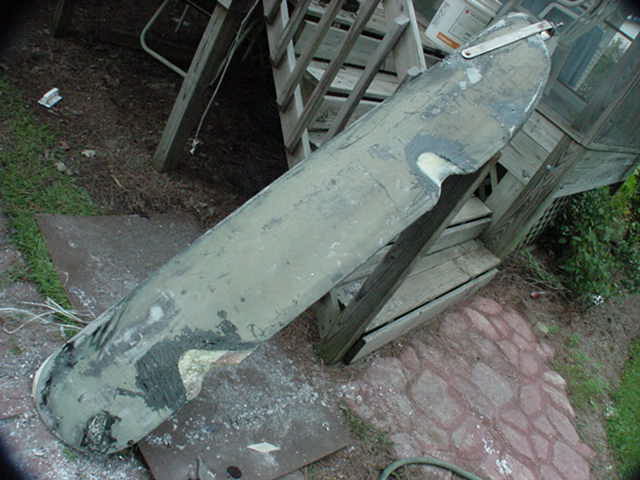
~ I had to replace the entire centerboard as it
fell out into the Pamlico Sound (22mph and centerboard drops = no more board)
See ships logs 2011.
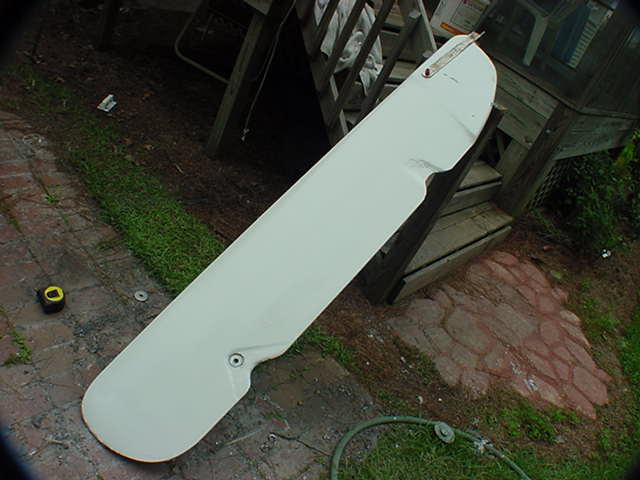
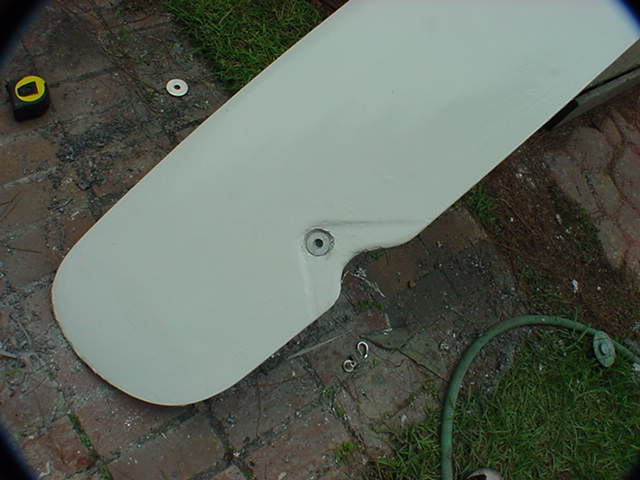
So I had the pivot point plate made at a local metal shop www.americanfabricatorsnc.com , it cost $265 since it had to made from scratch... they did a great job.
I ordered a new board from Blue Water Yachts ( http://www.bwyachts.com ) and they even drilled the pivot hole in it... probably because they have all Macgregor's Jigs. I filled it with lead and epoxy again (buck shot this time) until the board weighed 100 lbs (less than the 138 lbs last time). Installed the Pivot Plate and added a metal sleeve at the pull up hole. I used some marine lumber and made some shims so the pin doesn't rub against the hull... I couldn't find the end caps mentioned above. Also added bearing grease to all the bullet blocks to keep the coated wire moving easily.


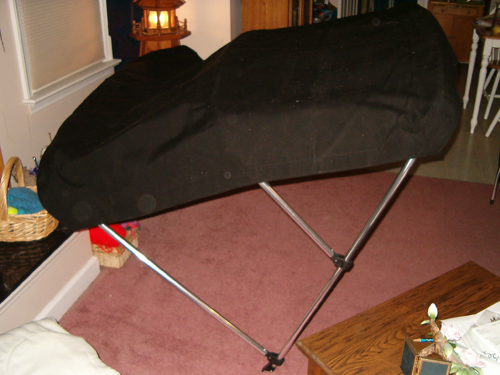
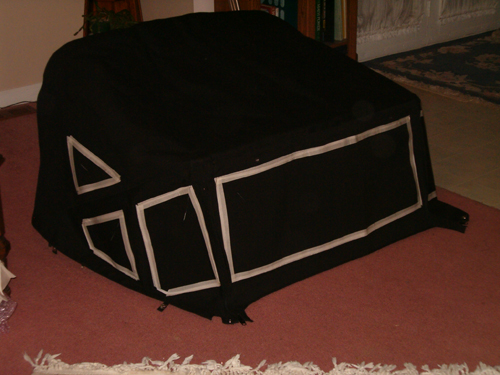
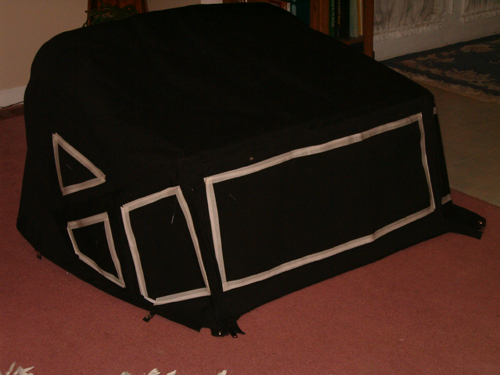
Cockpit Full Enclosure
~ I
bought a full enclosure from Bluewater Yachts. It works great.
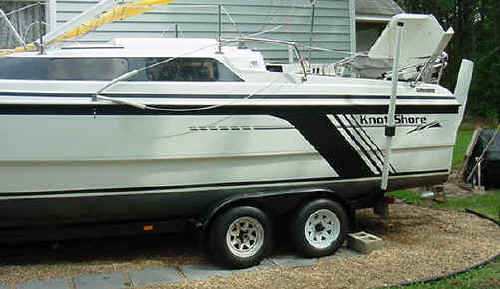
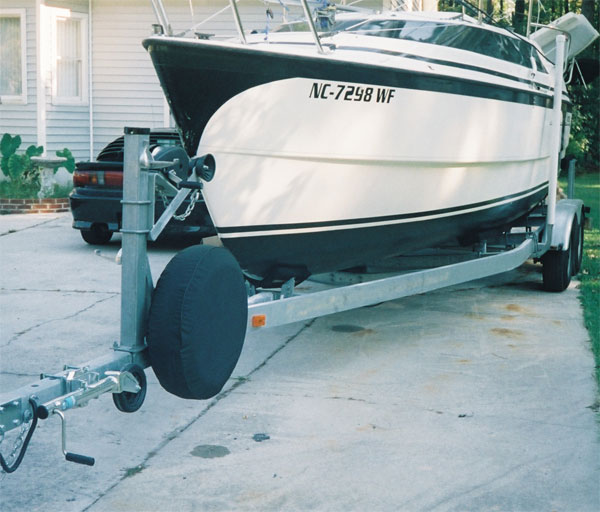
Replacement Trailer
~ My
factory trailer rusted itself to death (axle snapped) so I have purchased a new Galvanized
Trailer ( www.magictilt.com ) from a
local dealer ( www.pamlicomarine.com
).. Had
to have some slight (yea, right) modifications done to it.
 Changed to
a straight post for the winch stand, added 2 Mast Steps to the winch stand to
replace the original macgregor trailer ladder... magic tilt didn't have anything
that would work.
Changed to
a straight post for the winch stand, added 2 Mast Steps to the winch stand to
replace the original macgregor trailer ladder... magic tilt didn't have anything
that would work.
 Added goal posts too in front of the wheels, and kept the
heavy duty guides that came with the new trailer in the back. Dropped all
bunks down to the frame and had them add a
Added goal posts too in front of the wheels, and kept the
heavy duty guides that came with the new trailer in the back. Dropped all
bunks down to the frame and had them add a
 V-Bunk up front similar to the
original on the macgregor trailer.
V-Bunk up front similar to the
original on the macgregor trailer.
 I moved the trailer wheels and axles so
the center point between the two axles lined up with where the jib winches are on the boat... help bring down
the tongue weight. (used the trailer picture from the sales brochure)
I moved the trailer wheels and axles so
the center point between the two axles lined up with where the jib winches are on the boat... help bring down
the tongue weight. (used the trailer picture from the sales brochure)
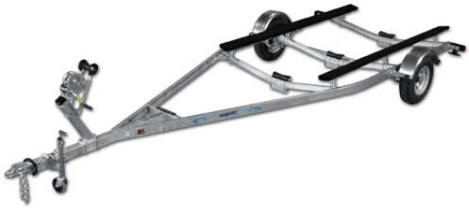
| Boat | Net Cap. | Overall | Overall | Tire | Trailer | ||
| MODEL # | Length | (lbs) | Width | Length | Size | Weight | DBF |
| TMCV 2224 | 22'-24' | 5720 | 100" | 28'-3" | ST205 / 75D14 C | 1120 | 84" |
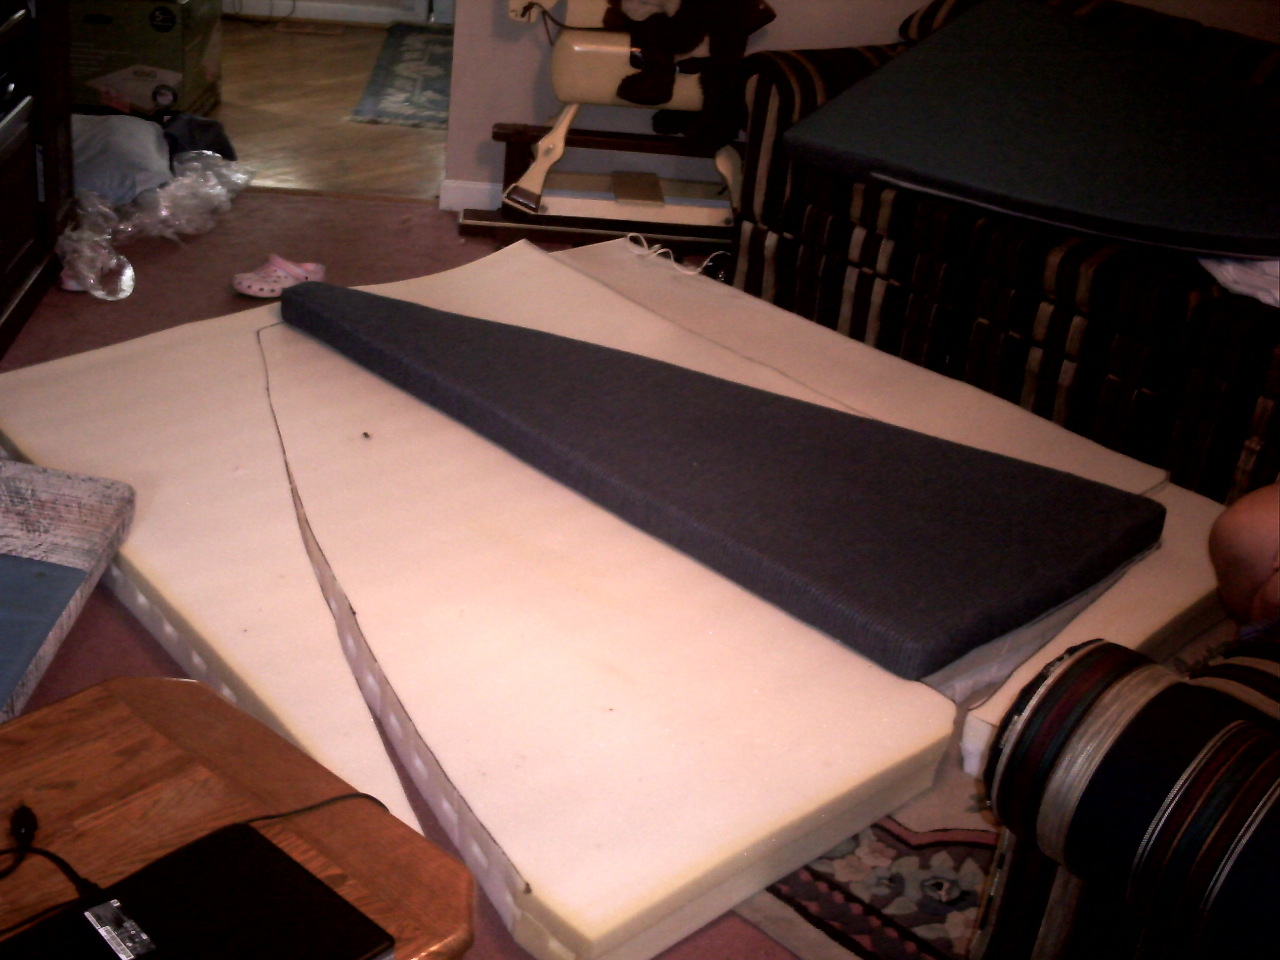
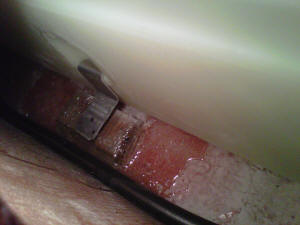
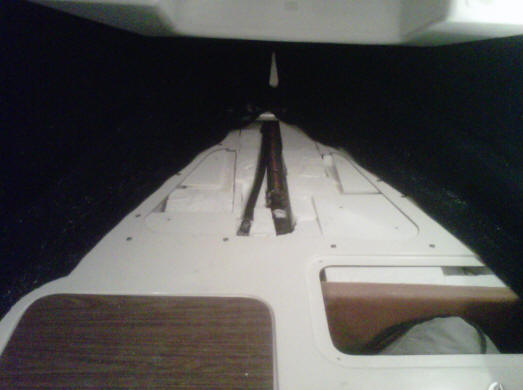
Interior Carpet
~ After seeing the M and the Hunter Edge with their
nice carpeted interiors... I finally decided to do it to mine... after all I
have done it to every other sailboat I have owned. I started
by taking newspaper and taping it together to cover the port wall for a
template. After cutting both sides using my template I started using
double sided tape on the carpet to make sure it fit, then went back with 3M 90
Adhesive spray. I also used some wood grain contact paper I still had from
the Pirate Fest and did a little fancy work on the ceiling brace.
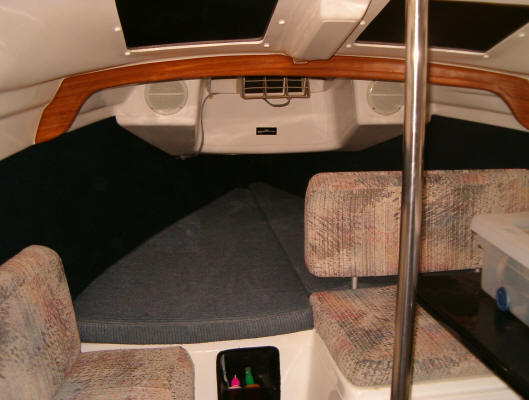
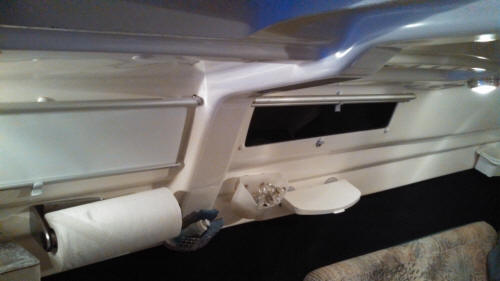
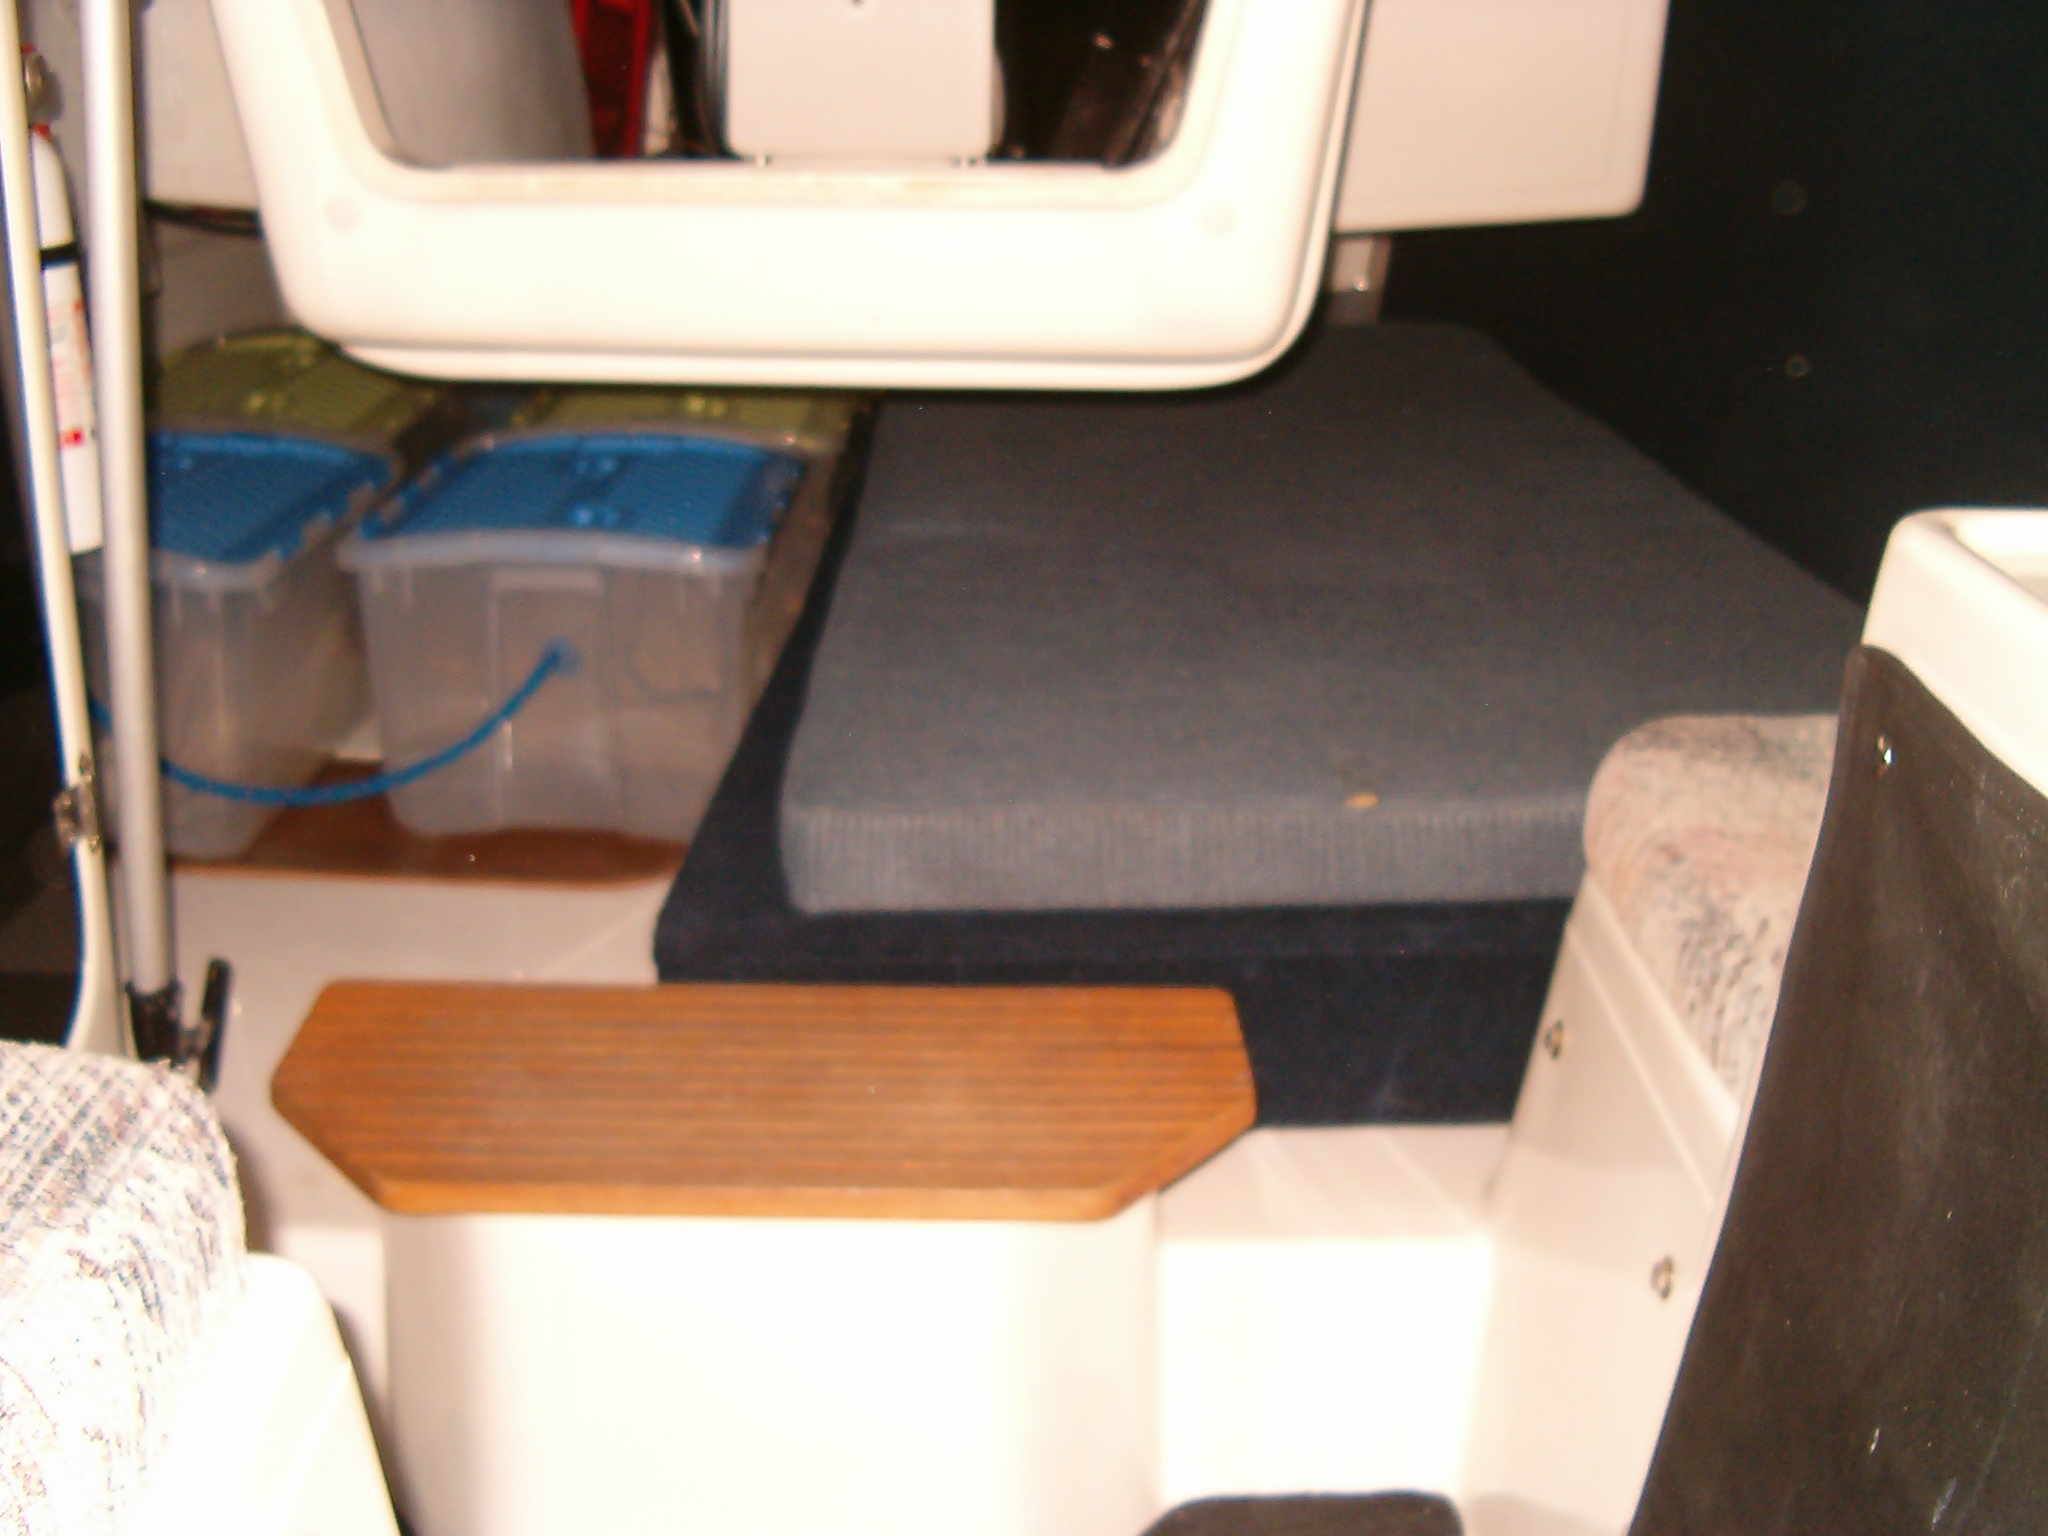
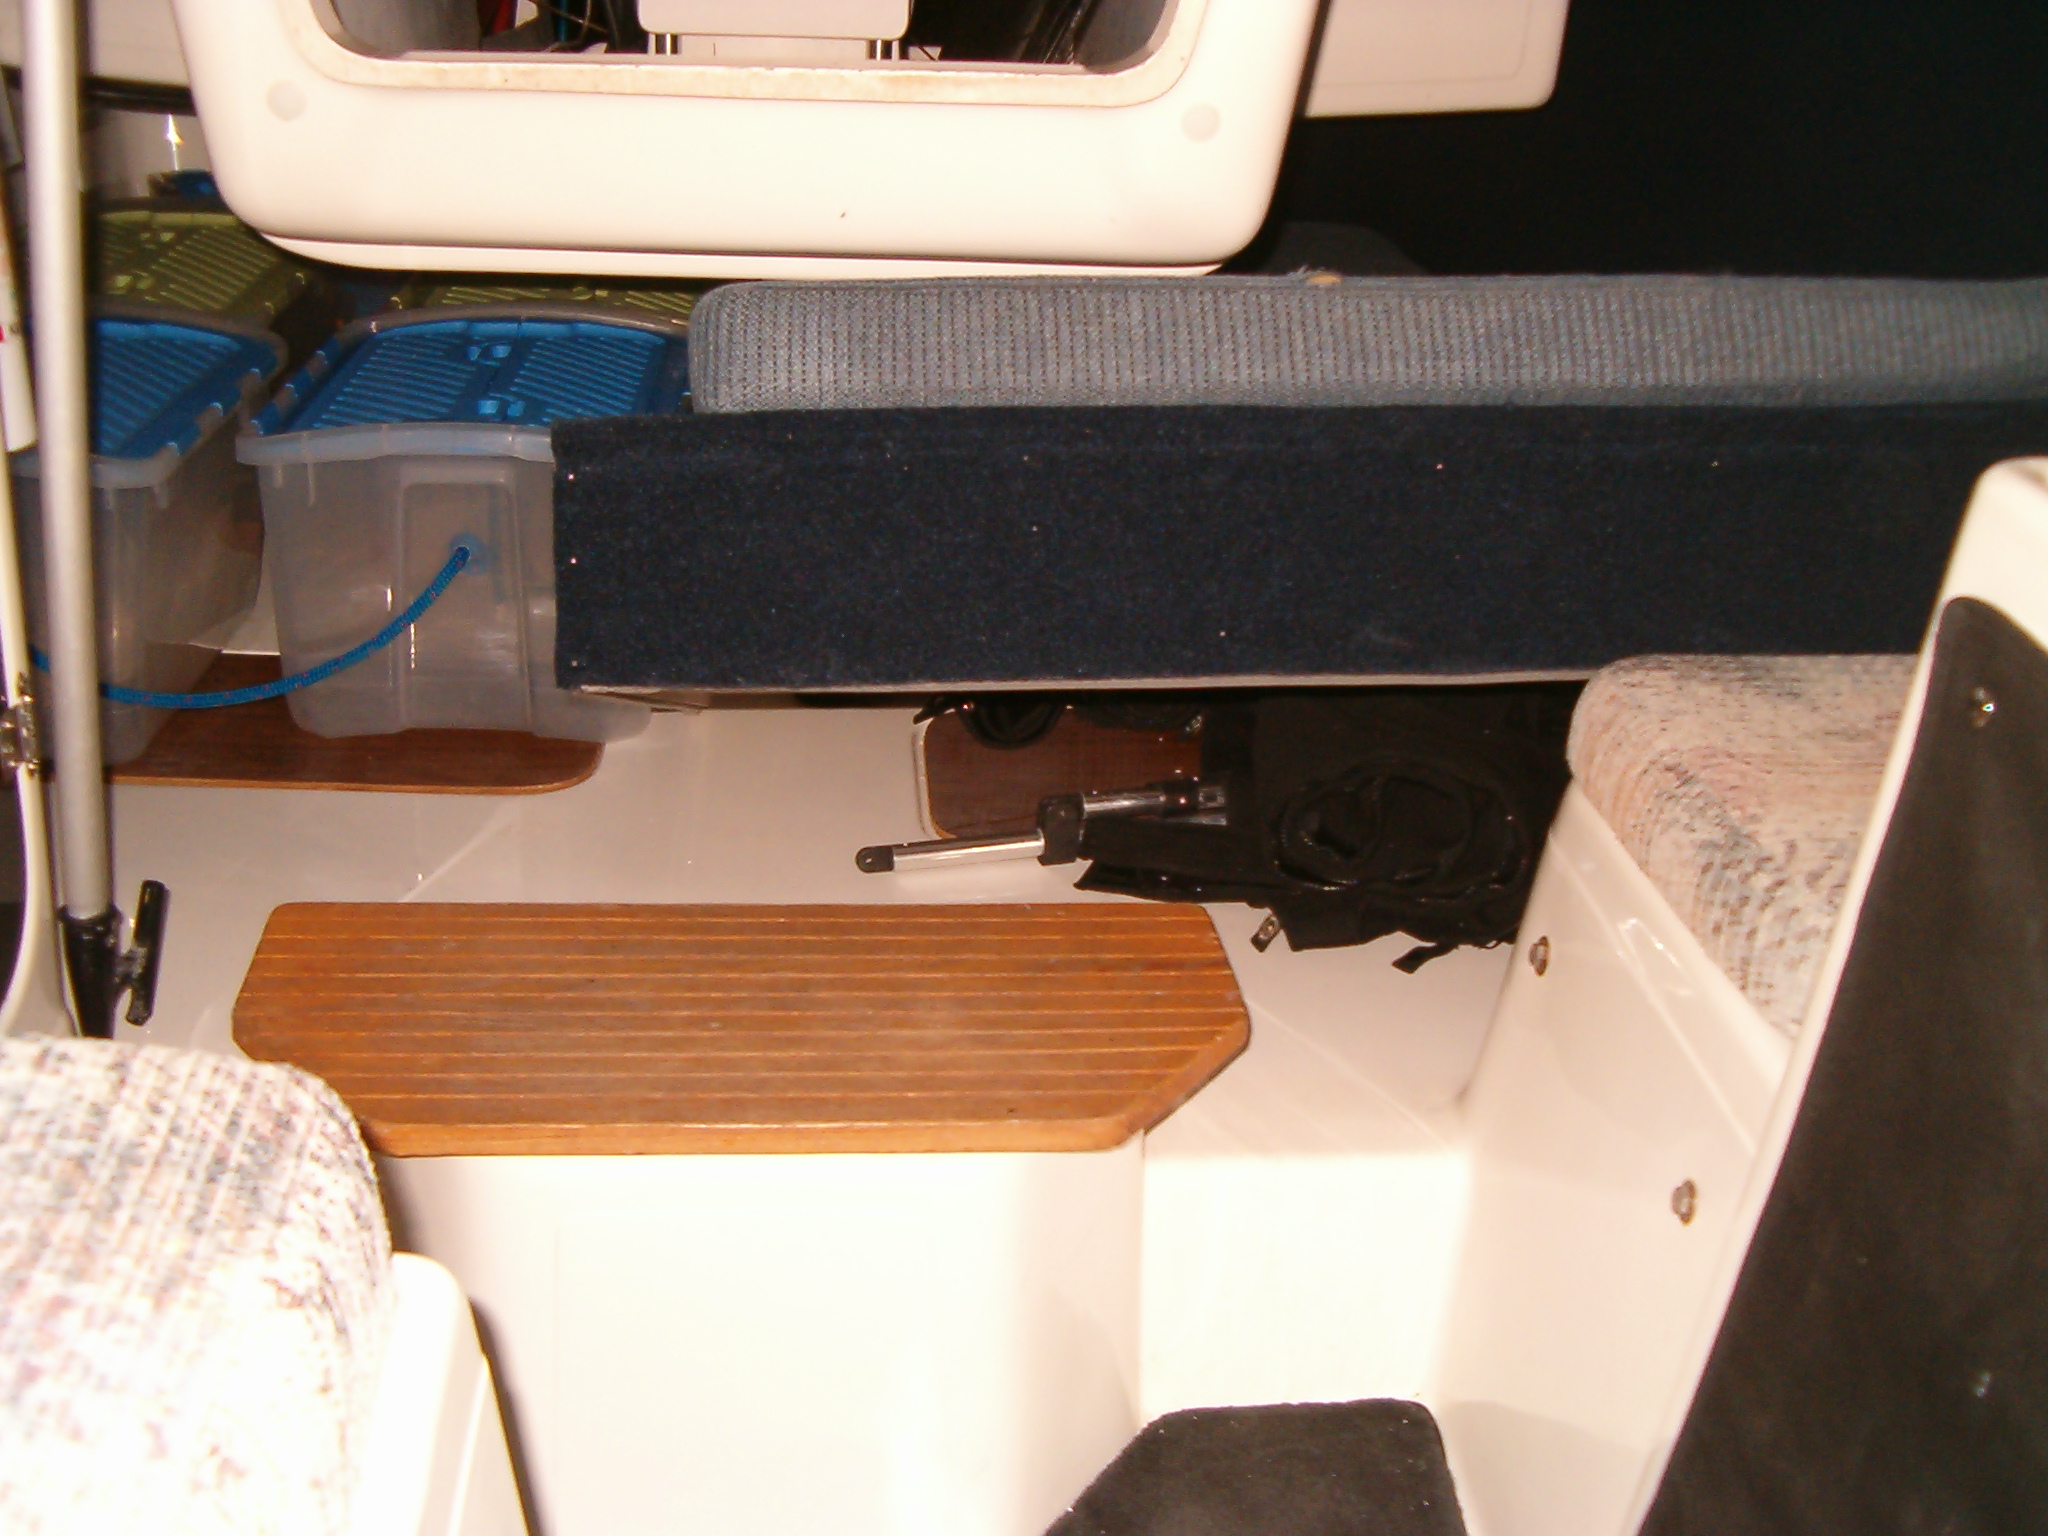
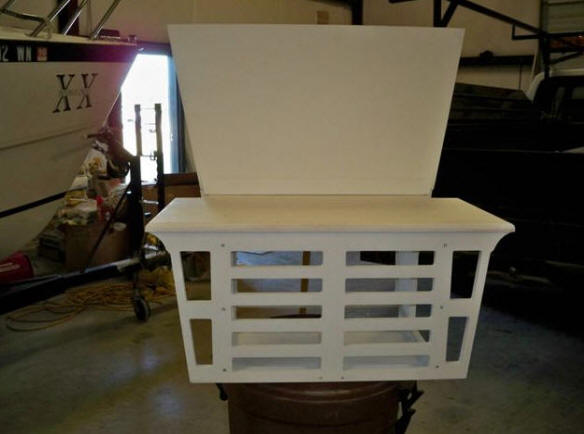
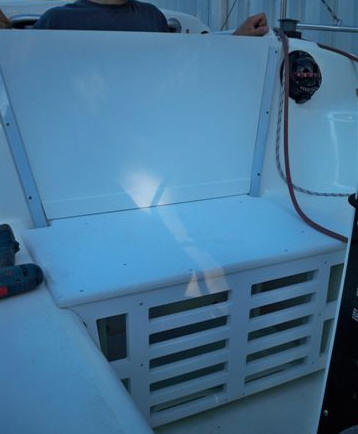
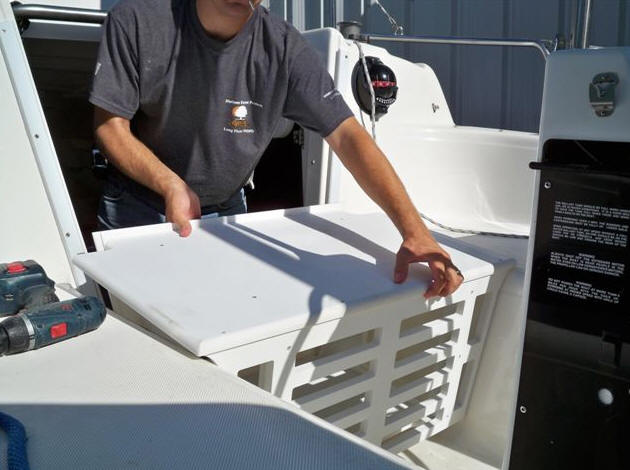
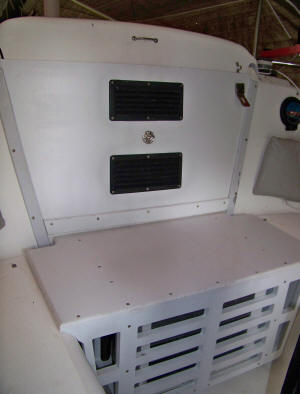
Line Pull Storage
~ I store a lot of stuff in the aft, so I have 6
storage bins that are attached like a train to each other with line. I
have 3 bins attached per side.
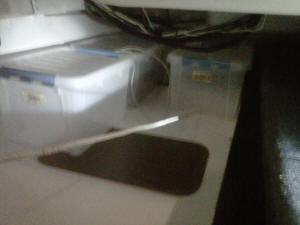
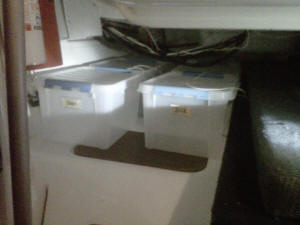
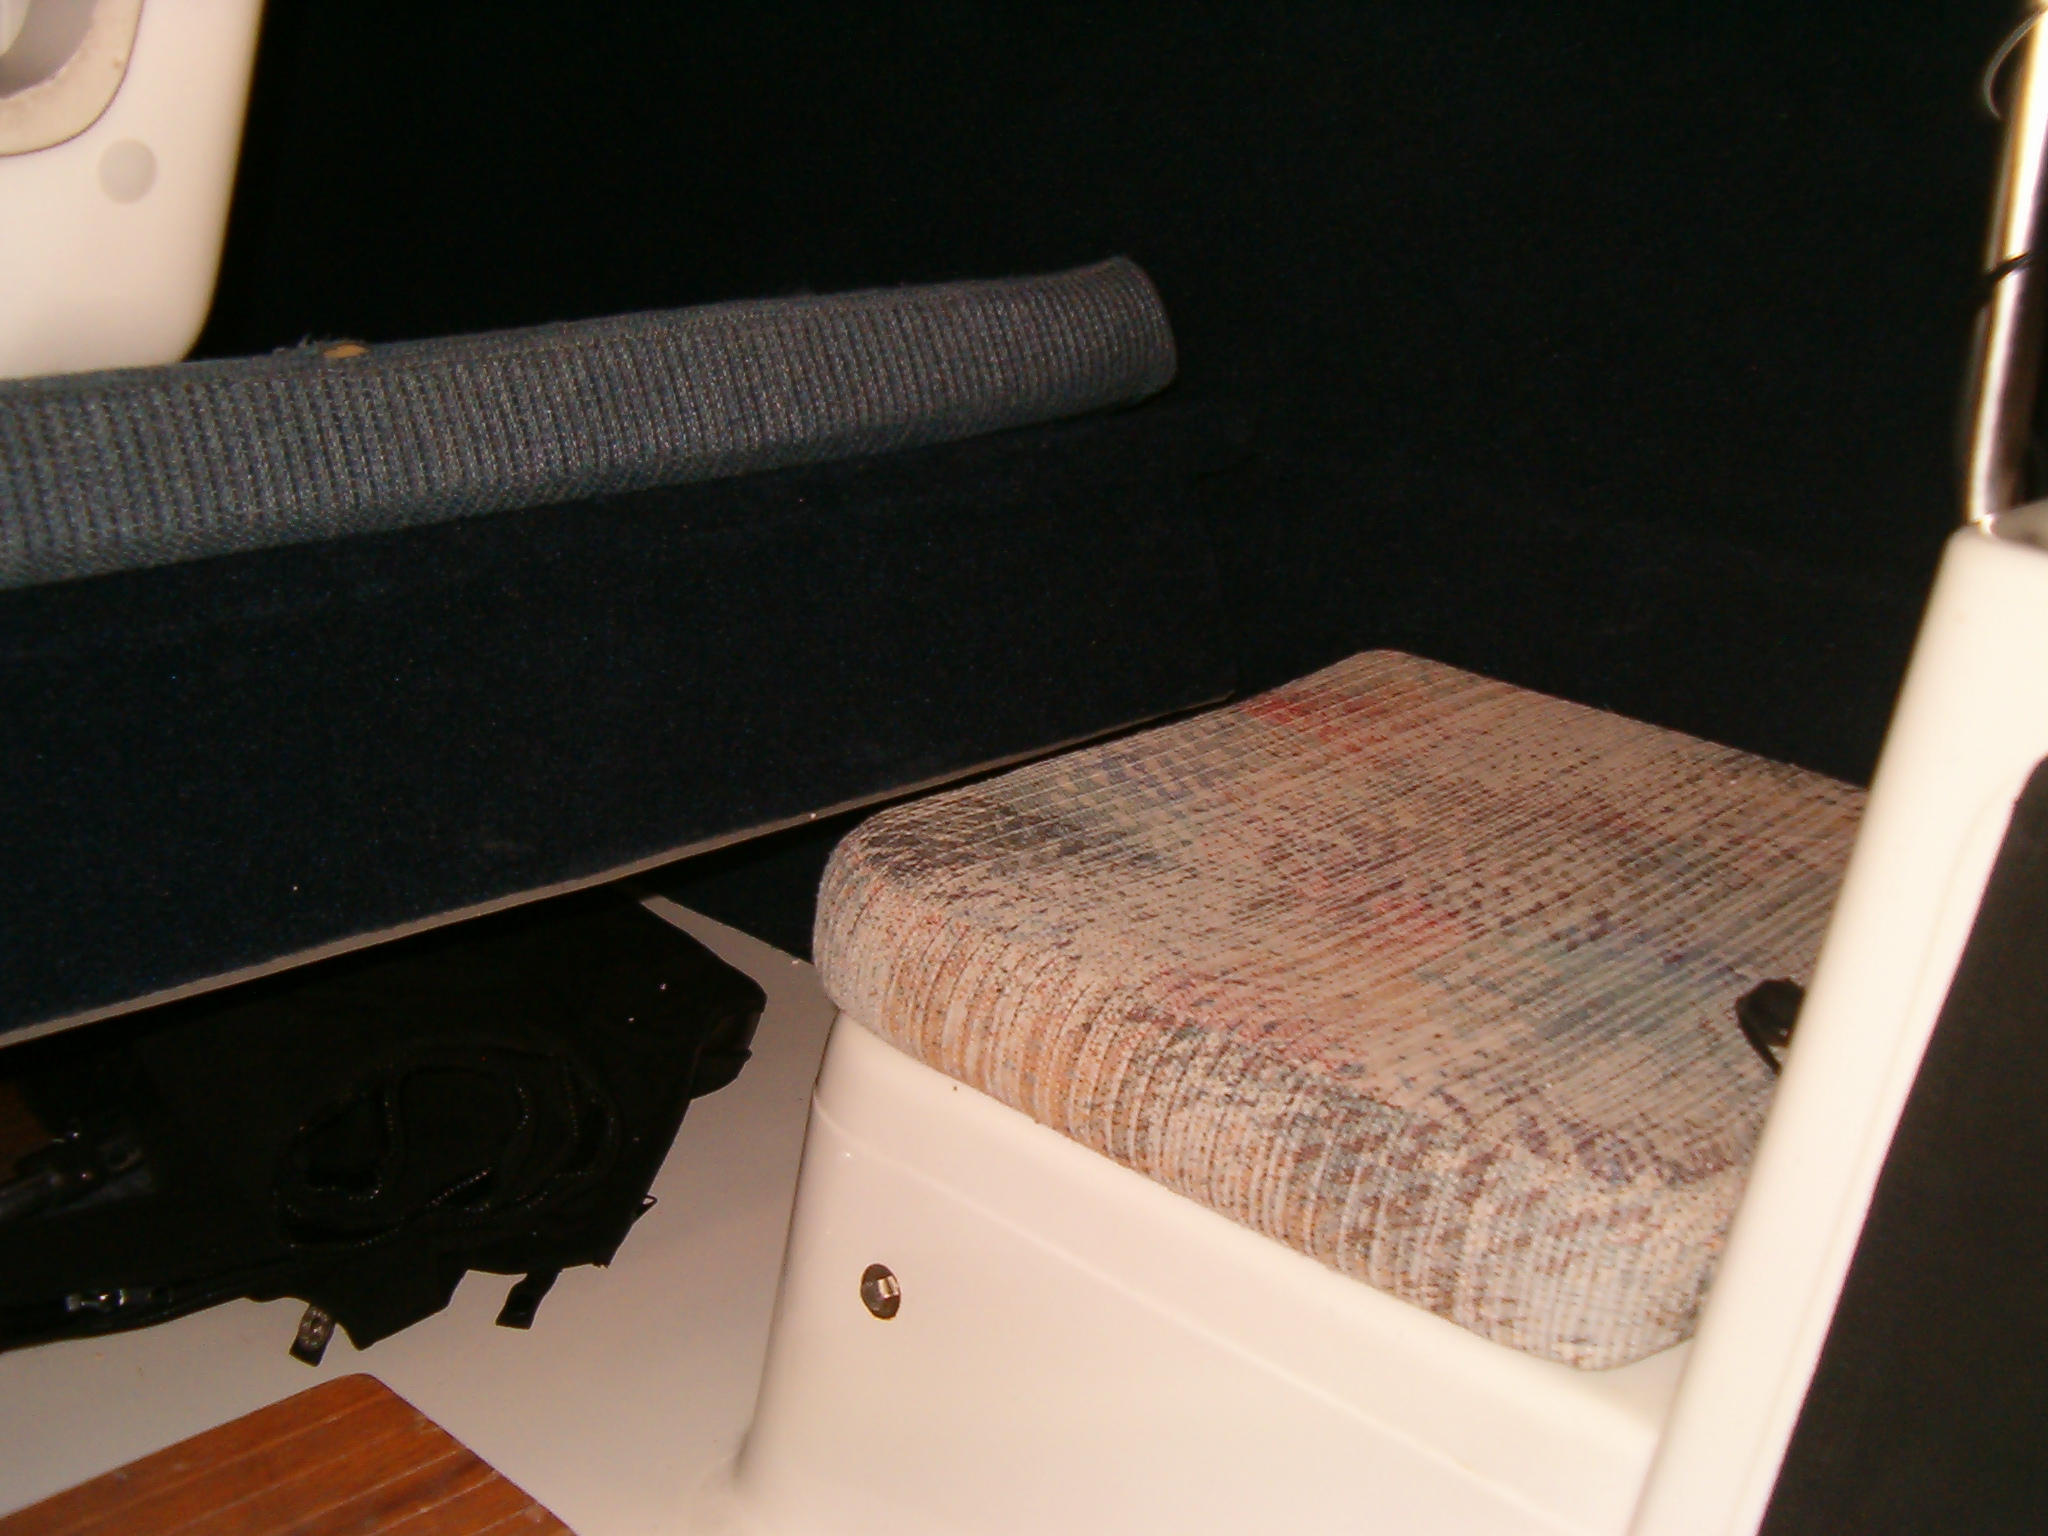
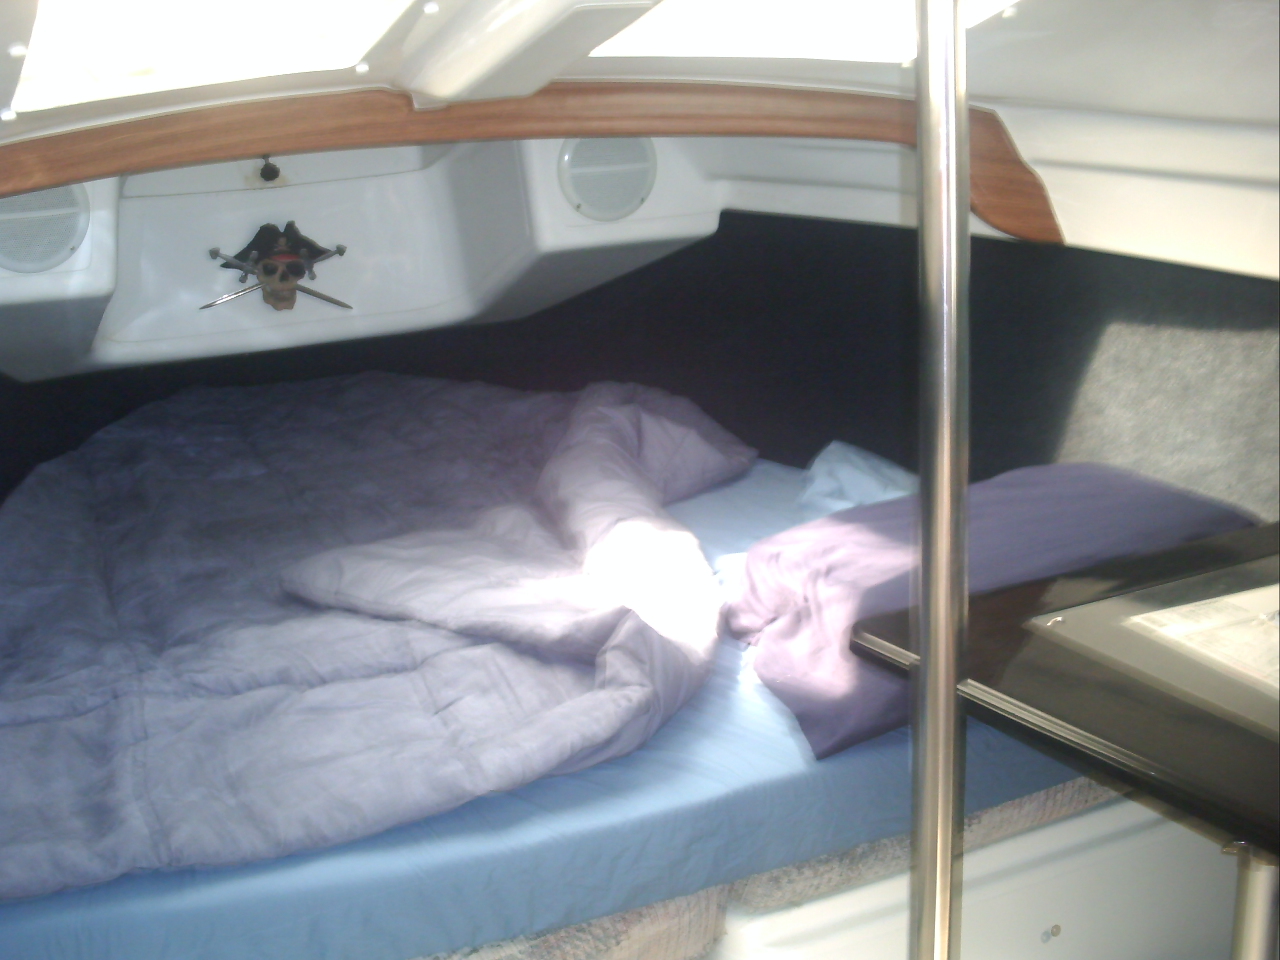
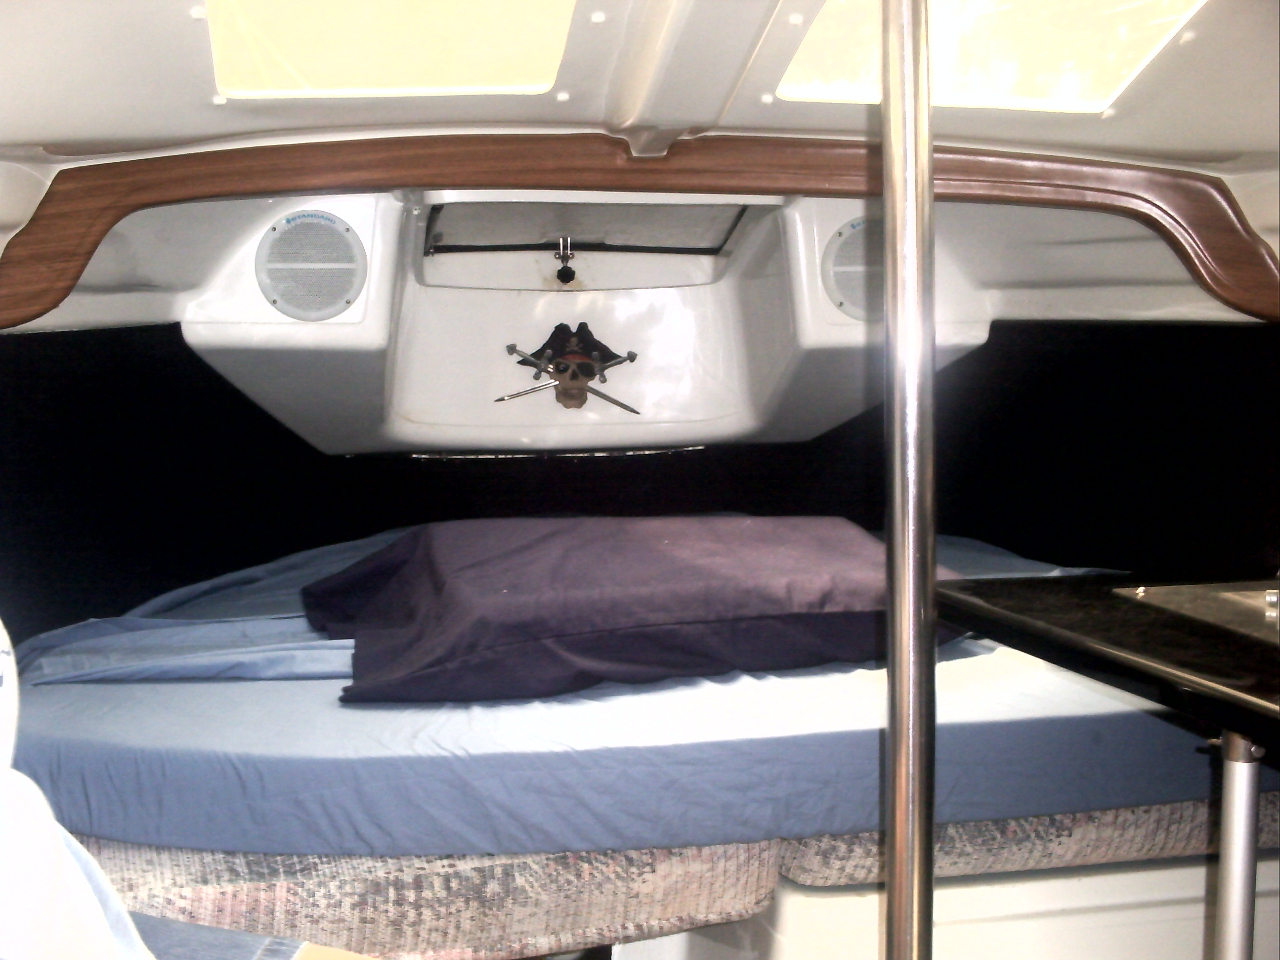
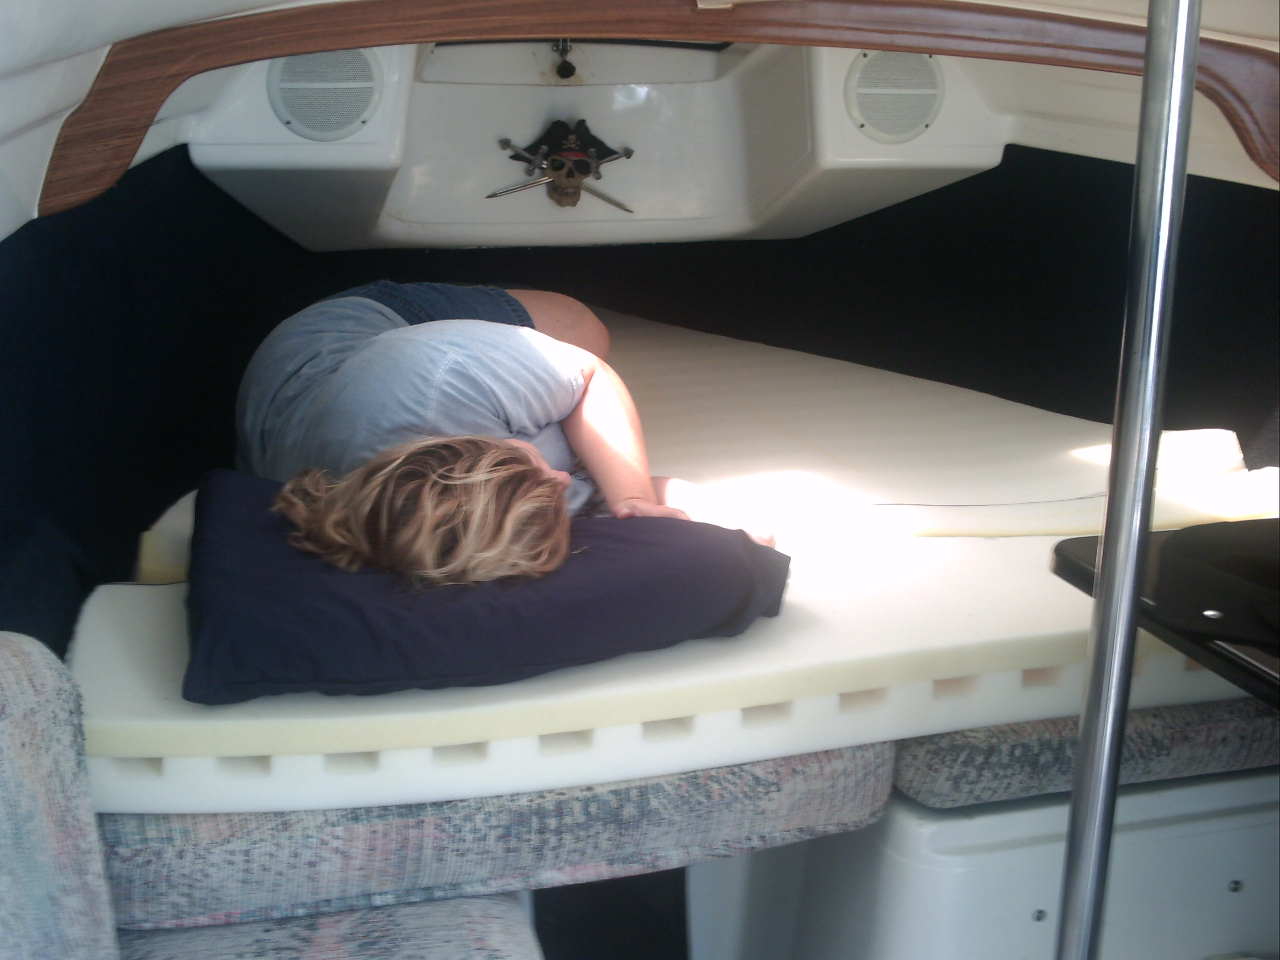
Aft Berth Raised Storage
~ So I have the complete canvas enclosure...
everything rolls up neatly for storage except for the dodger, so it is always
being stored in the aft... along with all the other junk I toss back there.
So I came up with the idea of storing the dodger and
accessories under the cushion and keep the port side bunk usable. So I
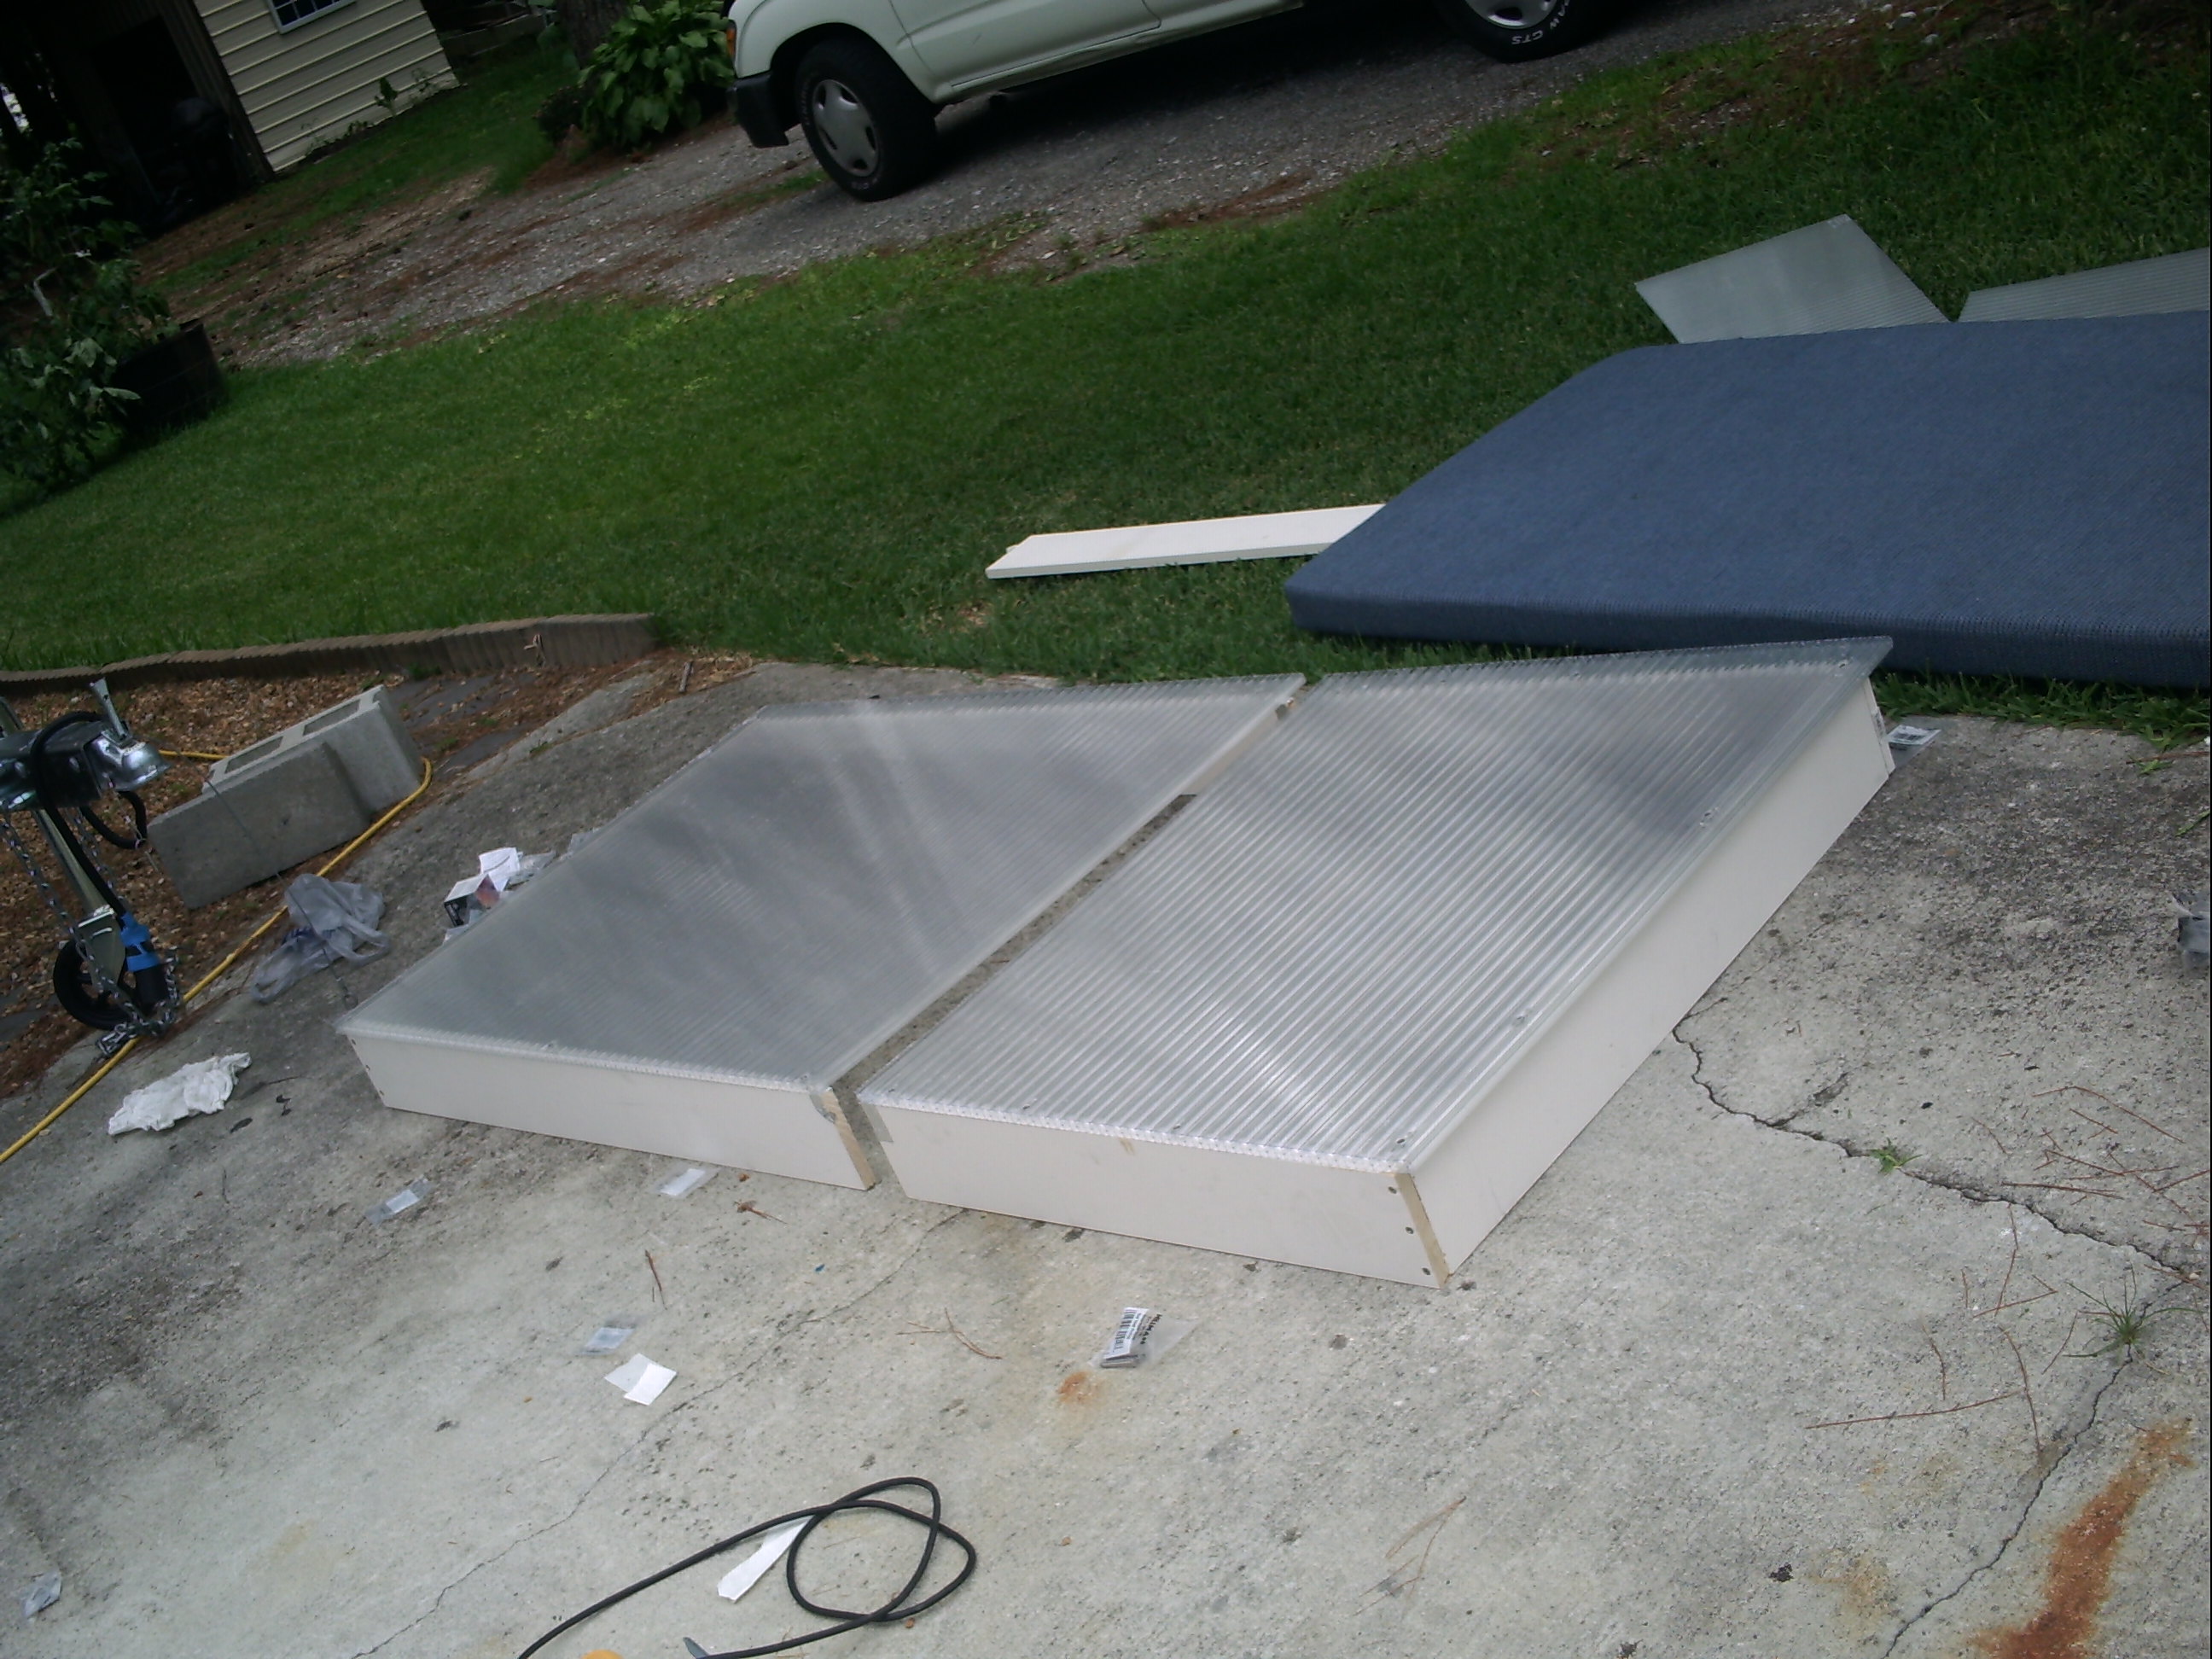
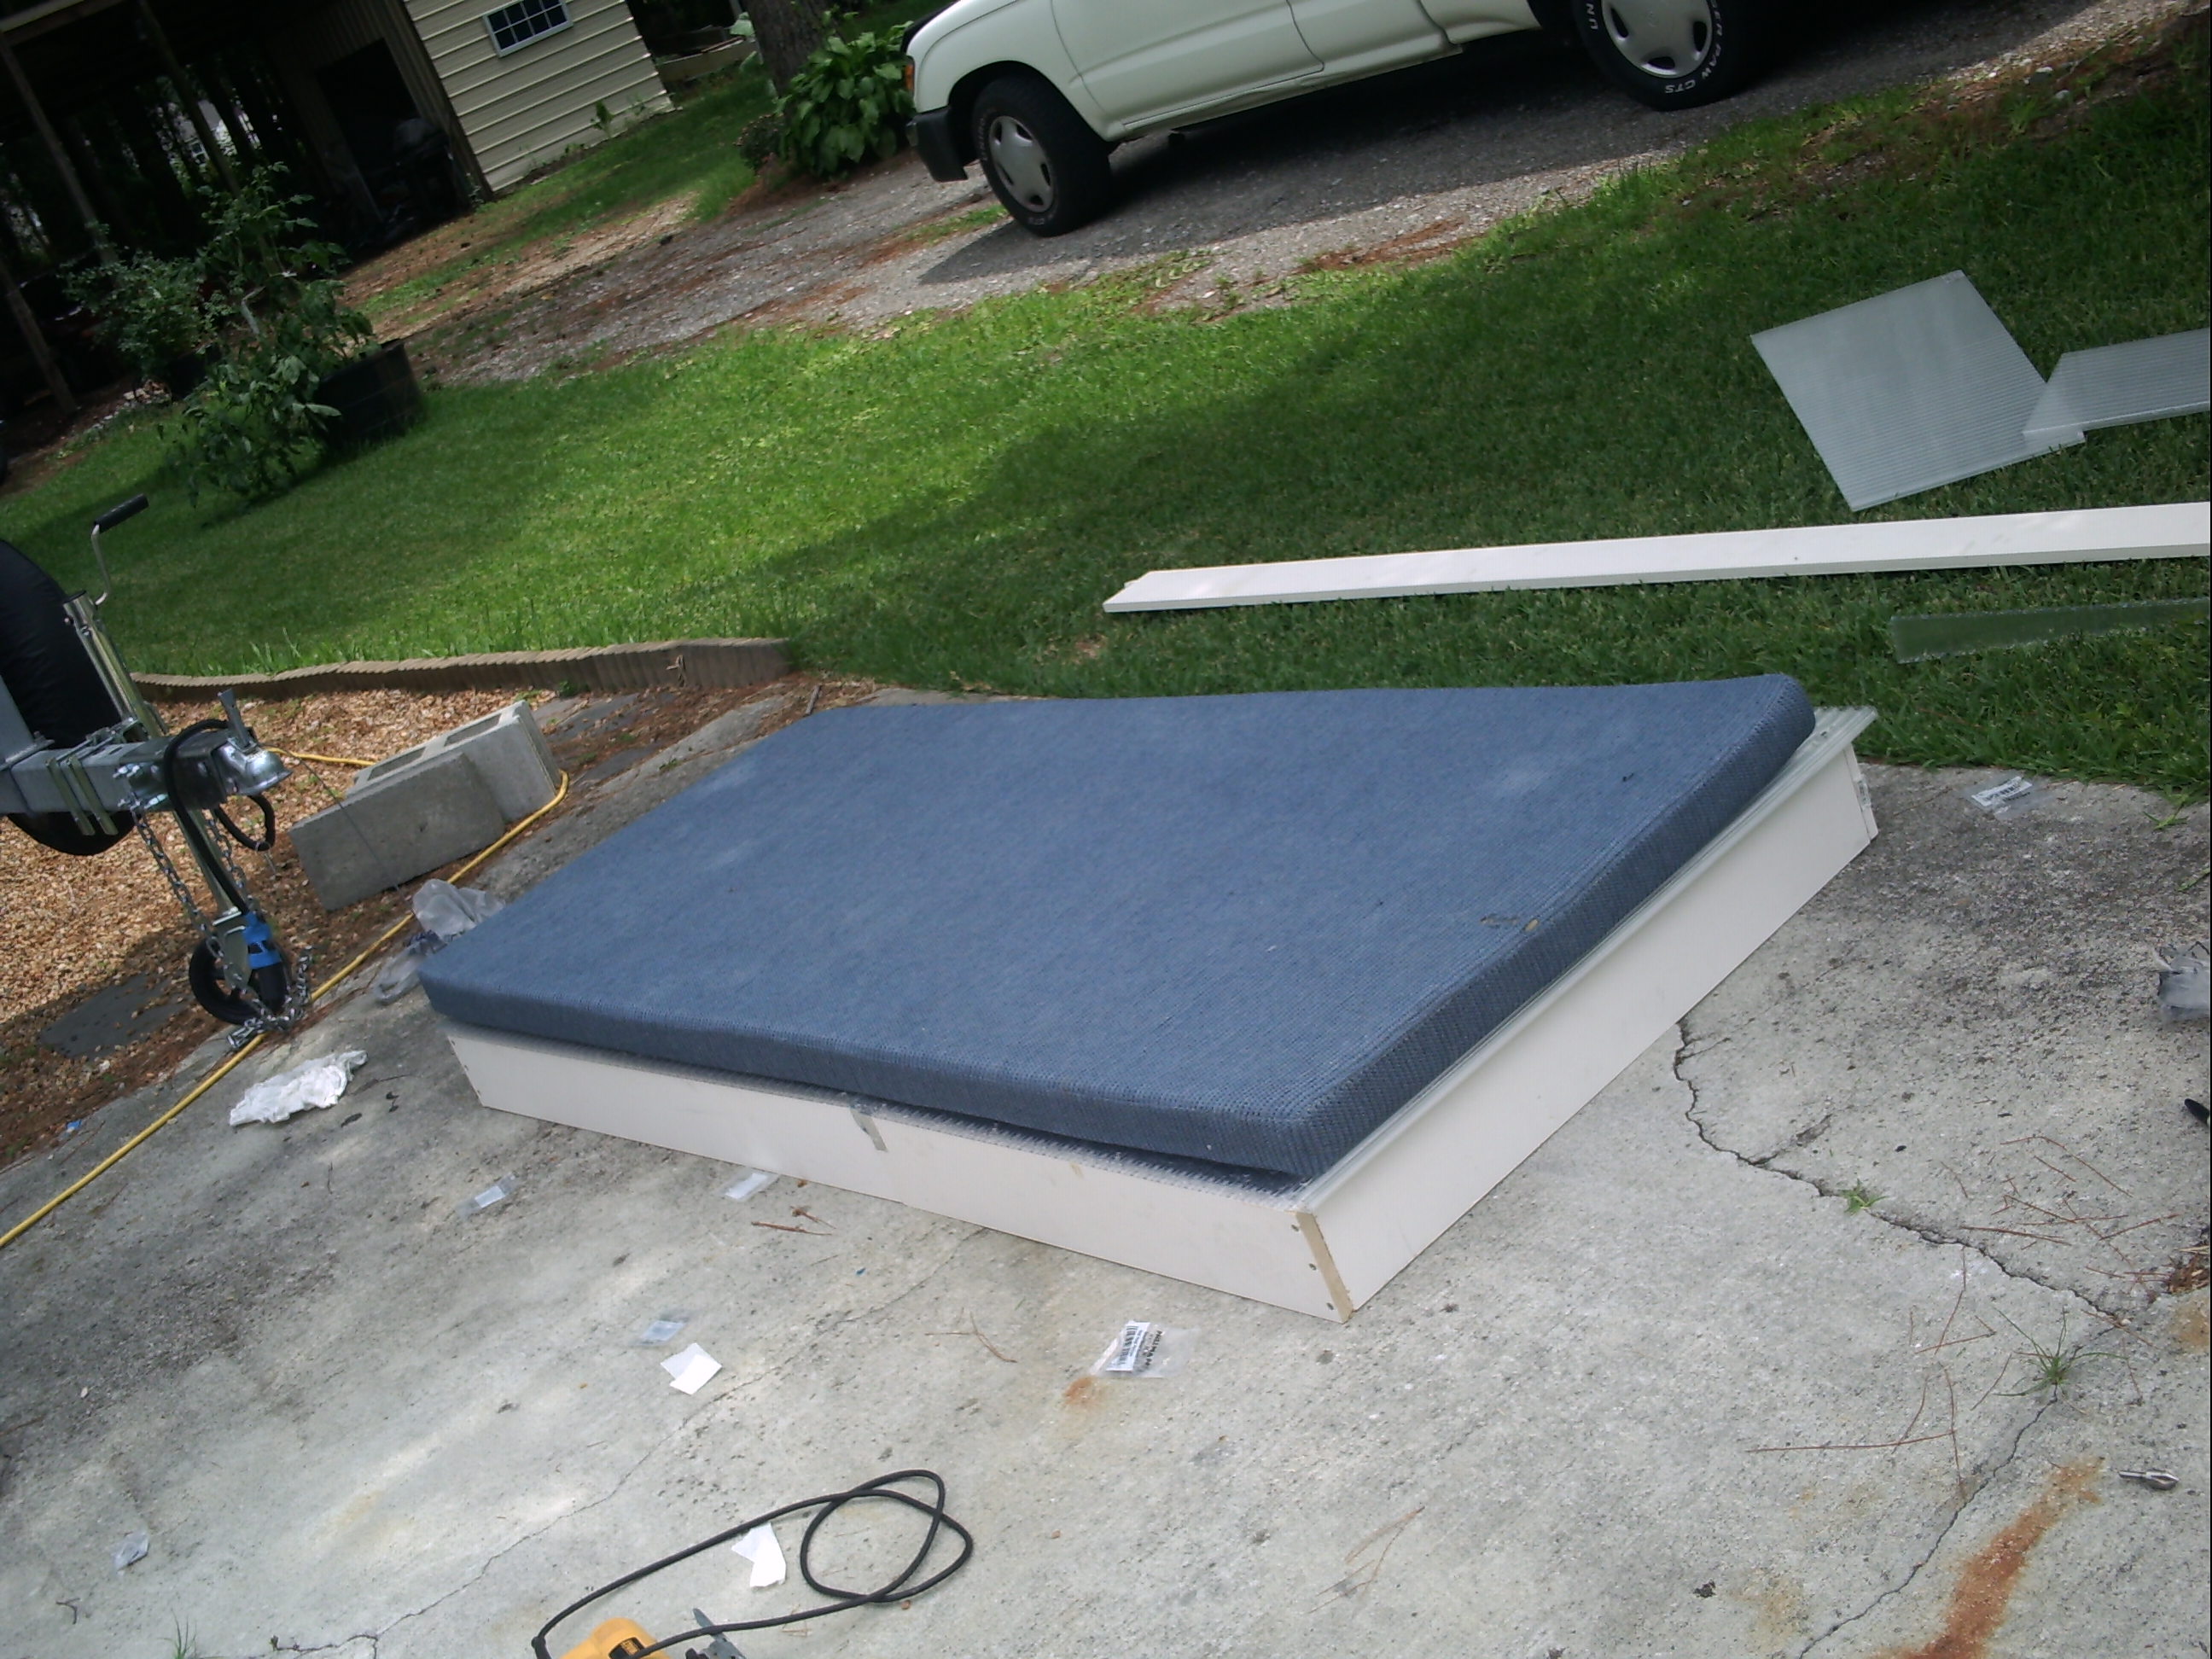
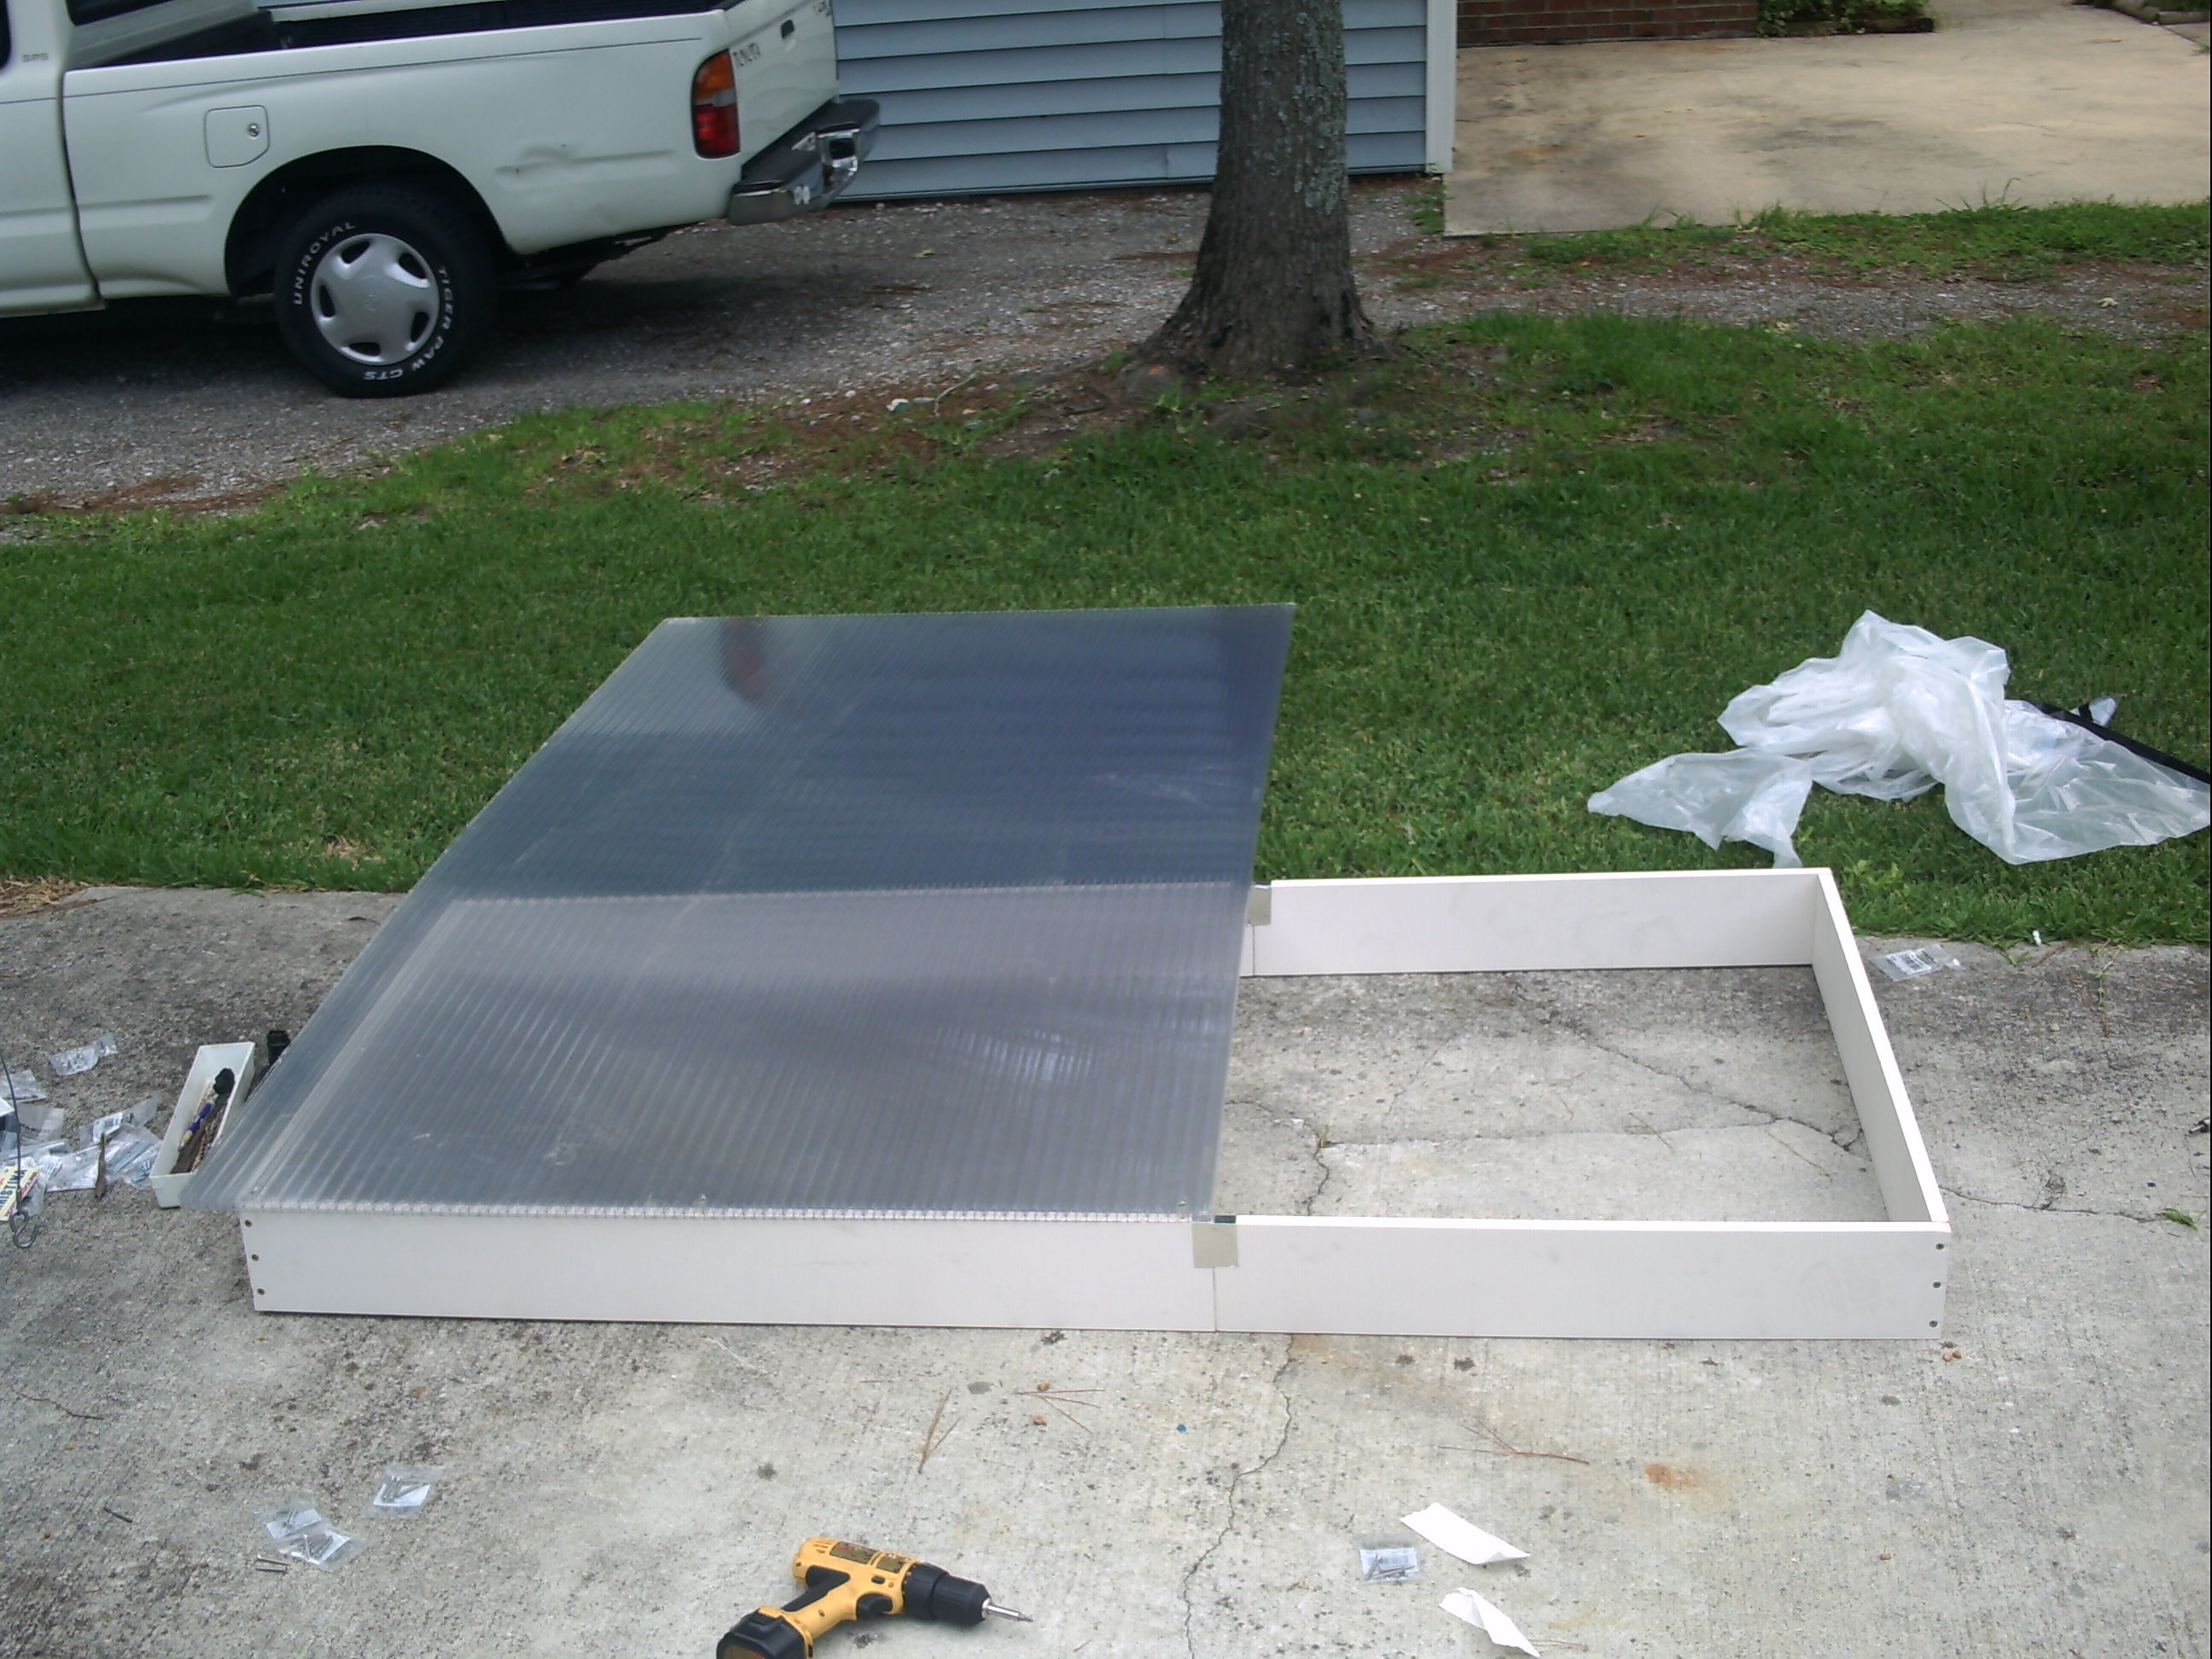
built a 6.5 inch Hinged raised bunk for the cushion to sit on and with storage
for the dodger underneath. (construction pics coming soon) I used Poli-cor
4x8 sheet ($80 ouch, but light weight) and some primed and treated armor wood
for the frame. Then I carpeted the bunk to go with the rest of the carpet
in the boat. There is now room to sleep and get rid of the clutter.
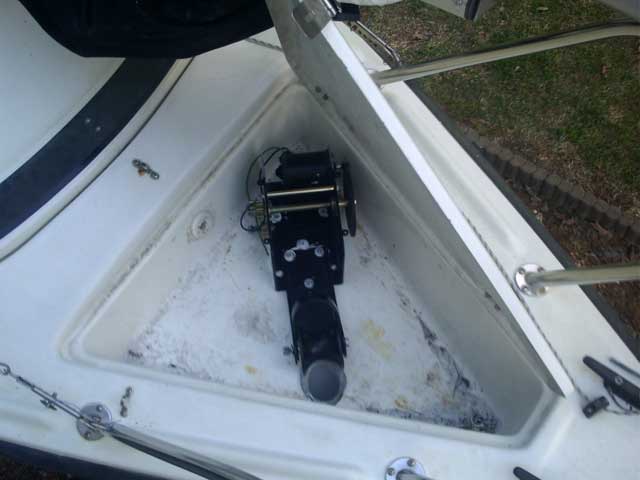
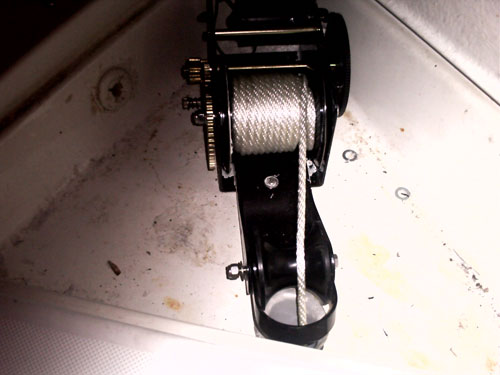
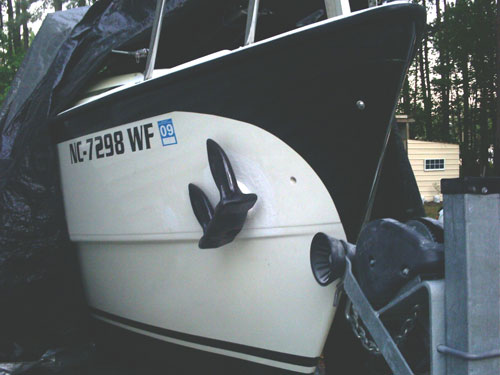
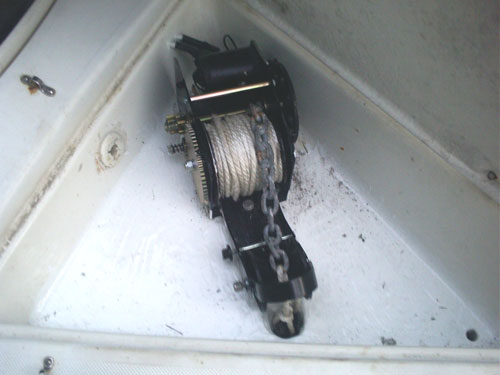
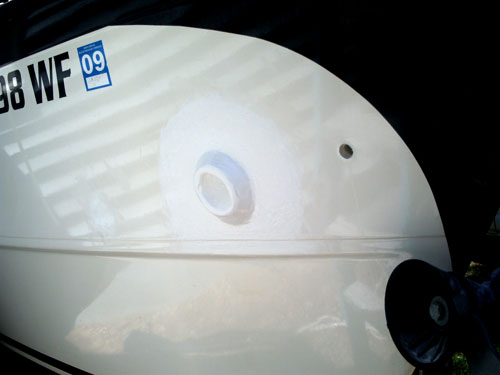
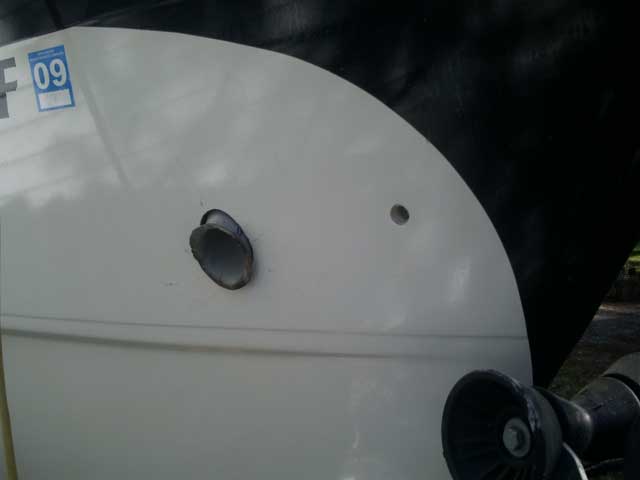
Battleship Anchor
~ I have been using Navy type anchors on my boats
for years. However watching the wife pull a 20 pound anchor out of the storage
area and throwing it overboard (whether it is tied to a cleat or not... a whole
other story ) has gotten to be a problem. I don't want to put a
traditional bow roller mounting because the wife and kids ride up there while
powering. So I got the idea from looking at a slightly bigger boat
(Battleship) and how it holds it's anchor. I plan on mounting a Deckmate
25 windlass INSIDE the anchor storage area and running a pipe to the starboard
side where the anchor will be. Here is a photoshopped image of what it should
look like. The Deckmate 25 will fit INSIDE the anchor storage area with
the plastic cover/light housing removed. The pipe will be 2" pvc that I will
wrap fiberglass matting around.


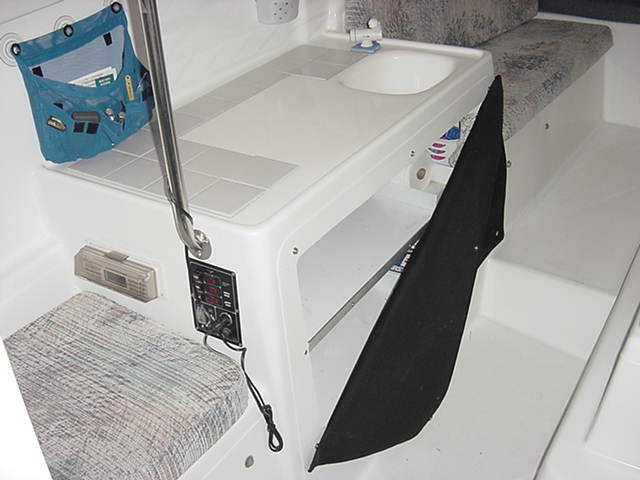
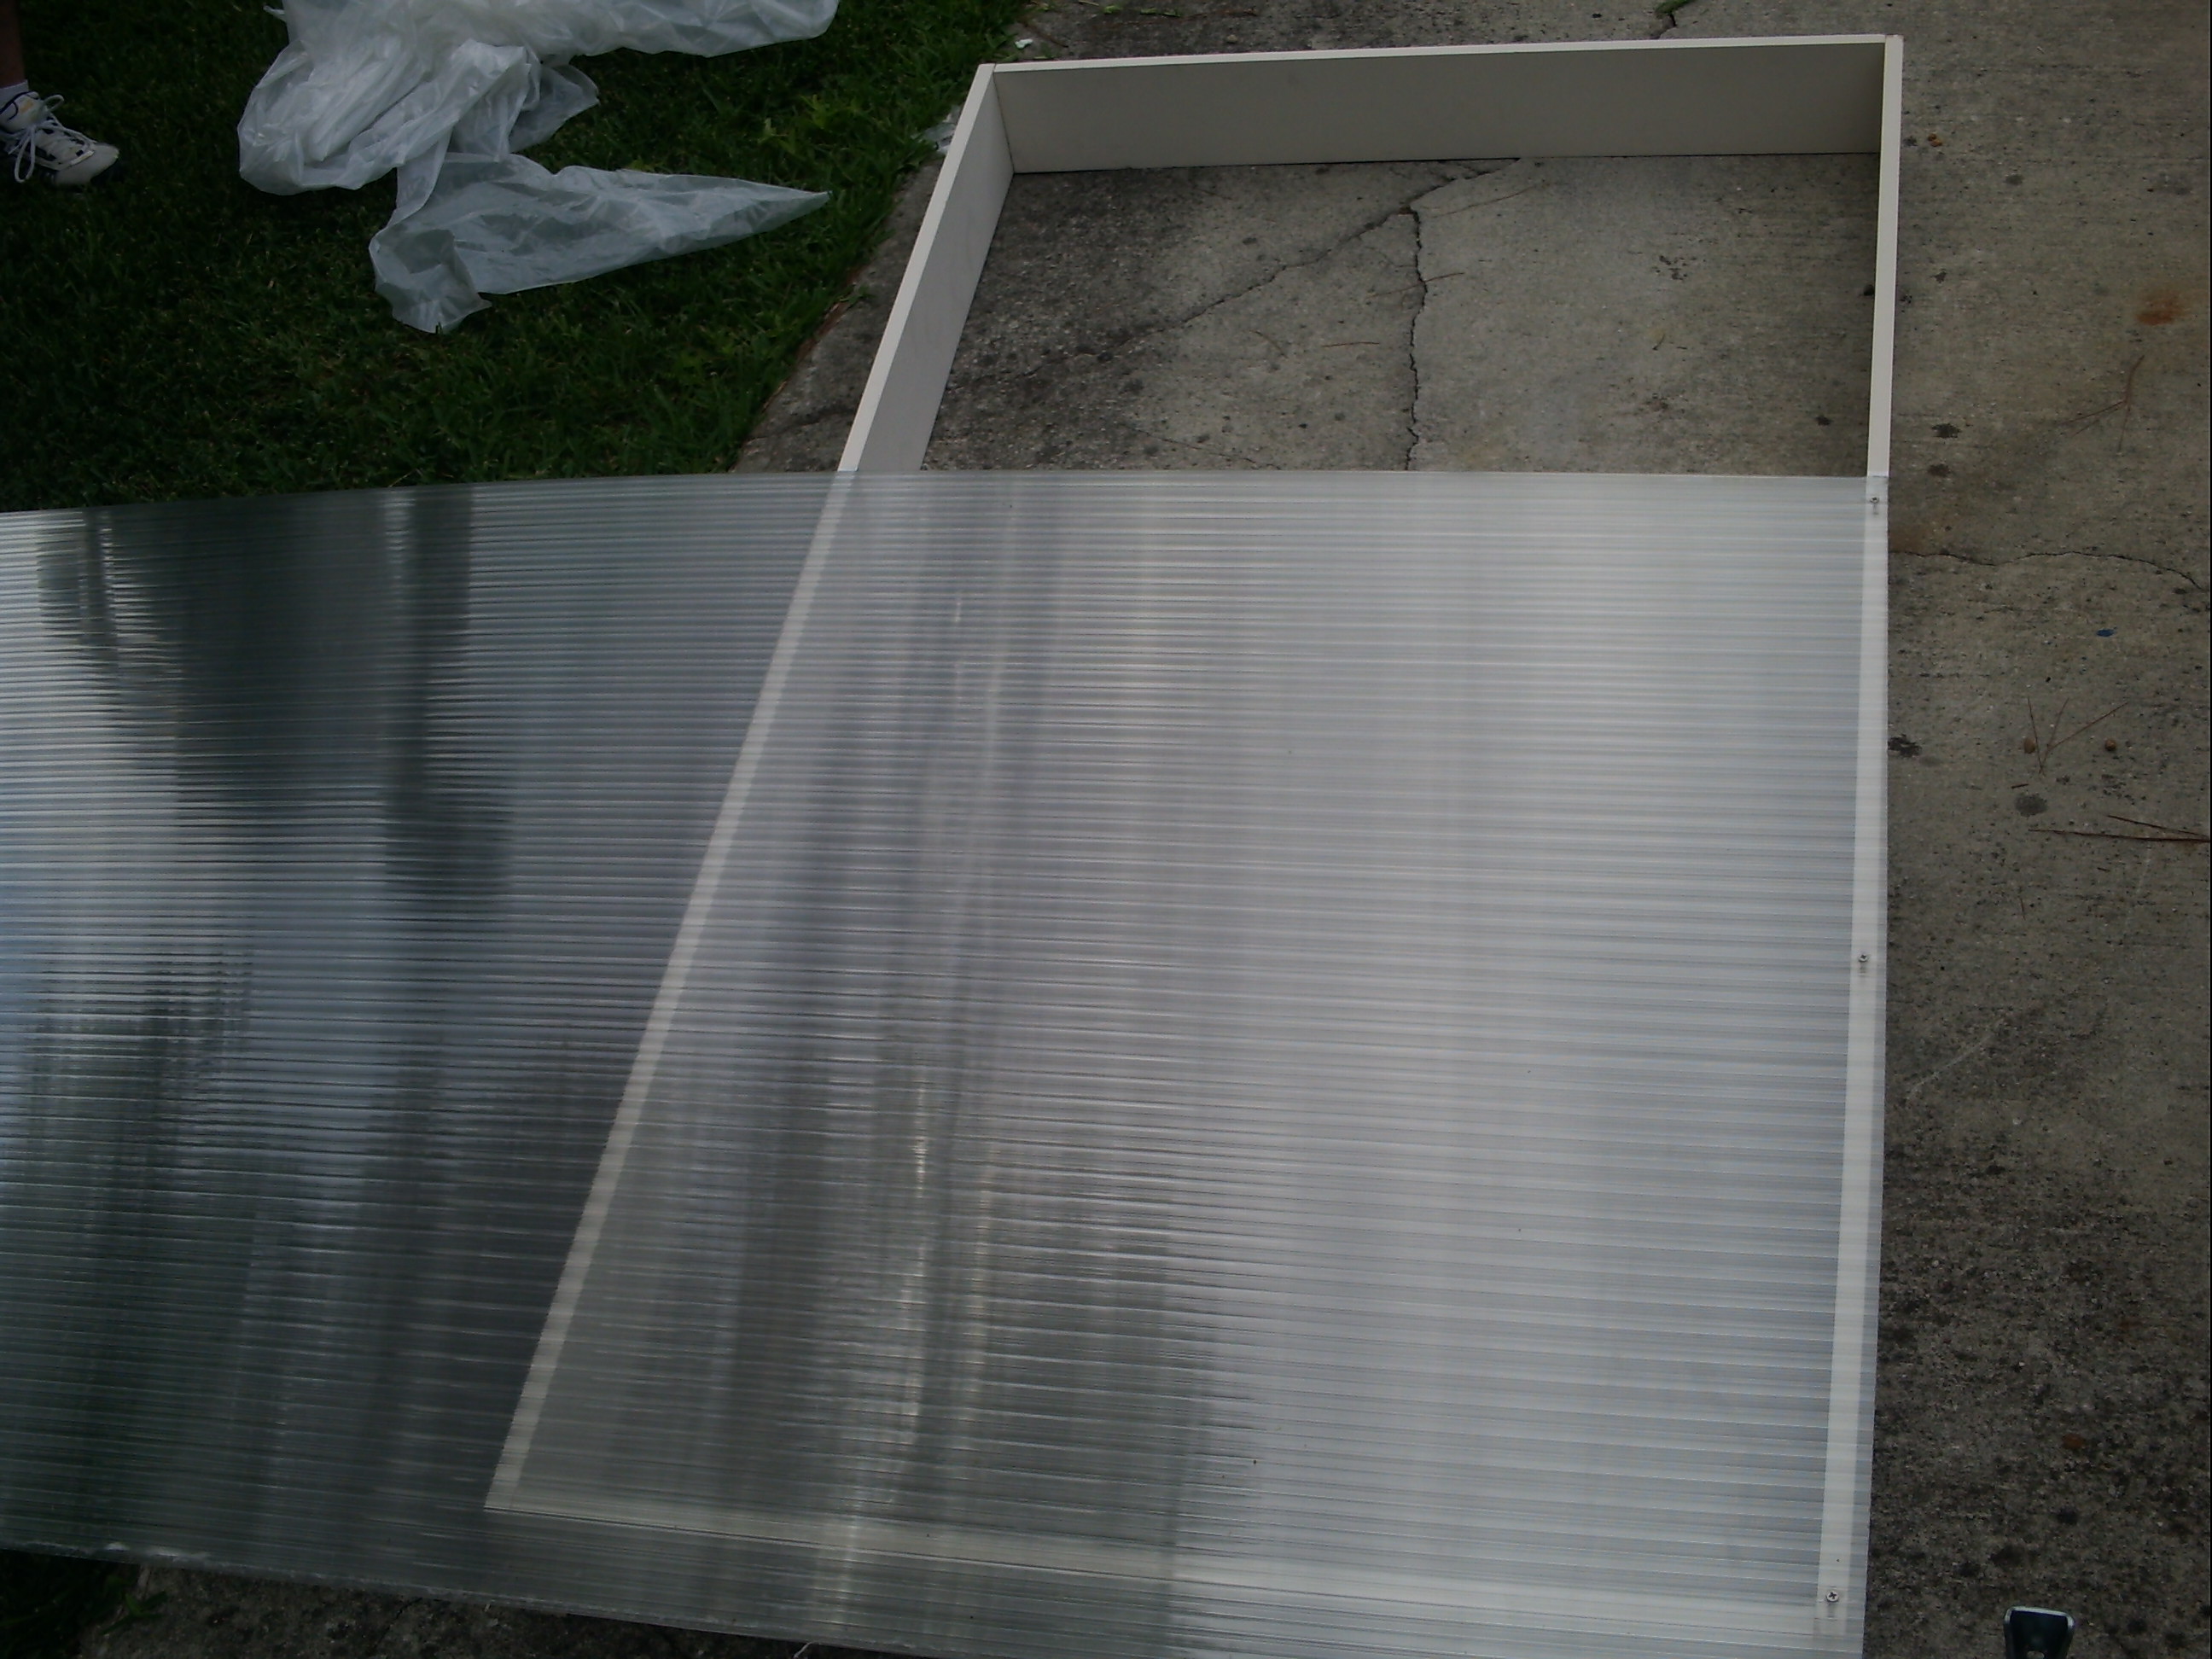
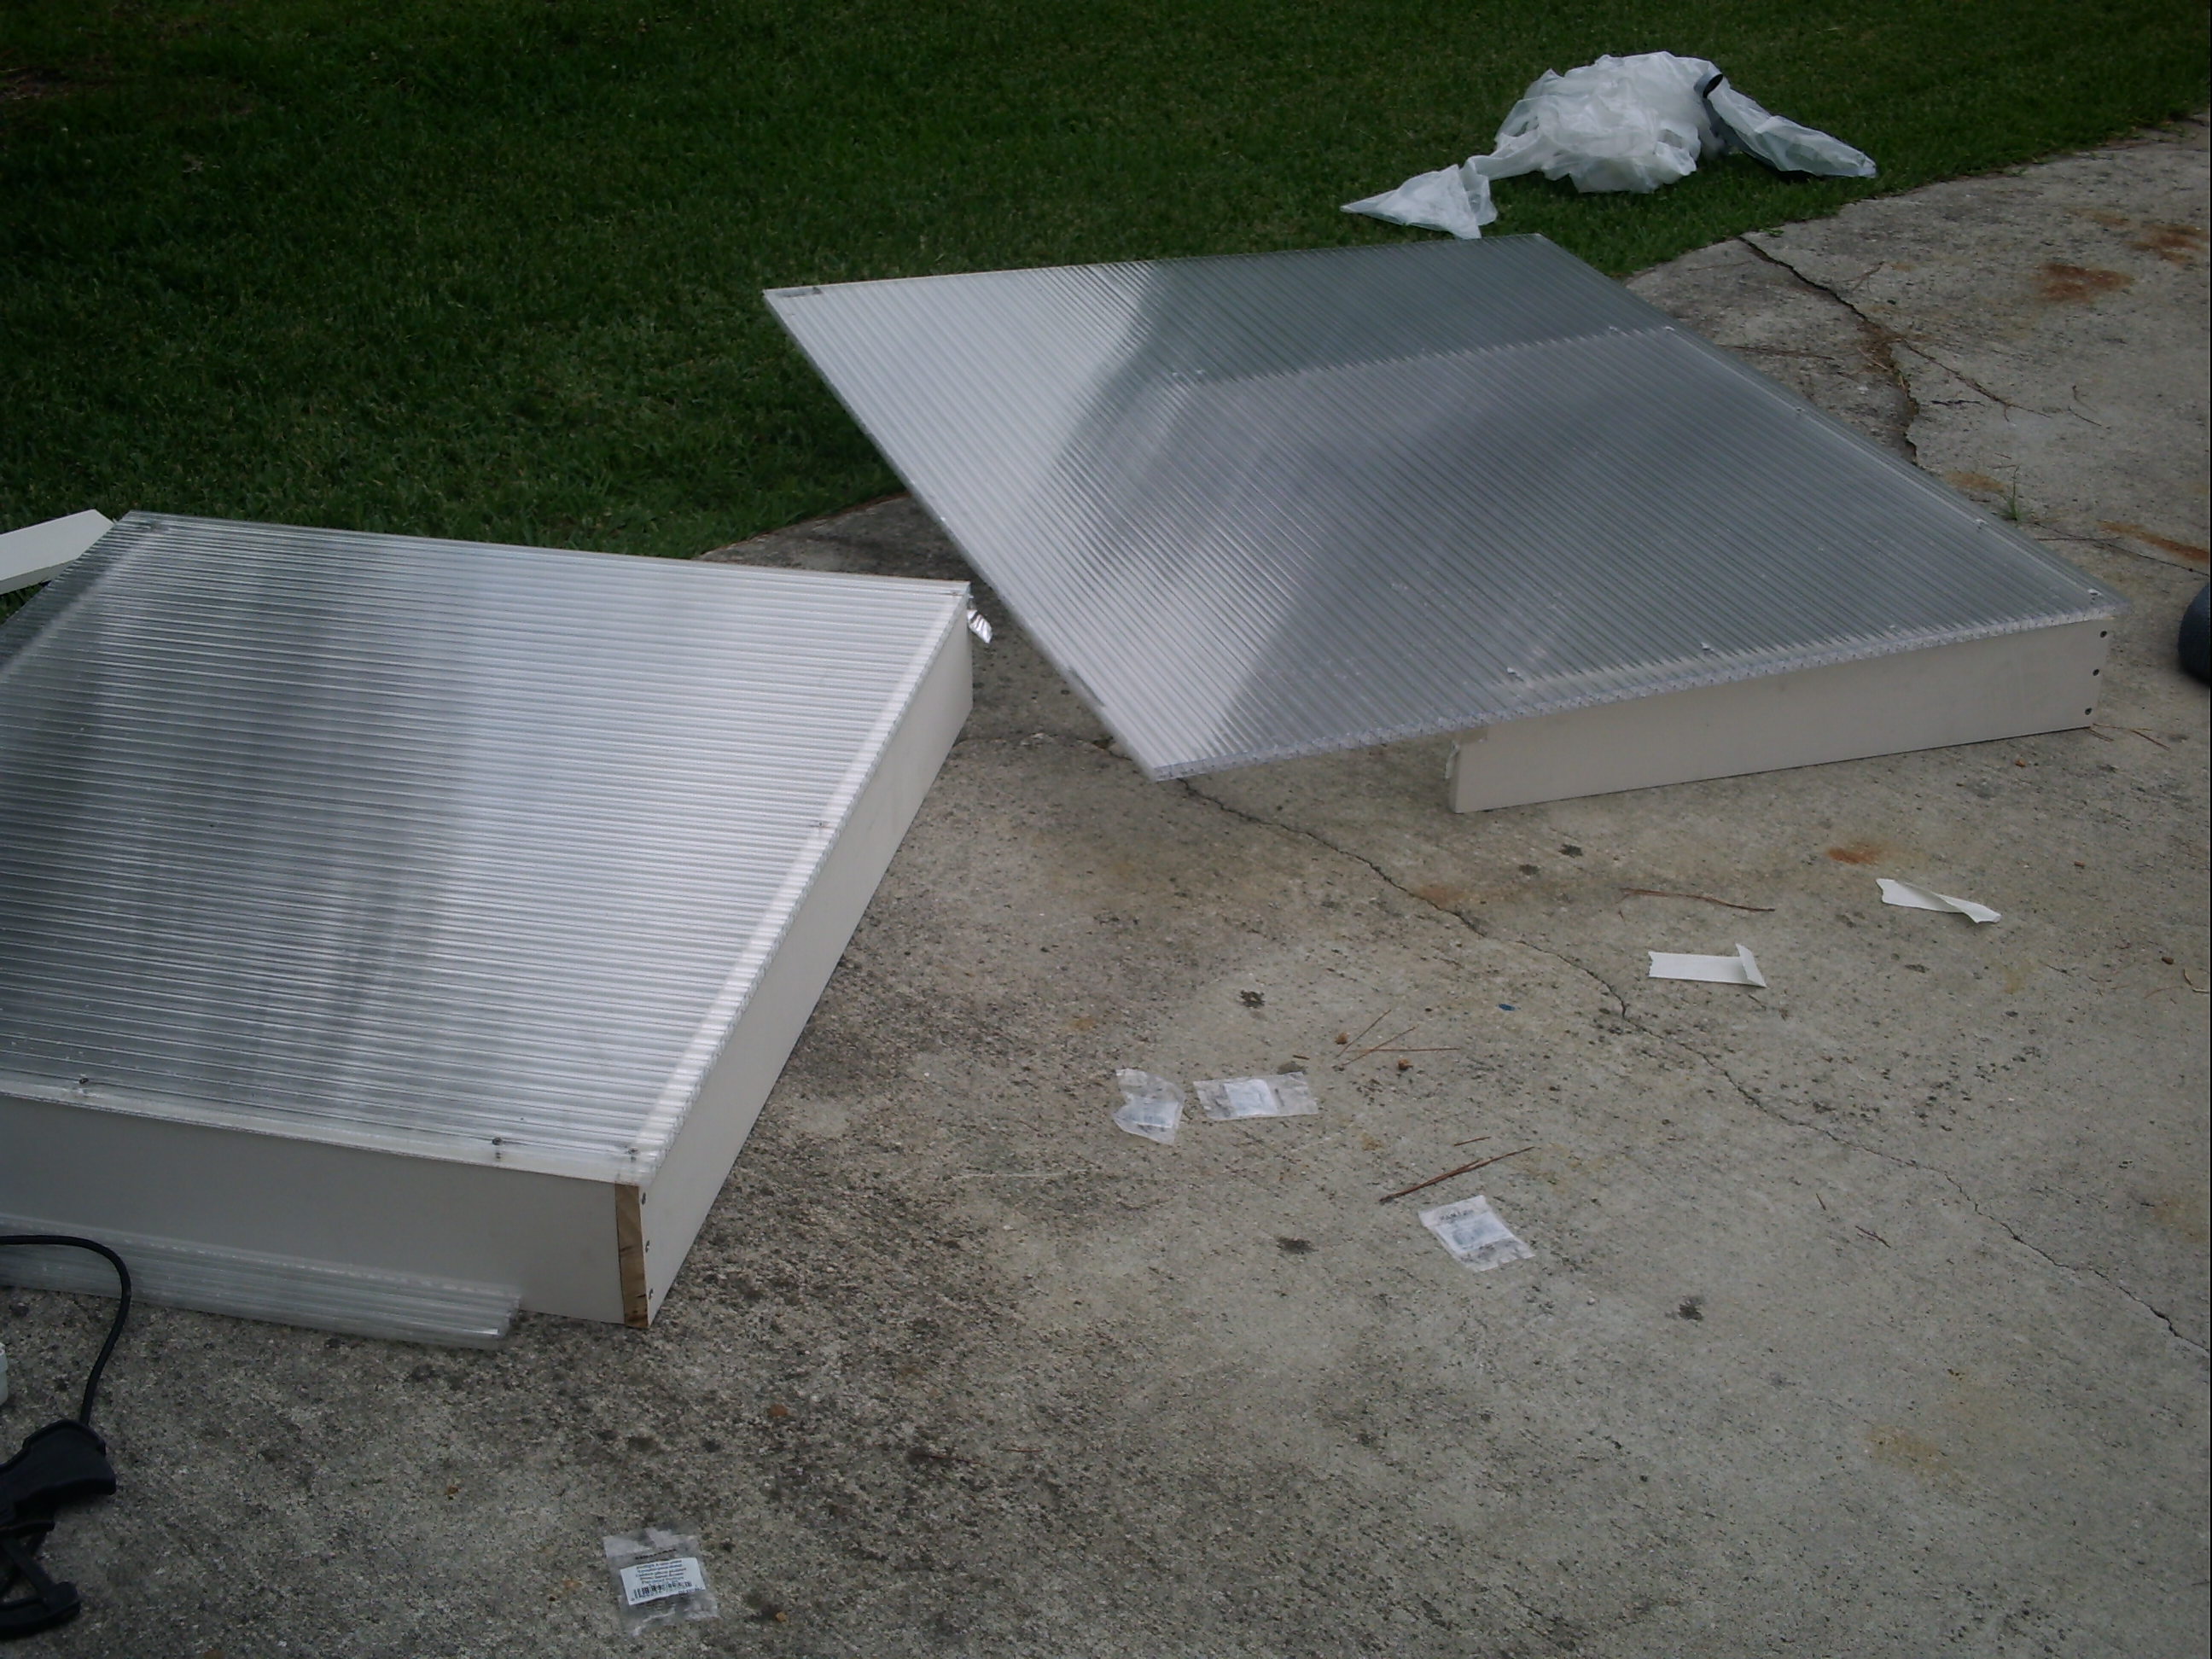
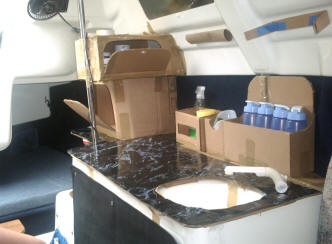
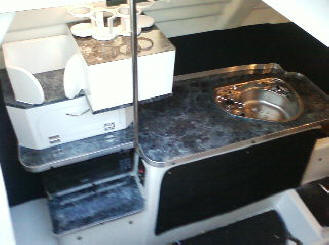
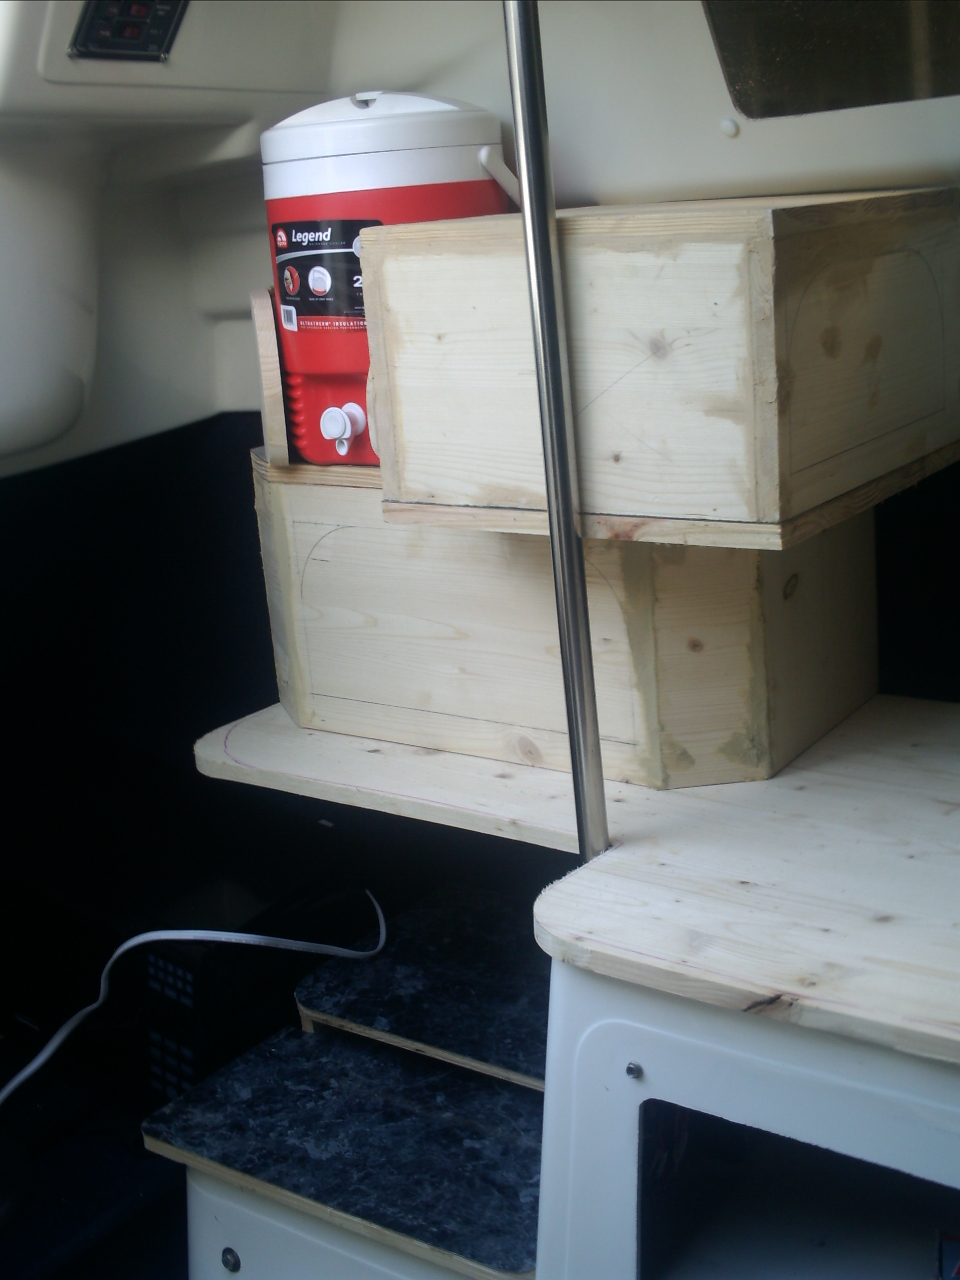
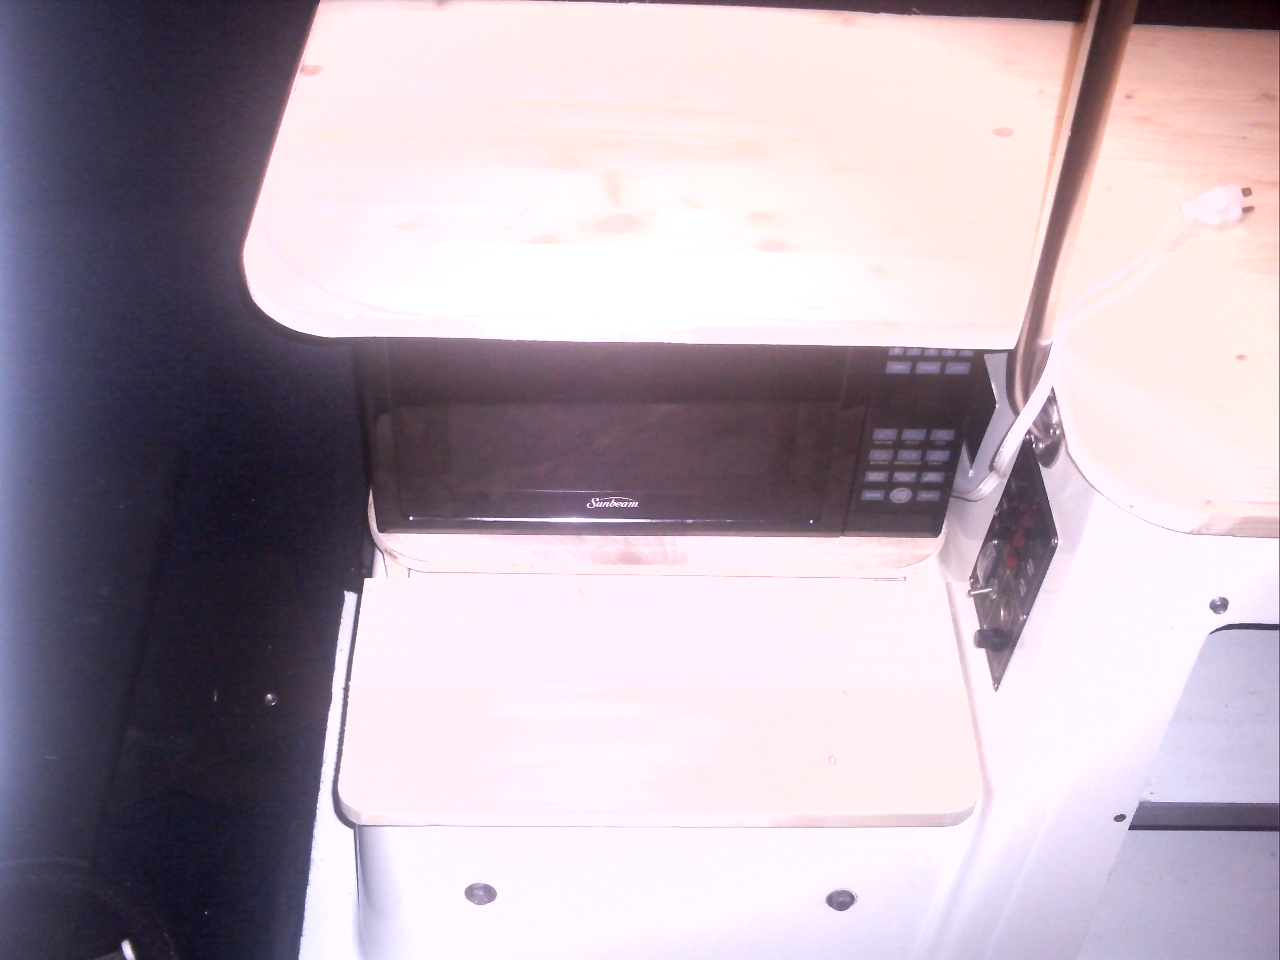
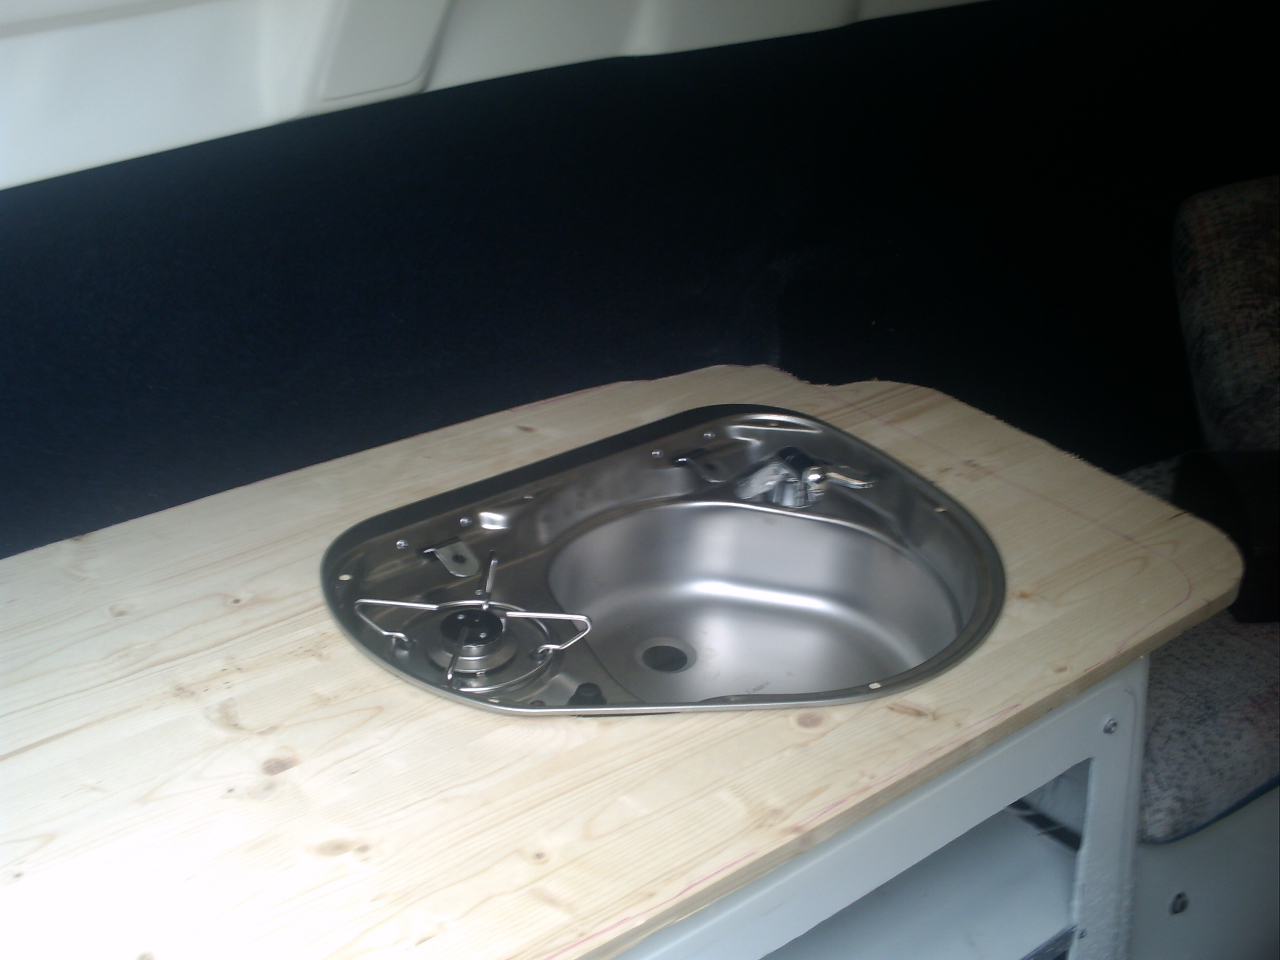
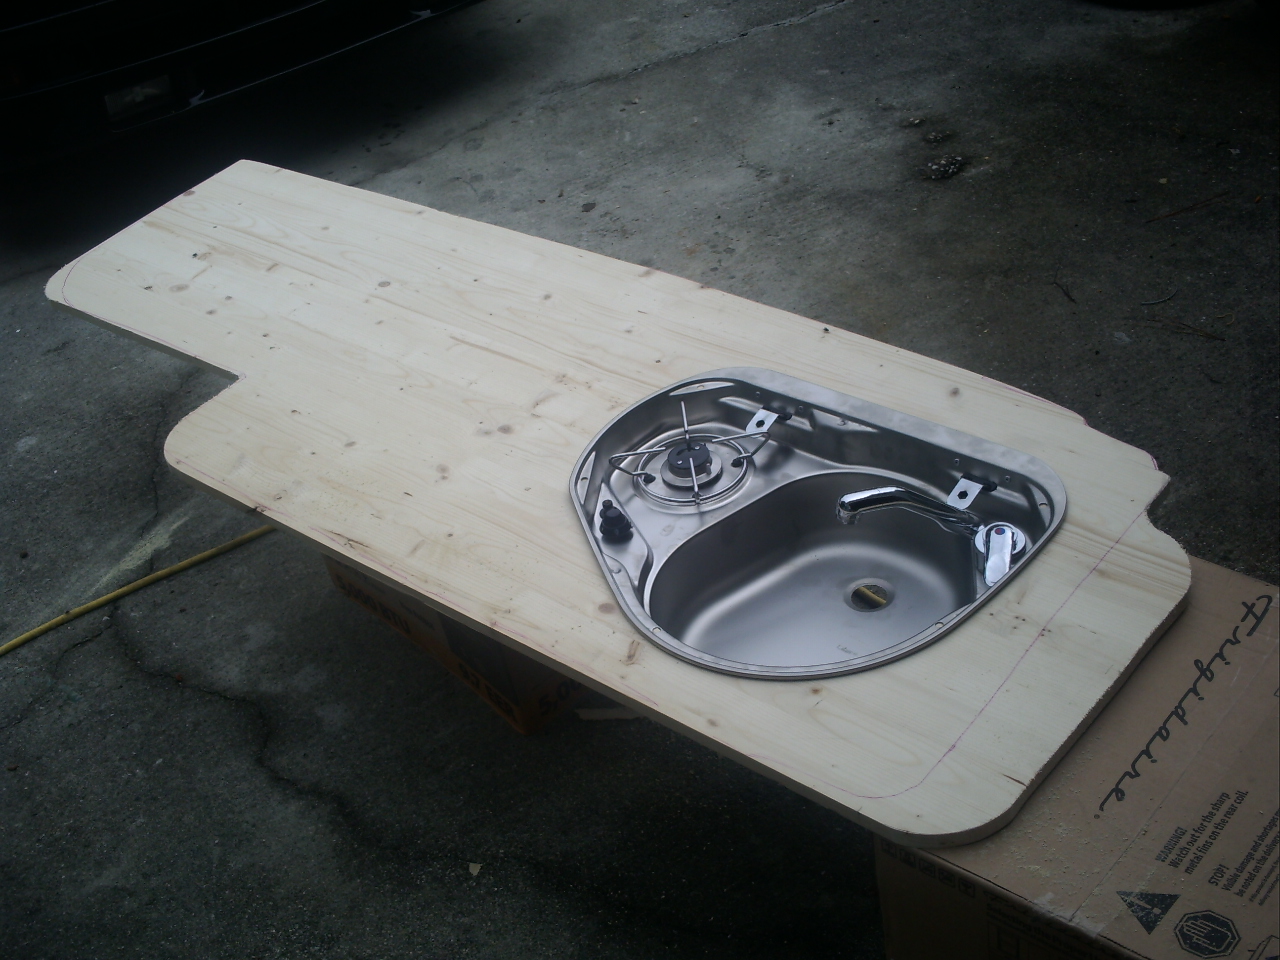
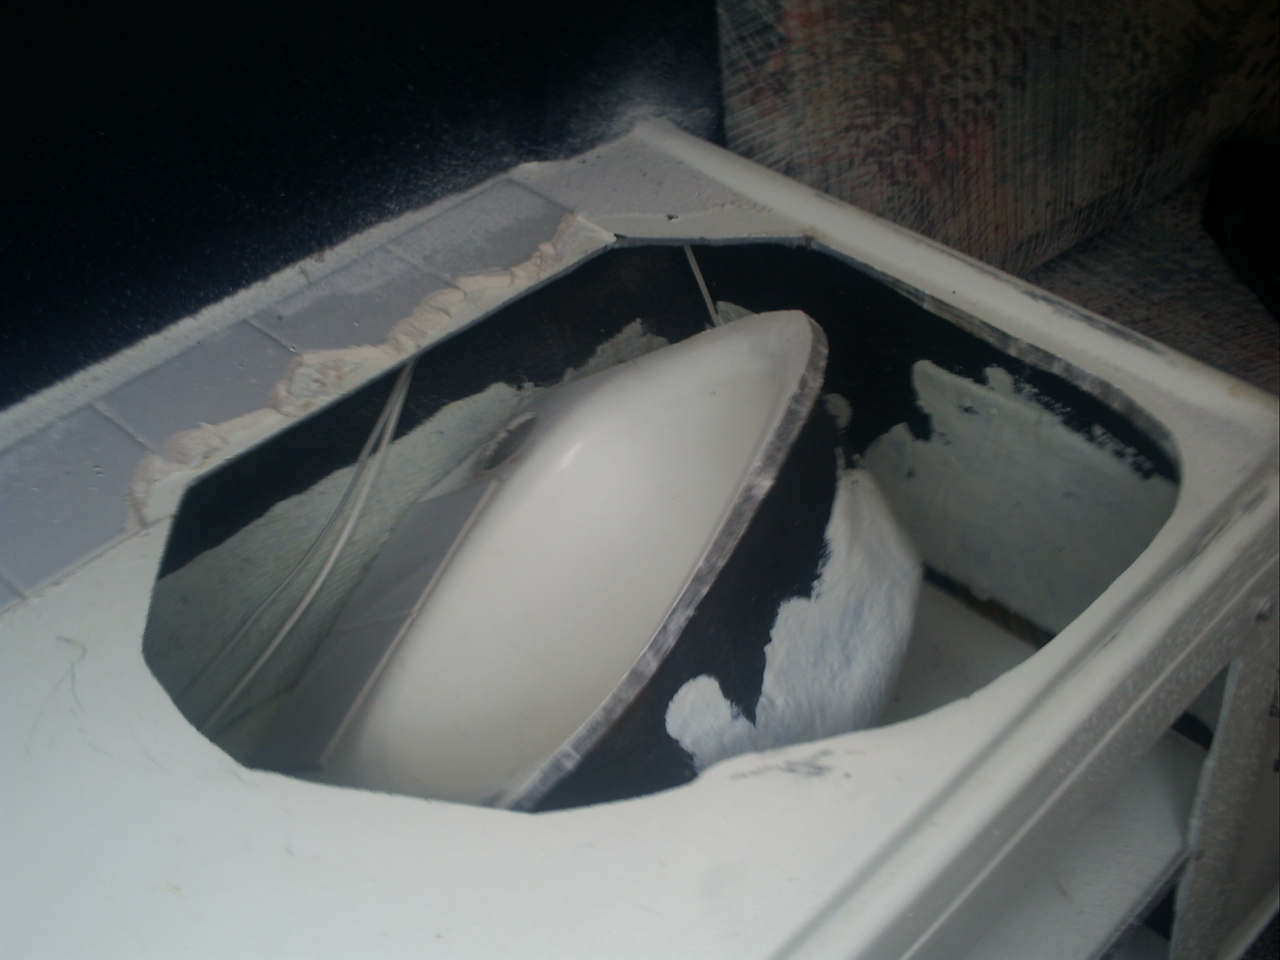
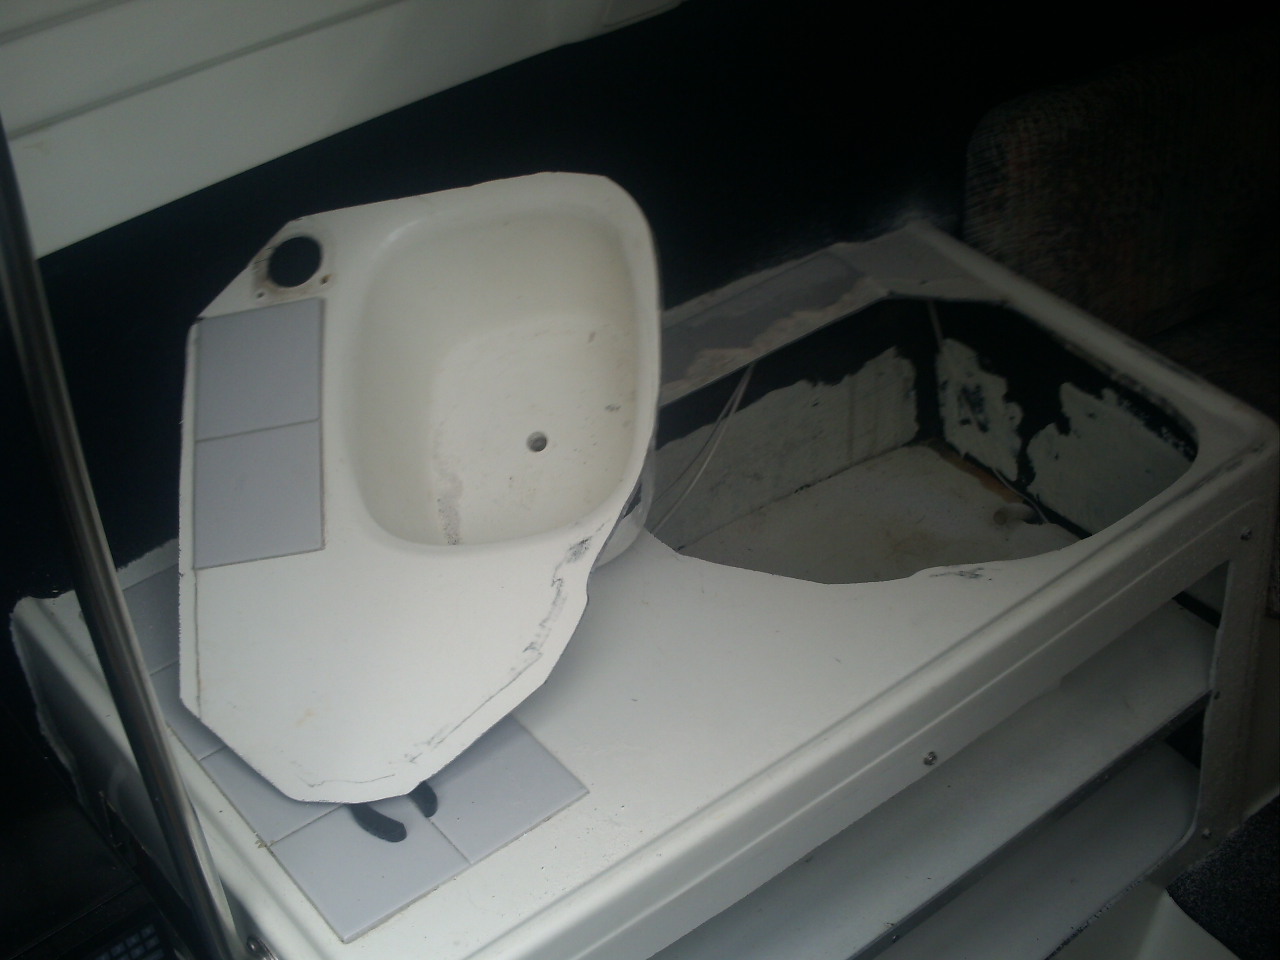
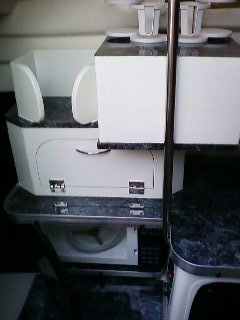
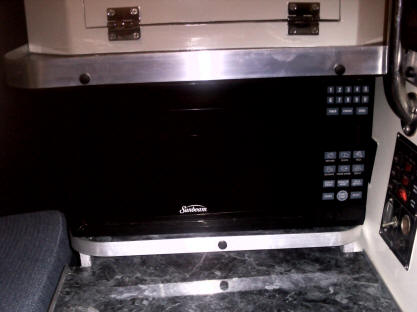
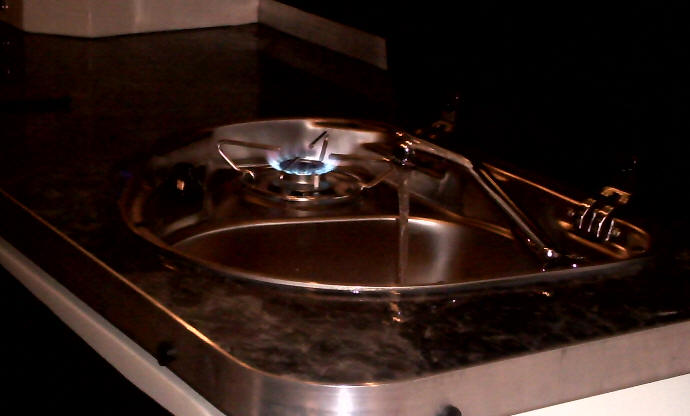
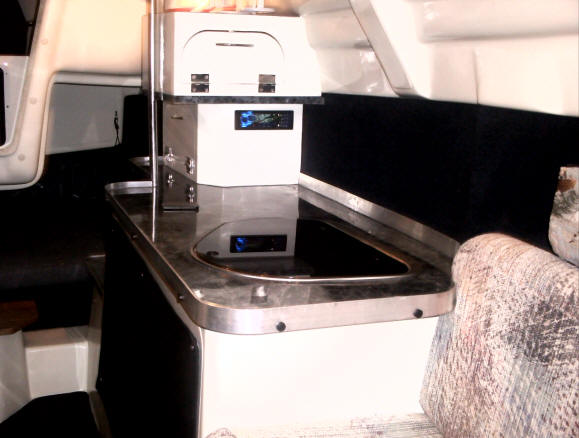
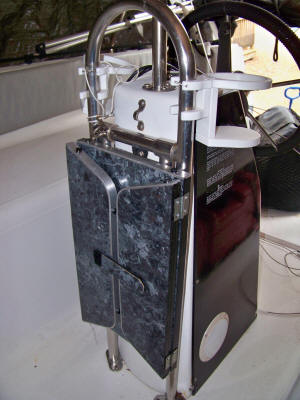
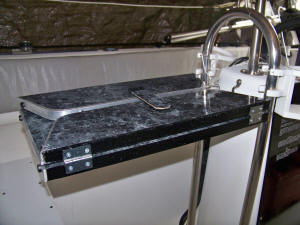
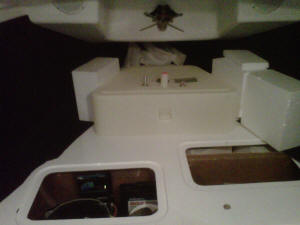
Galley Redesign
~ My wife scoured the MacGregorsSailors.com website
for all ideas on Galley changes and then asked me to design something.
It started out as a cardboard mock up and then I
flushed it out for real. The microwave is from wal-mart and the sink/burner
combo unit (SMEV series 8812 right hand sink) is from www.cms-customs.com
in England.
Before
After


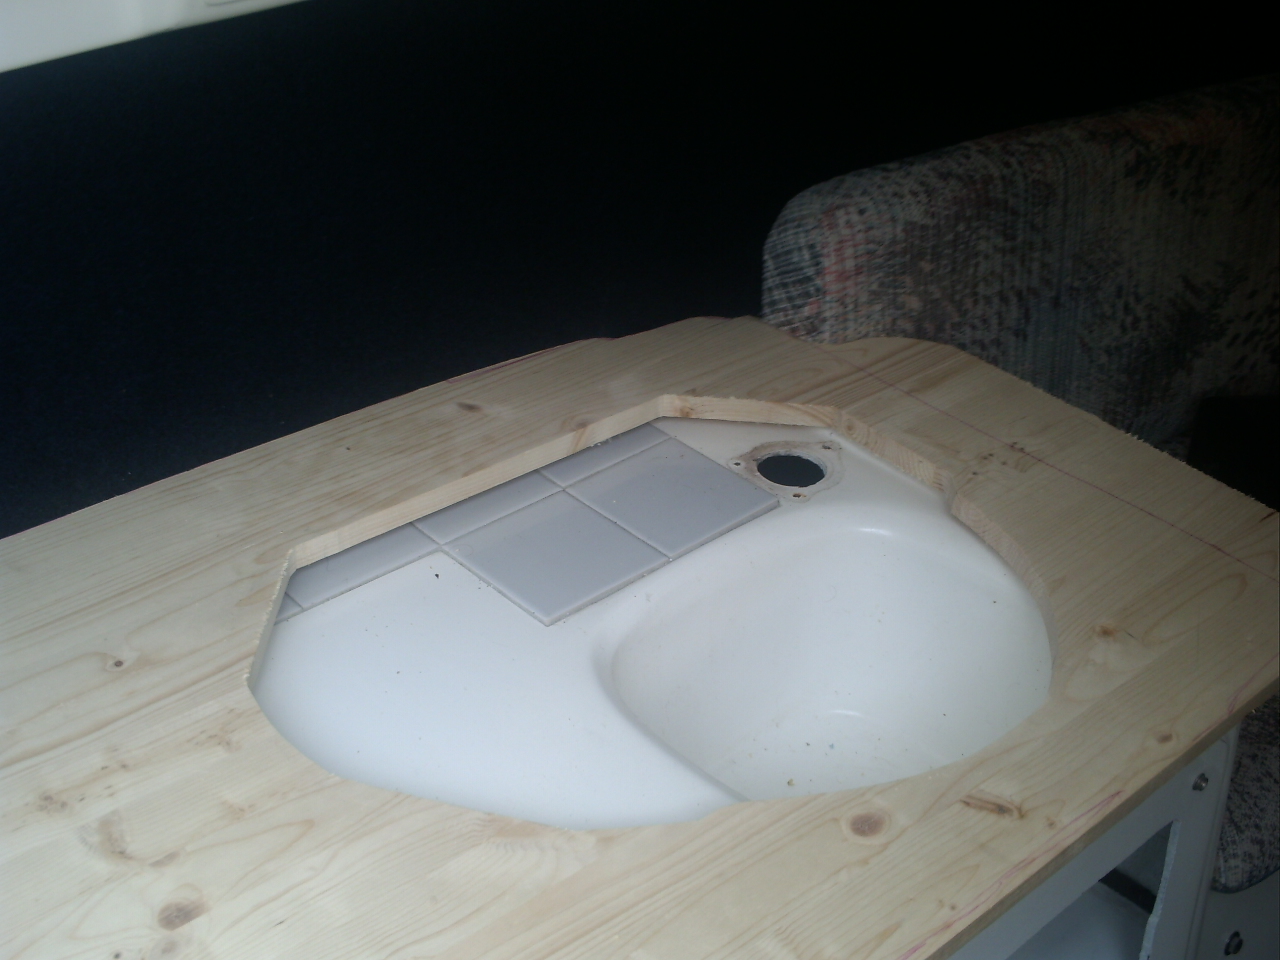
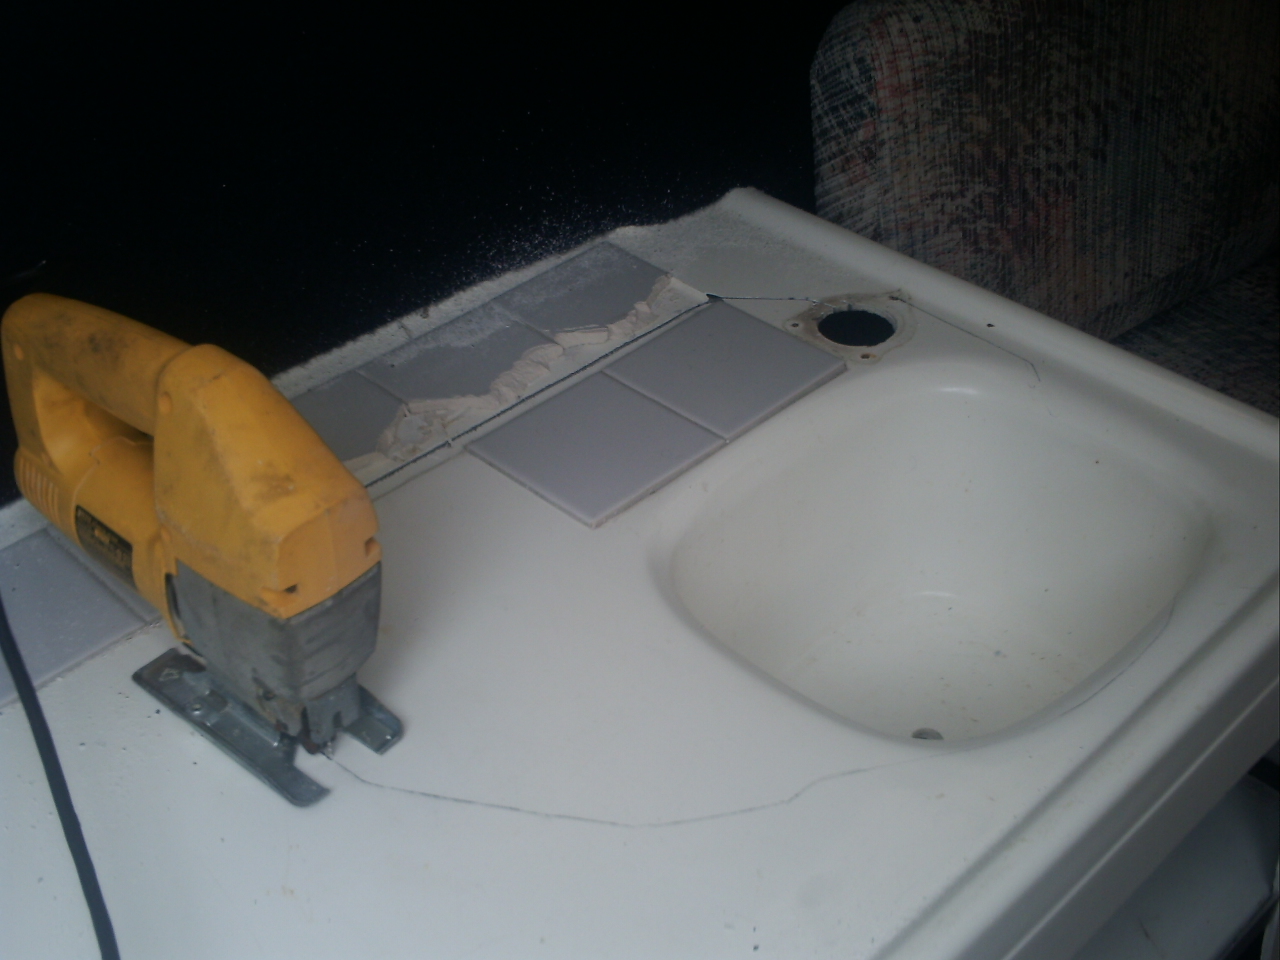
^ ^ ^ Construction Phase ^ ^ ^
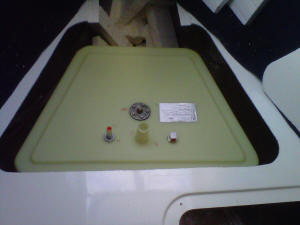
Finished Galley Below
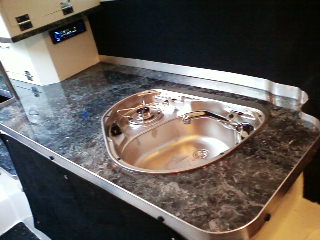
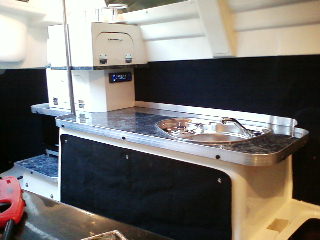
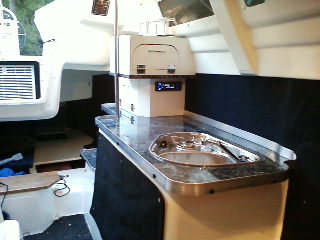
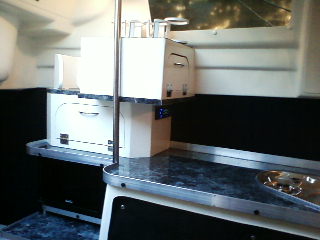
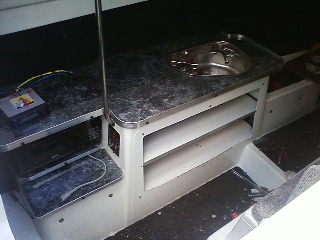

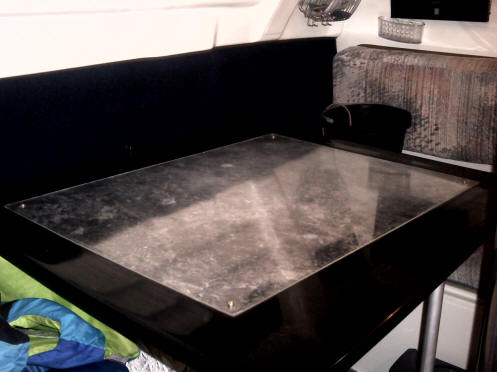
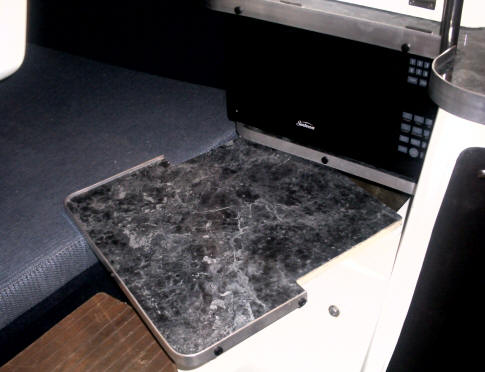
Cut the same marble laminate to put into the table
insert.
The bottom shelf pulls out to get to the battery.
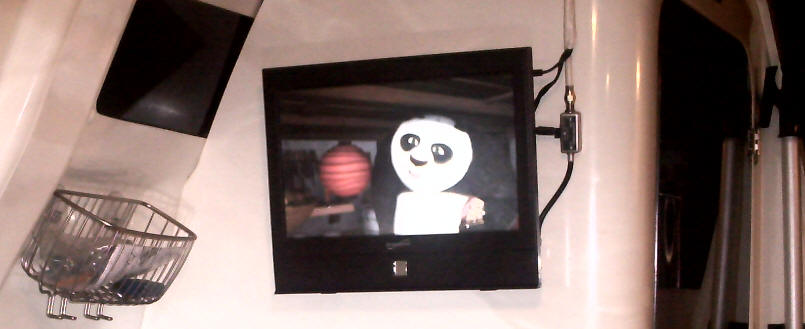
V-Berth Padding & Extension
~ So the Admiral has never slept well with the
padding in the v-berth. So we cut a 4 inch thick combo memory and normal
foam pad to fit the v-berth and she made fitted sheets for the bed. She
now sleeps much better.
(had to add an HDTV / DVD for viewing from the new
v-berth)
Solar Mast Anchor Light
~Got
this idea from a fellow 26X'er. They sell them at Lowes for a about $5.
I just stuck it in the foam I had at the top of the mast and epoxyed the post
in. Comes on at night, charges during the day.
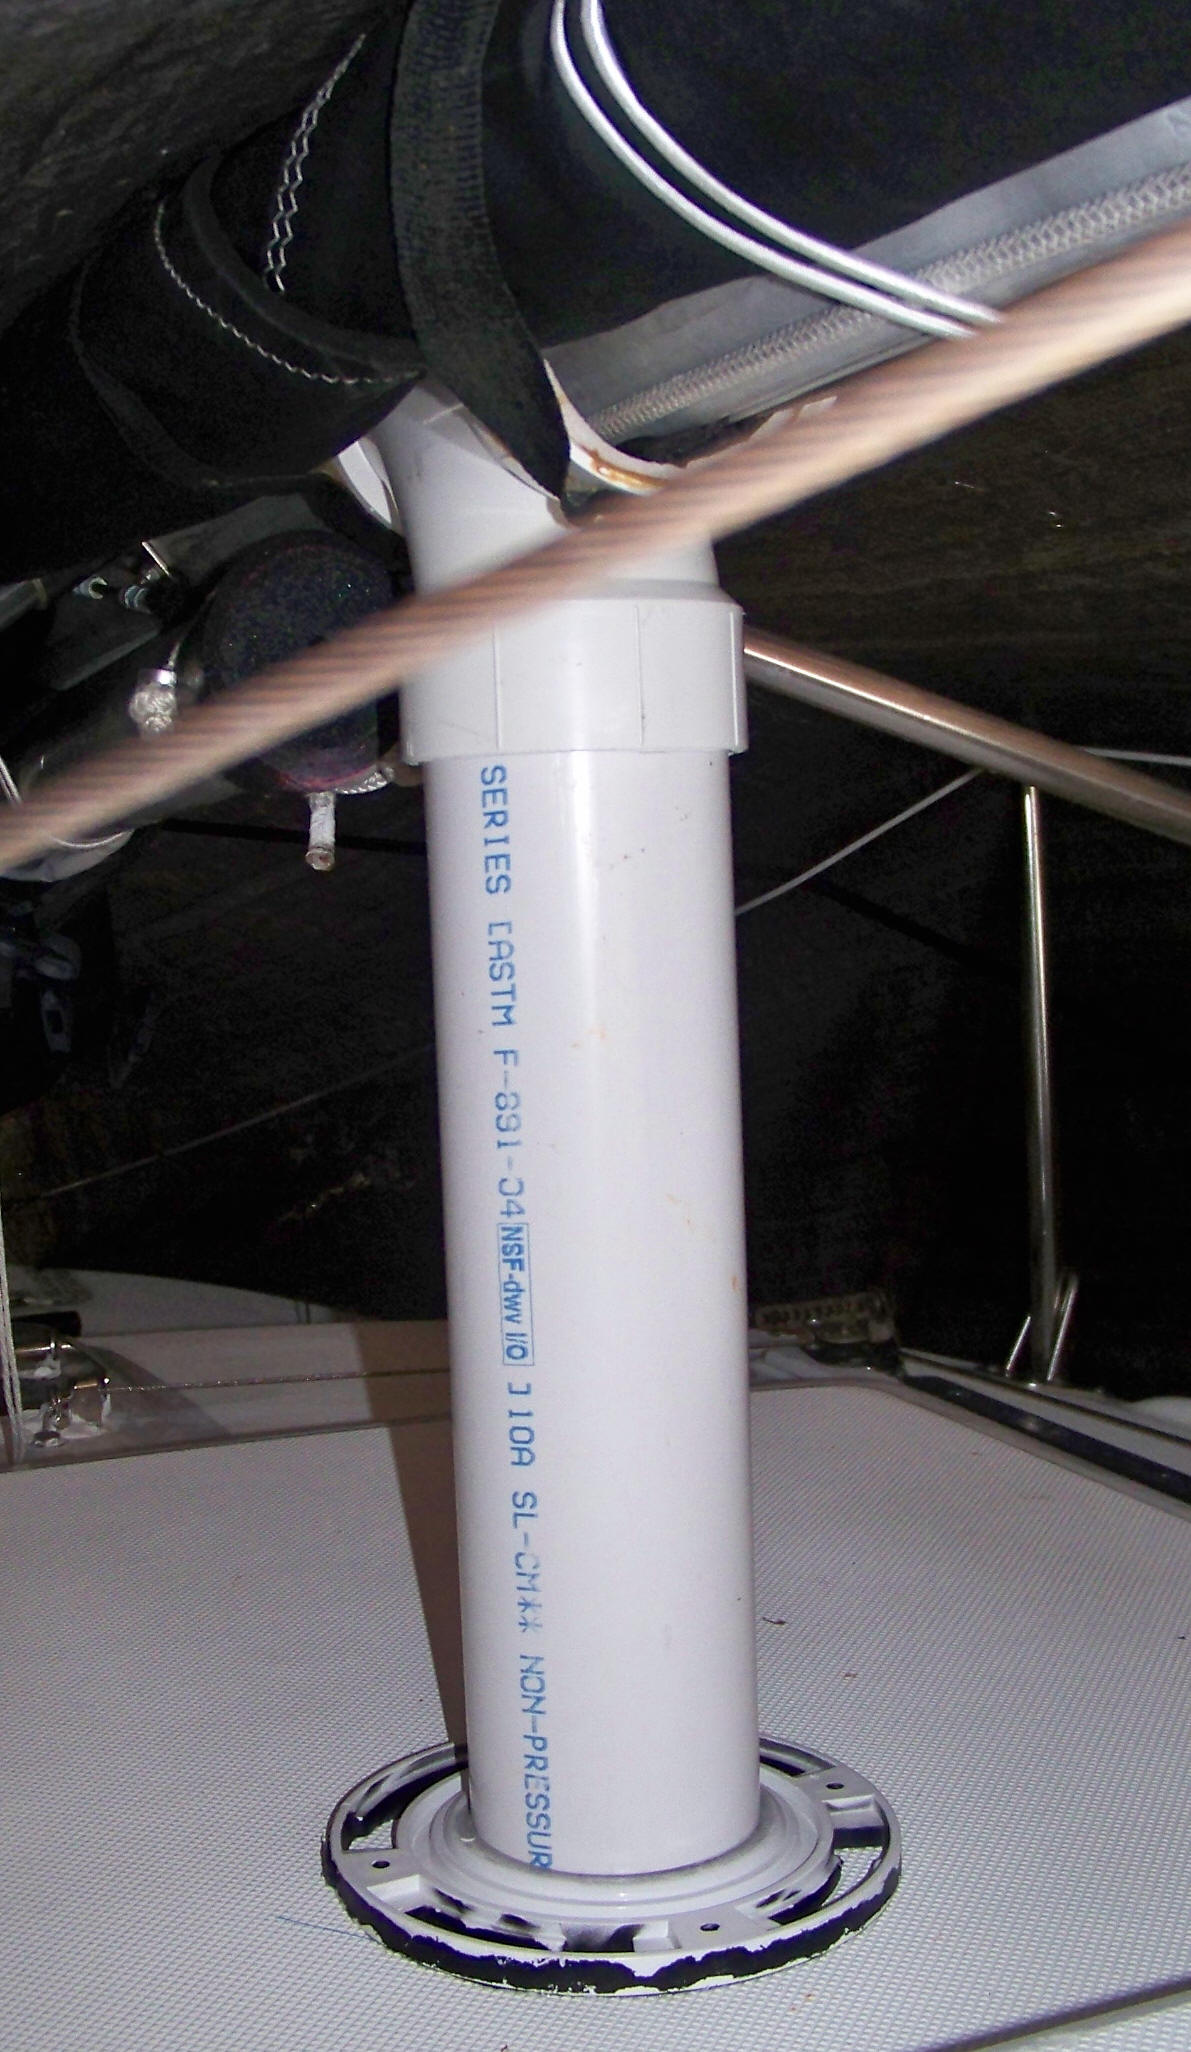
Mast
Trailering Support
~ Watching the mast bounce up and down got a little
scary so I made a support out of PVC from the local Lowes store.
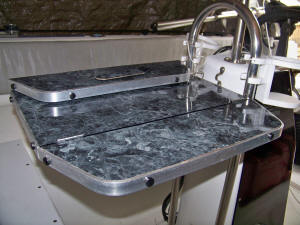
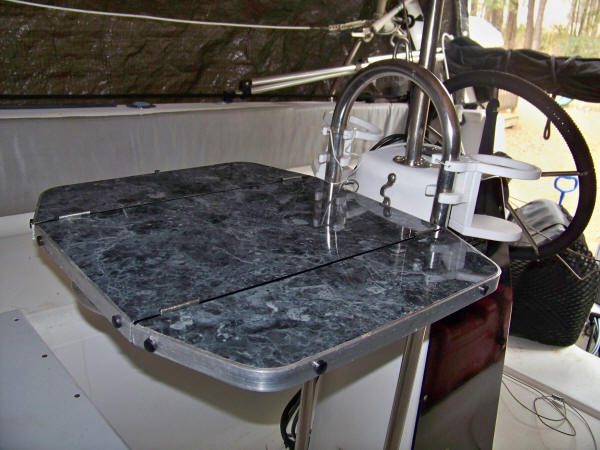
Cockpit
Folding Table
~ After
putting in the A/C Mod I couldn't get the original table to clear past it, so I
redesigned it to be shorter but fold out to be wider... and match the laminate
that I now have inside the Galley Mod.
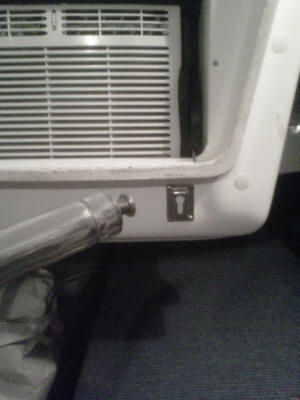
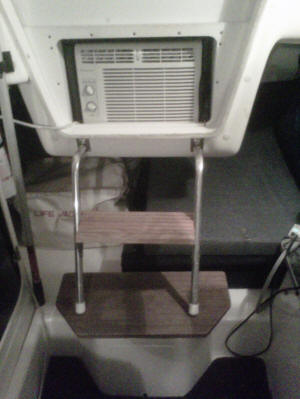
Air Conditioning
~ Billy from Double Cross came up with this Mod and
I purchased one of the first production prototypes. Bought the smallest
A/C window unit from Lowes... works great... almost too cold sometimes. I
also had a smoked Plexiglas hatch piece made up like the white one pictured to
let light in when occupied.
Had to add a ladder to make it easier to get down, since I leave it in all the time.
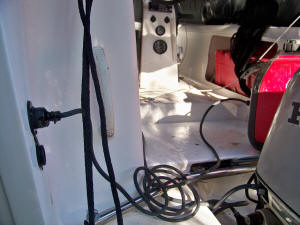
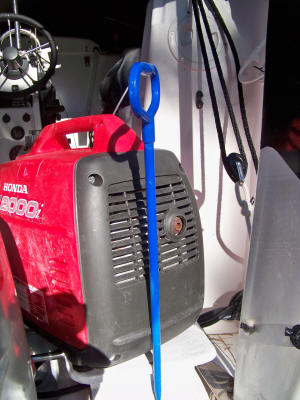
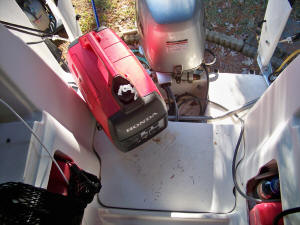
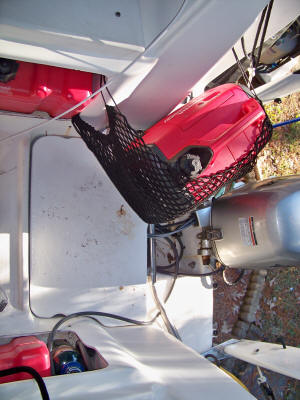
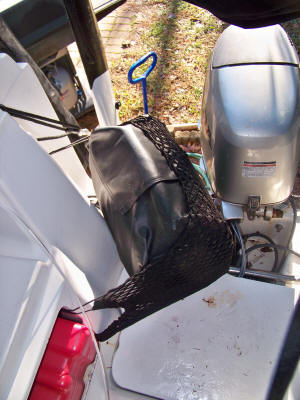
Generator
~ In order to power the A/C Unit and all my other
toys I got me self a Honda 2000i generator (ebay) Needed someplace to keep
it and run it whenever without having to move a whole bunch of stuff around.
I created a platform on the aft that sits over the rudder controls and I can
strap the generator to the wall and still run it. It is also close to the
shore power connection on the boat so I can just plug in the Generator with a
short cord.

Captains Seat & Cushions
~ After
adding in the A/C modification (which creates a seating area) I moved the
existing captain seat cushion to the A/C mod top and the Admiral helped create a
raised captain seat cushion.

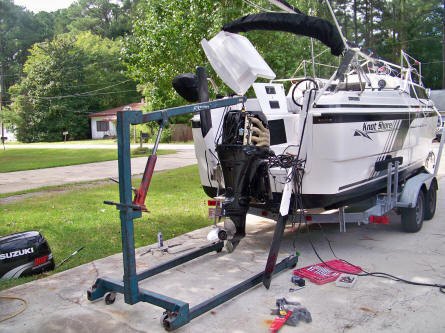
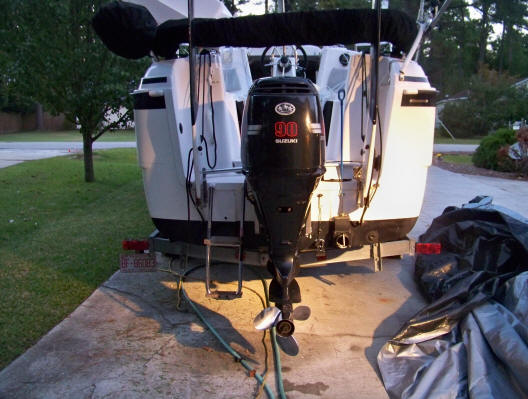
90 HP Upgrade
~ Upgraded to a 90HP Engine


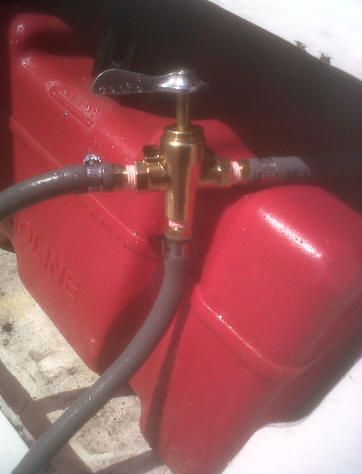
Fuel Tank Switch
~ So the quick connects for fuel lines are just not
quick enough to go from one tank to the other when you are in 3-4 waves in an
inlet... and it always seems to run out in one tank at that exact moment... so I
put in a switch to easily switch from one to tank to the other.
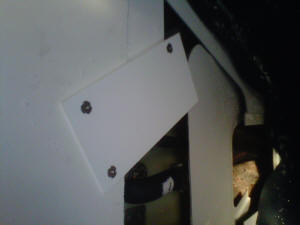
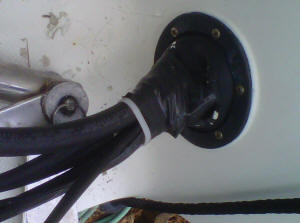
Internal Bow Fuel Tank
~ I've noticed that the boat is back heavy with the
two 8 gallon tanks in the rear... and then add on a 90hp motor and it really
gets heavy. So to increase my motoring range and add more weight upfront I
added a Moeller 19 gallon bow tank. I will be adding a fuel gauge on the
pedestal.
Before I had to cut, making sure where it would go.
Did one cut so I end up with one piece to replace.
Used marine lumber rectangles to make supports for
the piece I cut out. Added hammer in nuts on the opposite side of the
board to secure the piece I cut out.
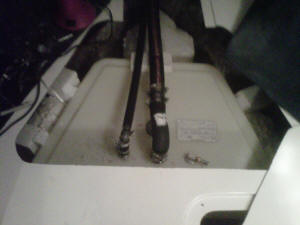
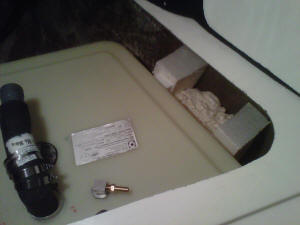
Added a 90 degree elbow for fuel fill and vent.
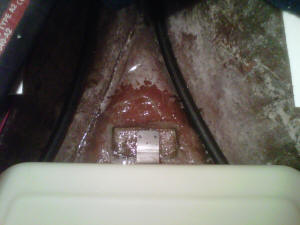
Had to fiberglass some wood onto the ballast tank (so I didn't screw into it) and re-bend the hold downs (that you have to buy separately) and then I used some of the foam blocks to make a mold on the side to squirt some great stuff in.
 I
added an anti-siphon tank vent inside the back of the anchor locker (next to my
auto ballast tank vent).
I
added an anti-siphon tank vent inside the back of the anchor locker (next to my
auto ballast tank vent).
I also added a fuel whistler just before the anti-siphon vent so I can hear it fill.
Showing the 90 degree elbow (left). This shows how I routed the fuel fill, fuel vent and ballast vent lines. Shows clearance after cut out (right).
Putting the carpeting back on and added all the foam back in (except for 4 large blocks).
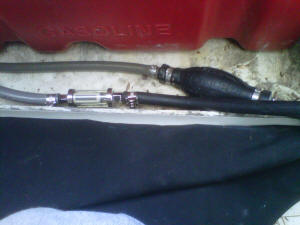
This shows the fuel fill line coming out where the battery wires and motor controls come out of the inside. I also added a clear fuel filter (just in case I dropped something in the tank during install) and I can see the fuel flow as I pump the bulb. Only took about 30 pumps to get it going, then 2 pumps for normal operation. (the red tank is empty)
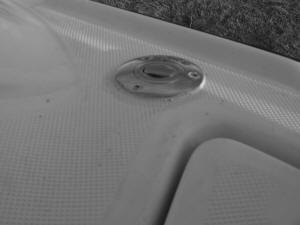
Installed the fuel fill cap on the port side with a pop up turning handle. Because of the two 90 degree elbows you have fill slowly, it really holds 18 gallons.
Added a fuel gauge to the pedestal.

It did seem to level the boat out (below).
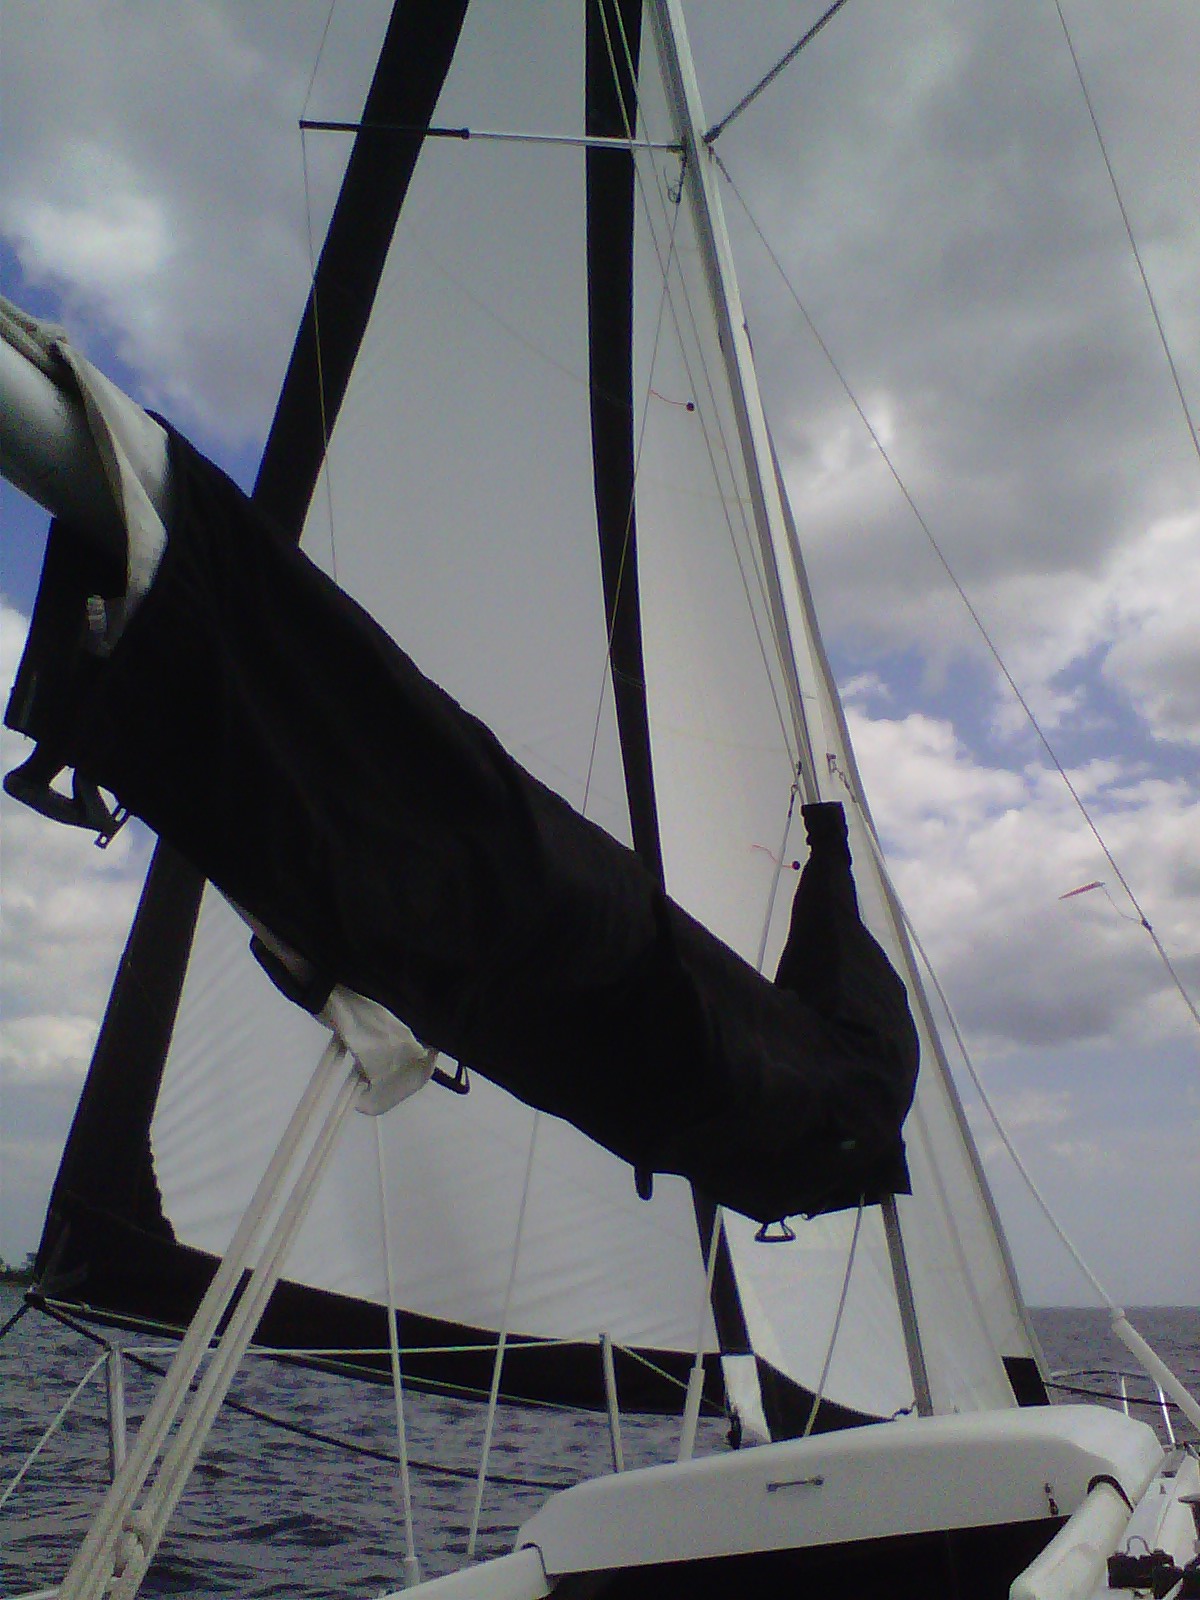
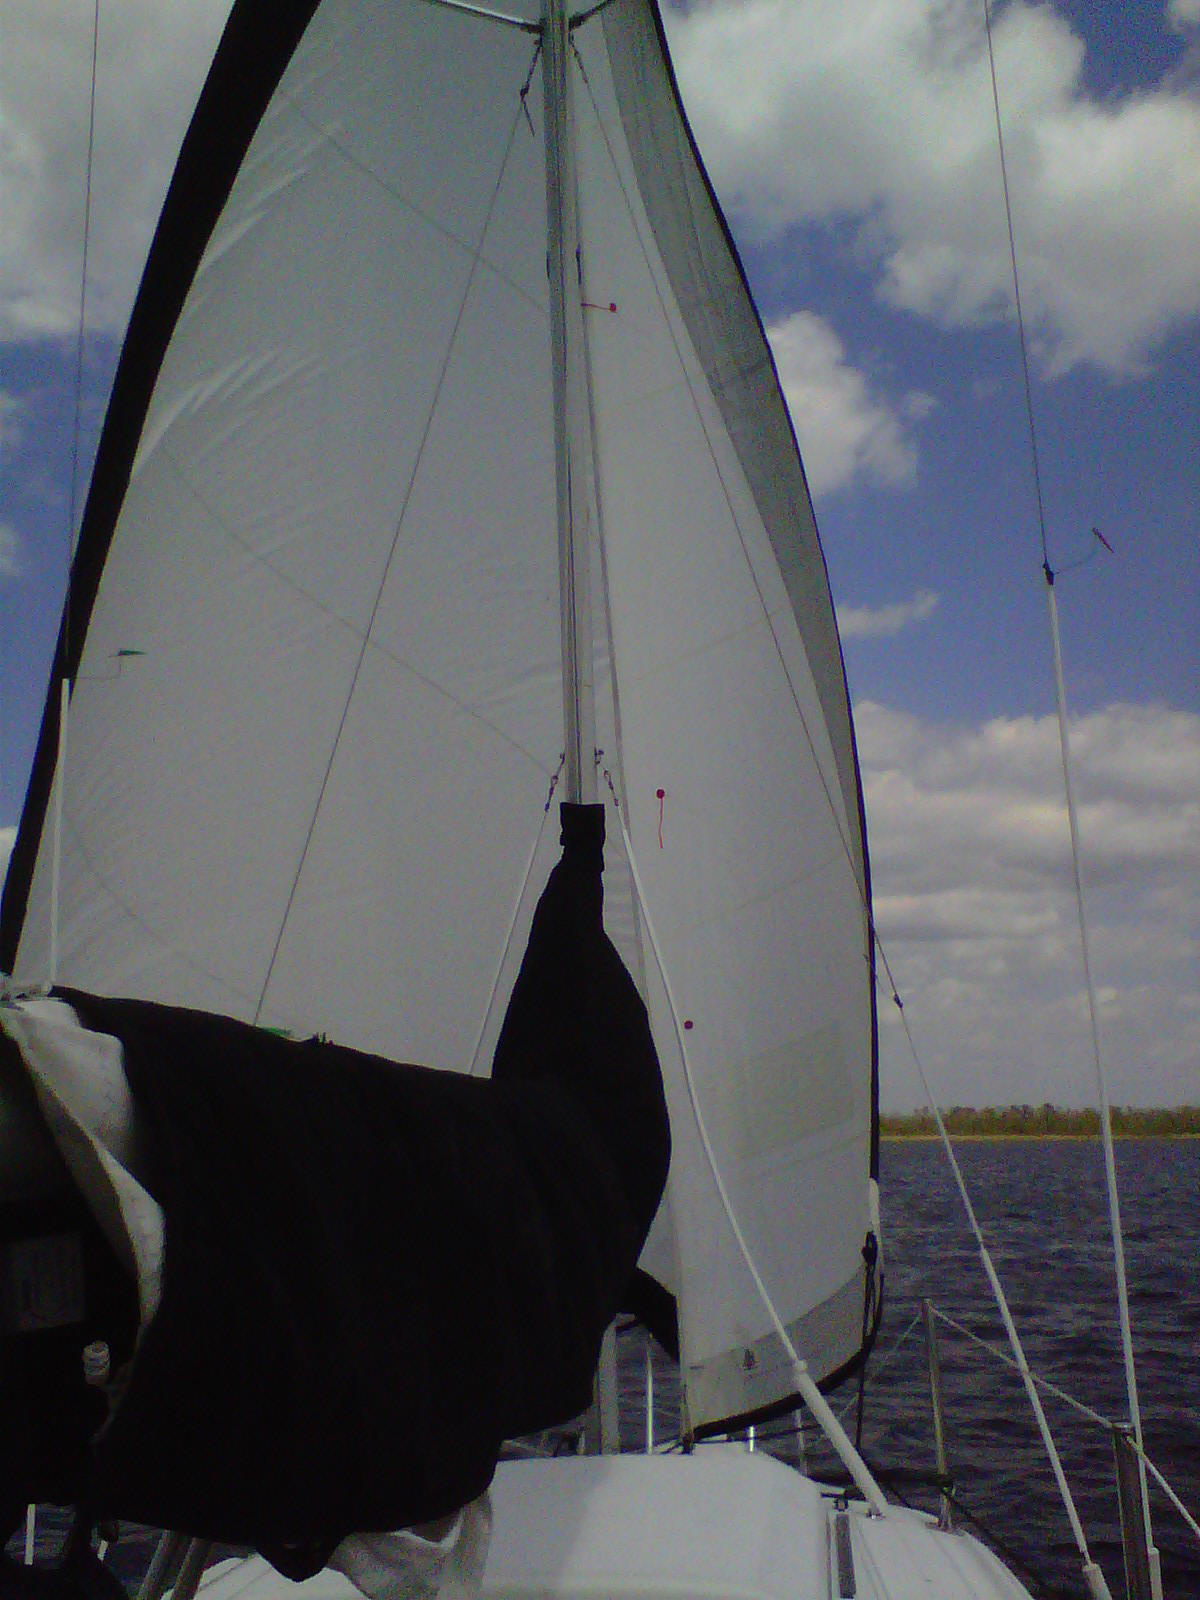
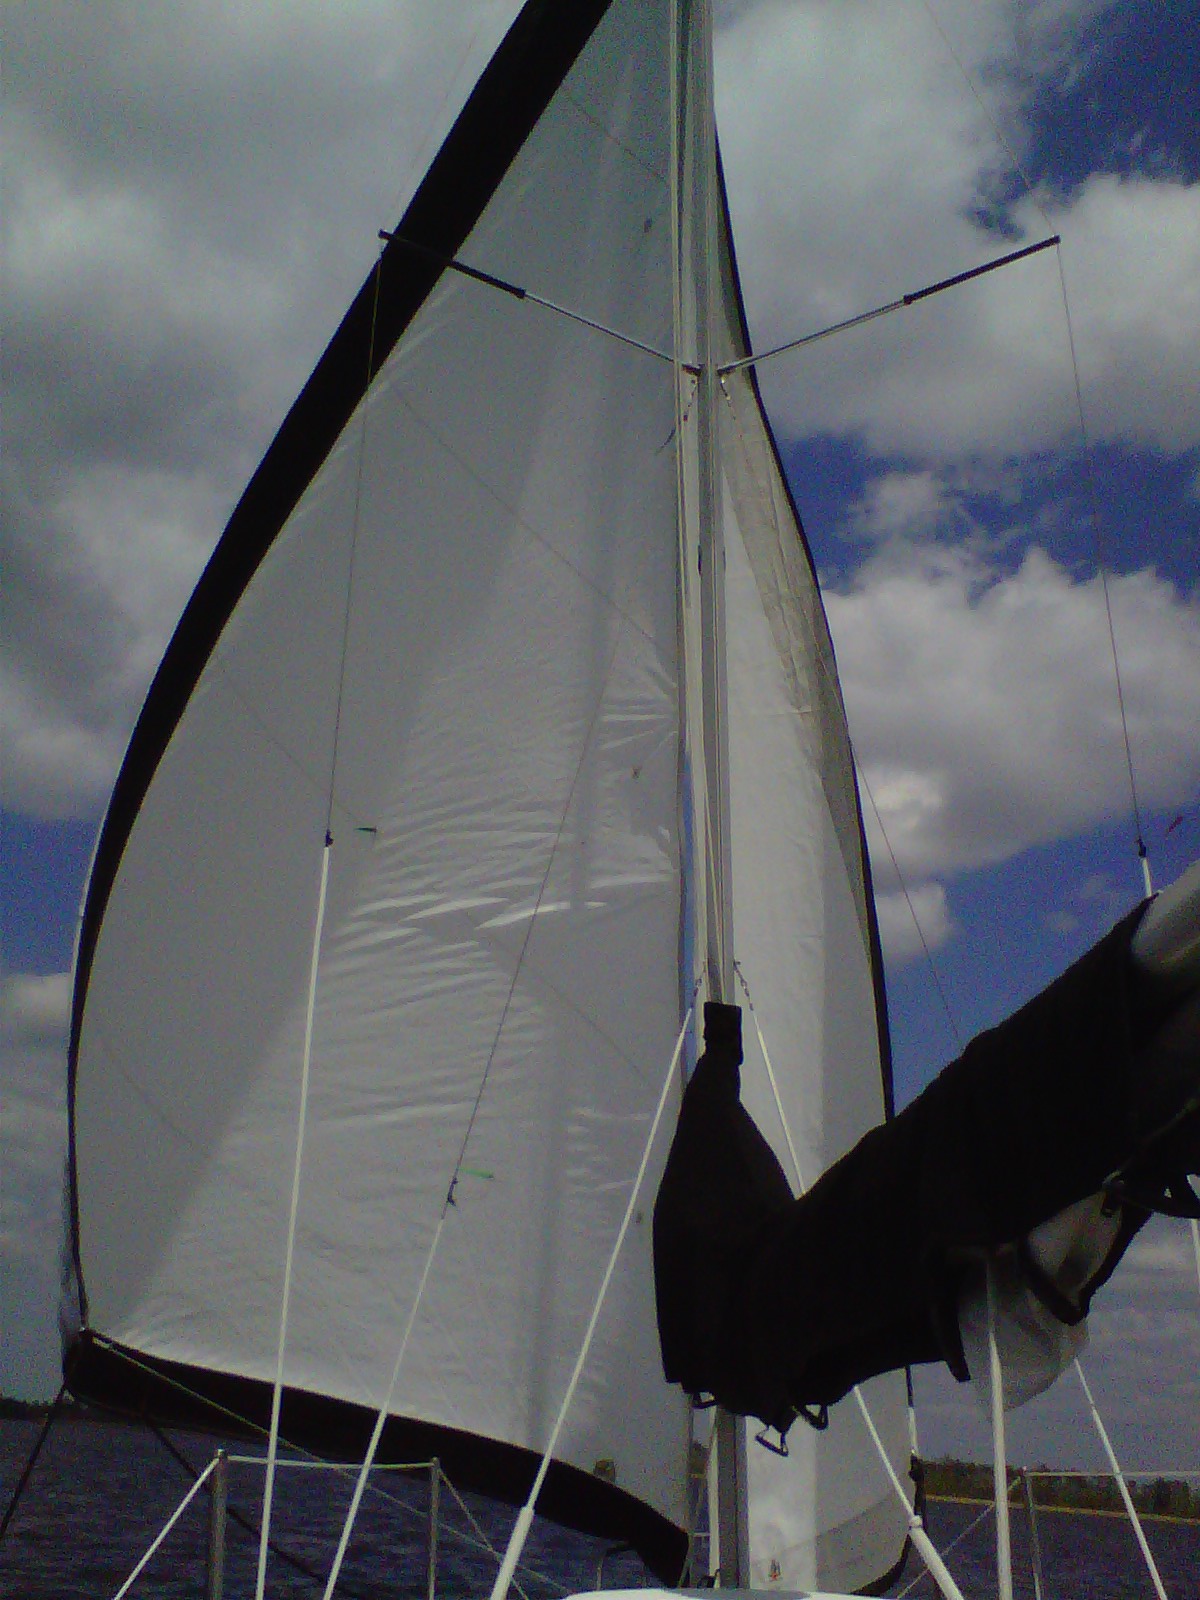
Stay Sail... aka Cutter Rig
~ So I
starting thinking about this idea when I saw another MacX with a hobie cat jib
on it. So I did some planning and looking for the right size sail and
making it self tacking... AND I wanted to be able to detach it and lay it up
against the mast if I didn't want to use it. Results: It can now add
1.5 - 2 kts of speed with it up.

Eventually found a sail size that was close enough... had it altered and
added the smallest roller furling system harken makes and traveler. I had
harken bend the track to the radius I needed, and I had sunbrella added to it
for furling.
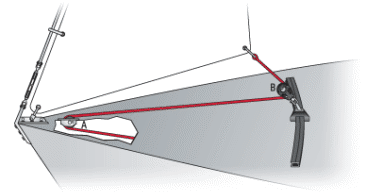
 This
is how I have the stay sail jib sheet routed (left pic), basically I have the
one line that leads to the cockpit.
This
is how I have the stay sail jib sheet routed (left pic), basically I have the
one line that leads to the cockpit.
The picture on the right shows how I tested it before I got the metal traveler track. There is a pulley attached near the bottom of the furler.
Jib Sheet Route:
Jib to pulley at bottom of furler, to fairleads on 2 stanchions, to track jib
lead car, to cam cleat (not pictured) to starboard aft cleat.

I did a
temporary install on the traveller track using 3m 5200 and some wood so I could
remove it later to fiberglass it down.
After testing worked I then fiber glassed the track
in place... I didn't want to screw or bolt into the deck.
Then to give it a finished look
(like it belonged there) I gel coated around it.
So I also set it up so I can detach it and put it up against the mast if I didn't want to use it.
The furler is attached to the mast raising eye strap using a Long "D" shackle that has a screw pin, and the pulley below it uses a quick release snap shackle. I added a boom bail at the top to attach the stay sail wire and ran a line to the top of the furler that goes to a pulley near where the main jib and forestay attach to be able to hoist the whole rig up about 2 feet to clear of the deck and get it up to the mast.

Here are some pics of sailing with both jibs up... and a couple of wing on wing (the stay sail actually helps keep the main jib filled when doing wing on wing) Winds were blowing a steady 20 mph.
Video of Stay Sail Tacking >
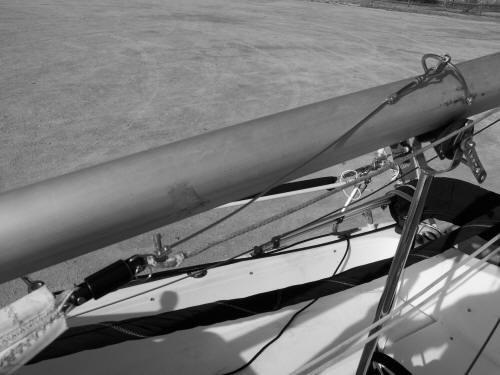
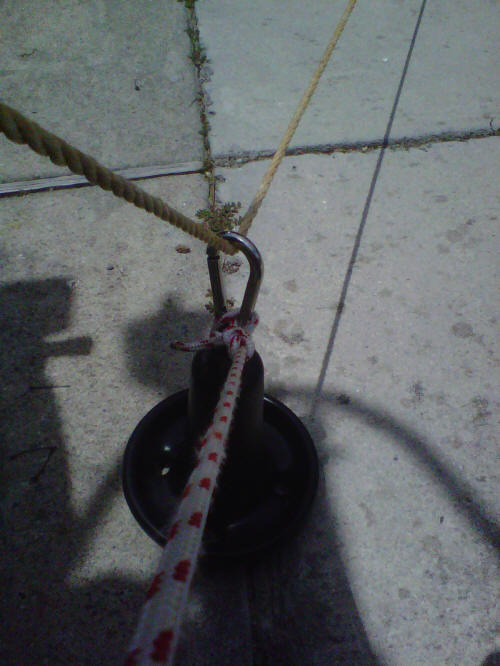
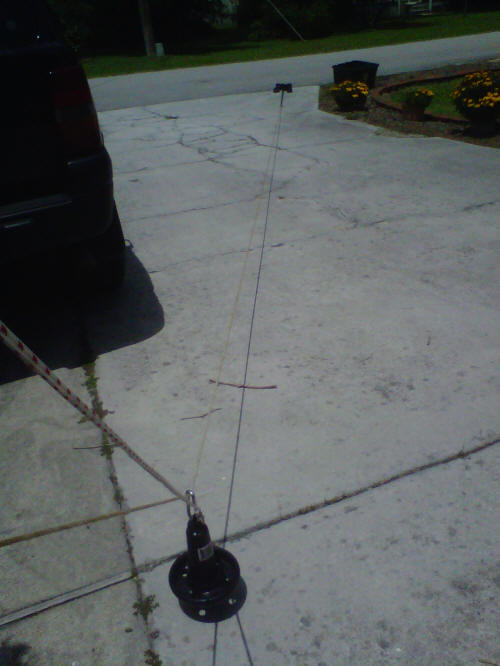
Anchor Weight (aka
Anchor Buddy)
~Testing....
want to see if using this system reduces the radius of swing... should also help
keep the anchor from dragging. Essentially this is like adding chain from
where the weight dangles to the anchor... without the chain.
The actual Anchor Buddy is quite expensive ($300+) So here is my $50 version.
Here is the logic behind it:
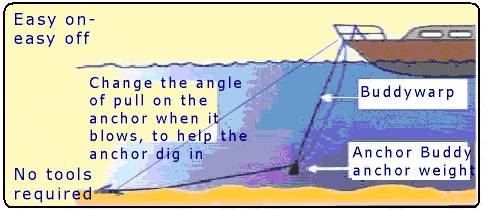
You need 3 things...
> Mushroom Anchor (West Marine # 4563581)
- I went with
a 10 lbs as it fits in the Anchor locker easily.
> Stainless Steel Carabiner (West Marine #
317057)
- This makes
it easy to attach and detach.
> Line (at least half the length of your anchor rode)
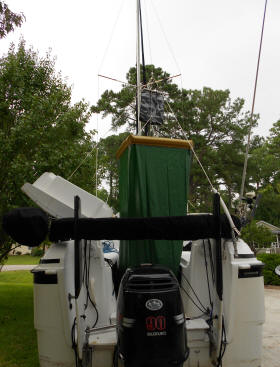
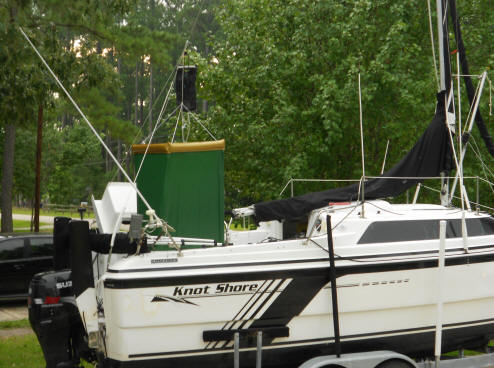
Solar
Shower Enclosure
~ Wanted the Admiral to have a private shower
without the dock fees. I added a shroud cleat with a ring, and a line to
pull the back stay to the center of the boat.
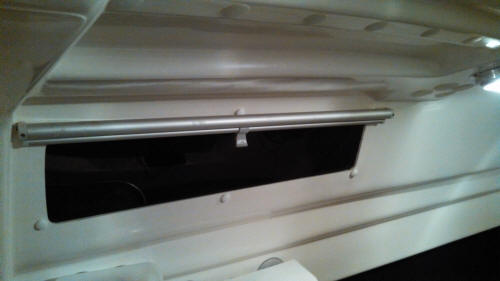
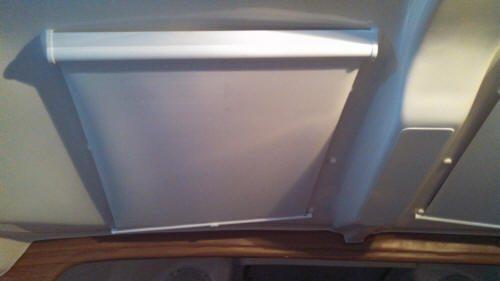
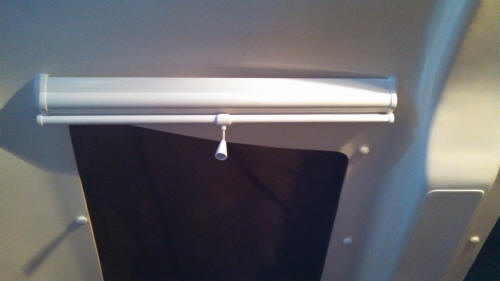
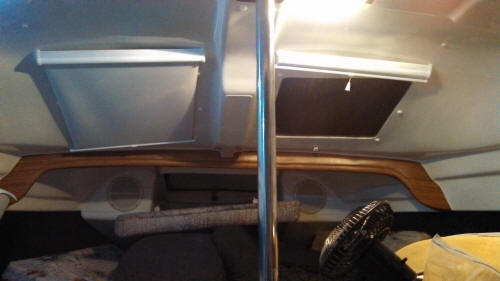
Cabin
Curtain/Blinds
~ Found out that a beach towel draped over the two
windows facing up dramatically decreases the heat in the cabin during the
summer, and my Admiral wanted privacy in the cabin. So I installed these
shades from OceanAir. http://www.zarcor.com
TOP WINDOWS (2): HSH2-40 - OceanAir HATCHshade, White - 17 1/4 x 20 1/8 x 18 3/4
SIDE WINDOWS (3): PSH-4 - OceanAir PORTshade, Silver - 26 x 12 5/8 x 27 5/8